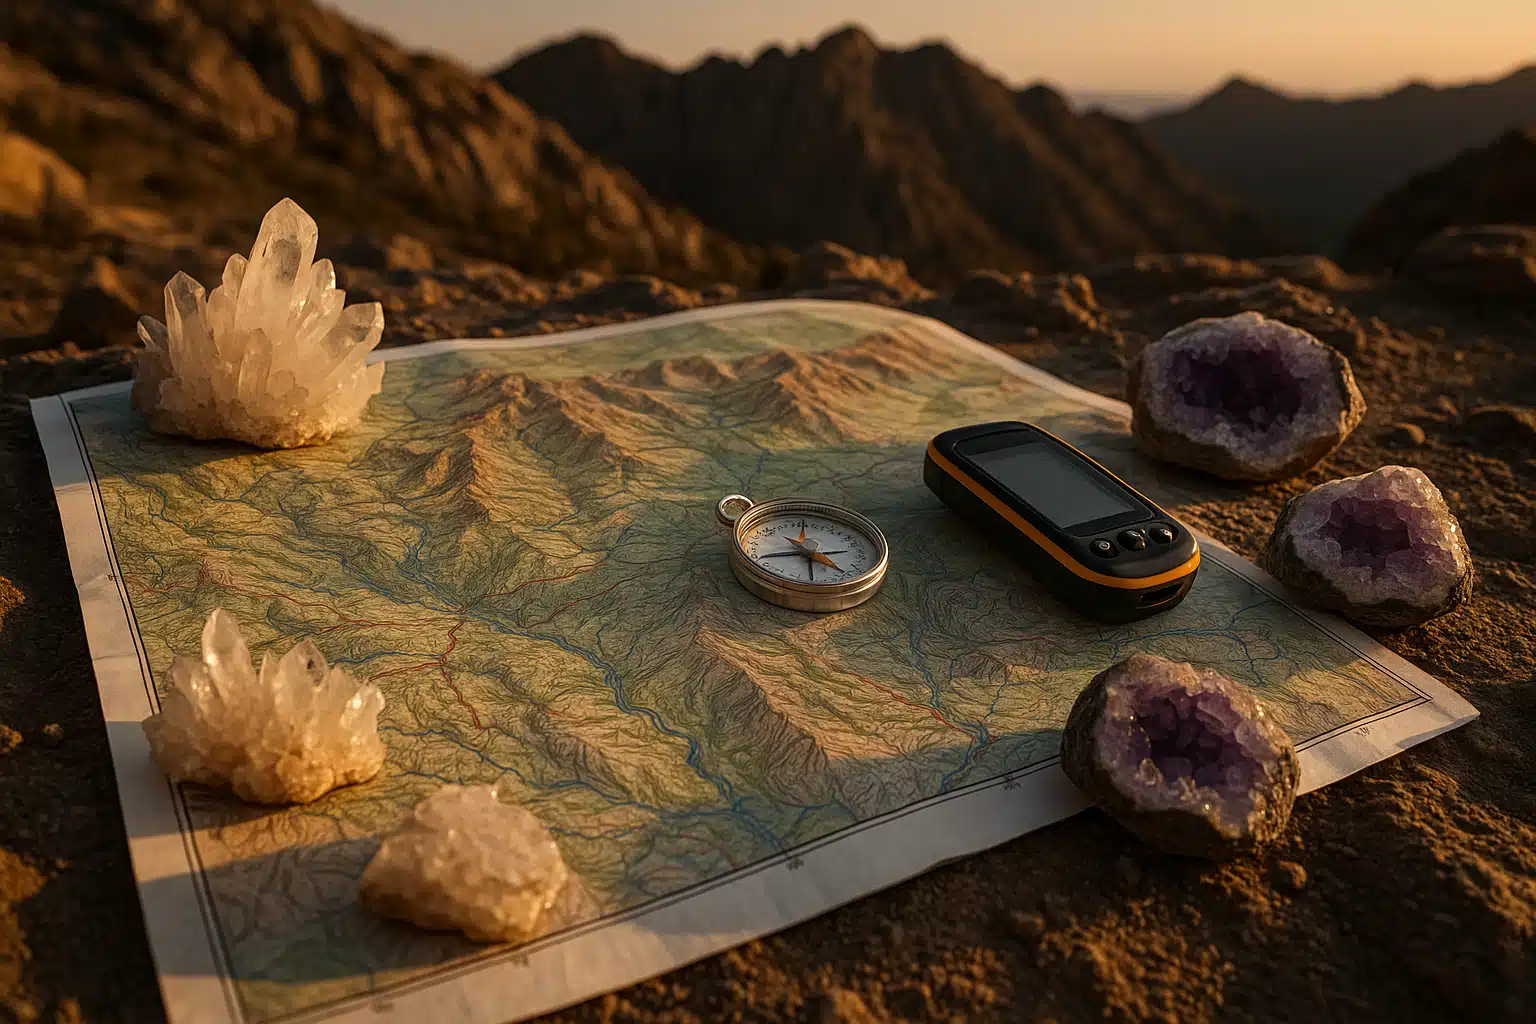
Topographic maps are powerful tools that transform complex three-dimensional terrain into readable two-dimensional representations. Whether you’re an aspiring rockhound, outdoor enthusiast, or geological hobbyist, understanding how to interpret these maps can unlock a world of exploration opportunities. These detailed cartographic resources reveal elevation changes, landscape features, and geological formations that might indicate the presence of mineral deposits, including quartz, amethyst, and other valuable crystals.
This comprehensive guide will teach you the fundamentals of topographic map reading, how to identify geological features that suggest mineral-rich areas, and practical techniques for applying this knowledge in the field. By mastering these skills, you’ll gain the confidence to plan effective exploration trips and increase your chances of discovering natural treasures hidden beneath the earth’s surface.
The Fundamentals of Topographic Maps
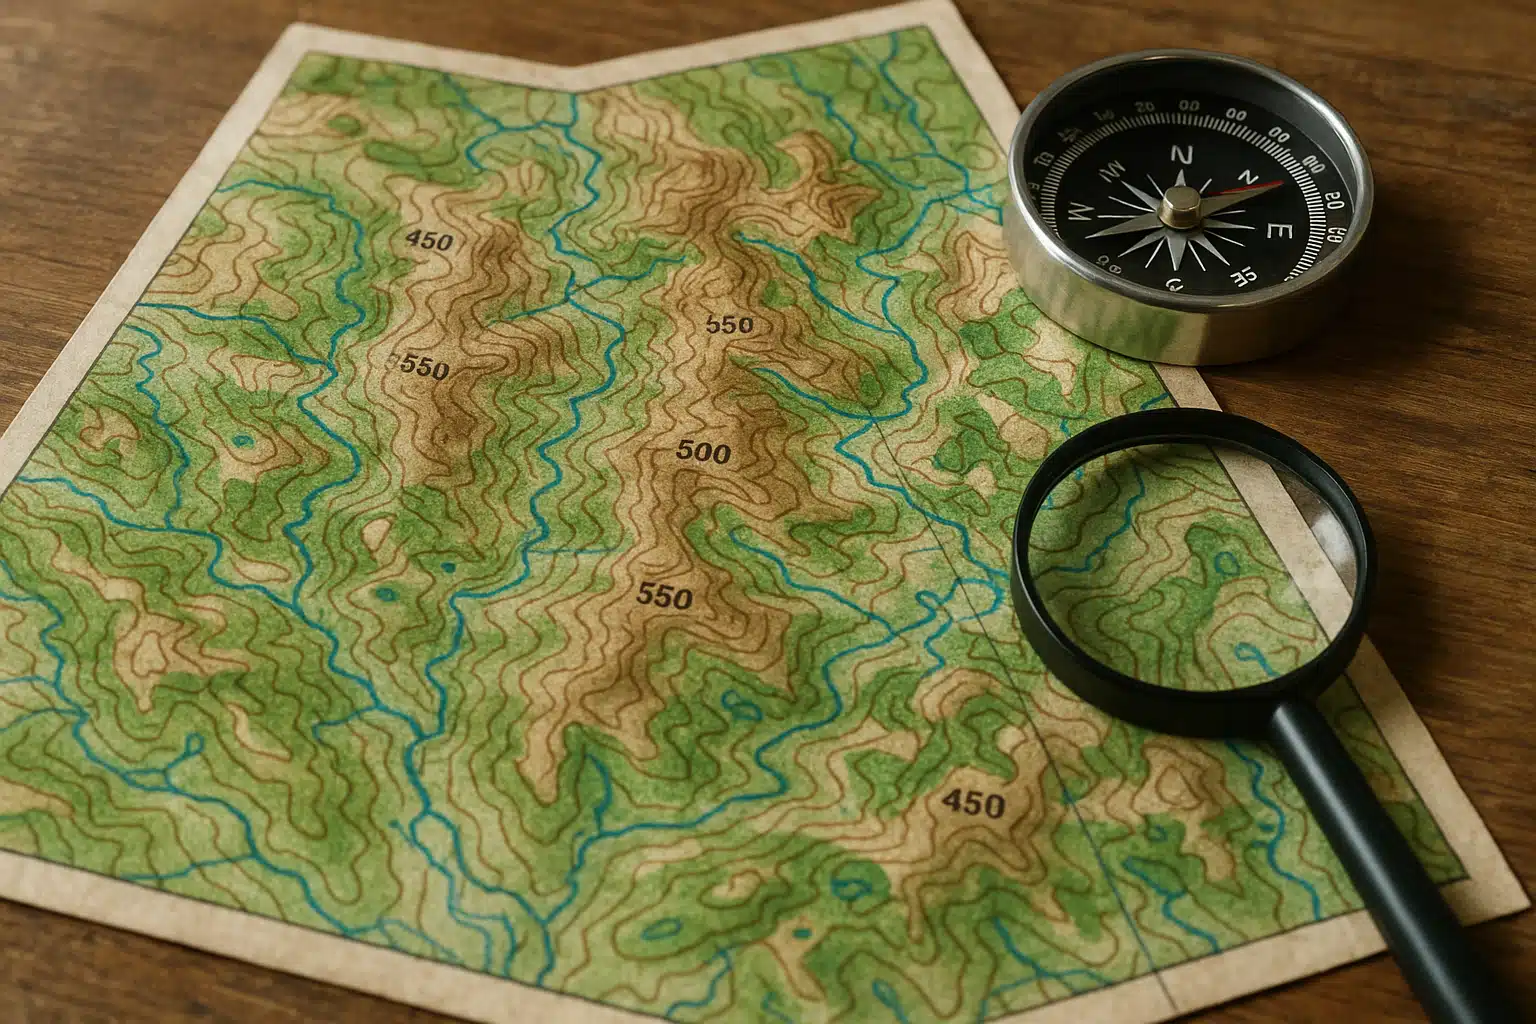
Topographic maps use a standardized system of symbols, lines, and colors to represent the physical features of terrain. Understanding these elements is essential for anyone seeking to navigate landscapes or identify geological features of interest.
Contour Lines: The Foundation of Topographic Reading
Contour lines are the most distinctive feature of topographic maps. Each line connects points of identical elevation, creating a visual representation of the land’s three-dimensional shape. Learning to interpret these lines is crucial for understanding terrain:
- Spacing Indicates Slope Steepness: Closely packed contour lines indicate steep terrain, such as cliffs or sharp inclines. Widely spaced lines suggest gentle slopes or relatively flat areas.
- Elevation Intervals: Most topographic maps use consistent vertical intervals between contour lines (such as 10, 20, or 40 meters/feet). Understanding this interval helps you calculate the steepness of any slope.
- Index Contours: These are darker, heavier lines that appear at regular intervals (typically every fifth line) and are often labeled with elevation numbers for easier reference.
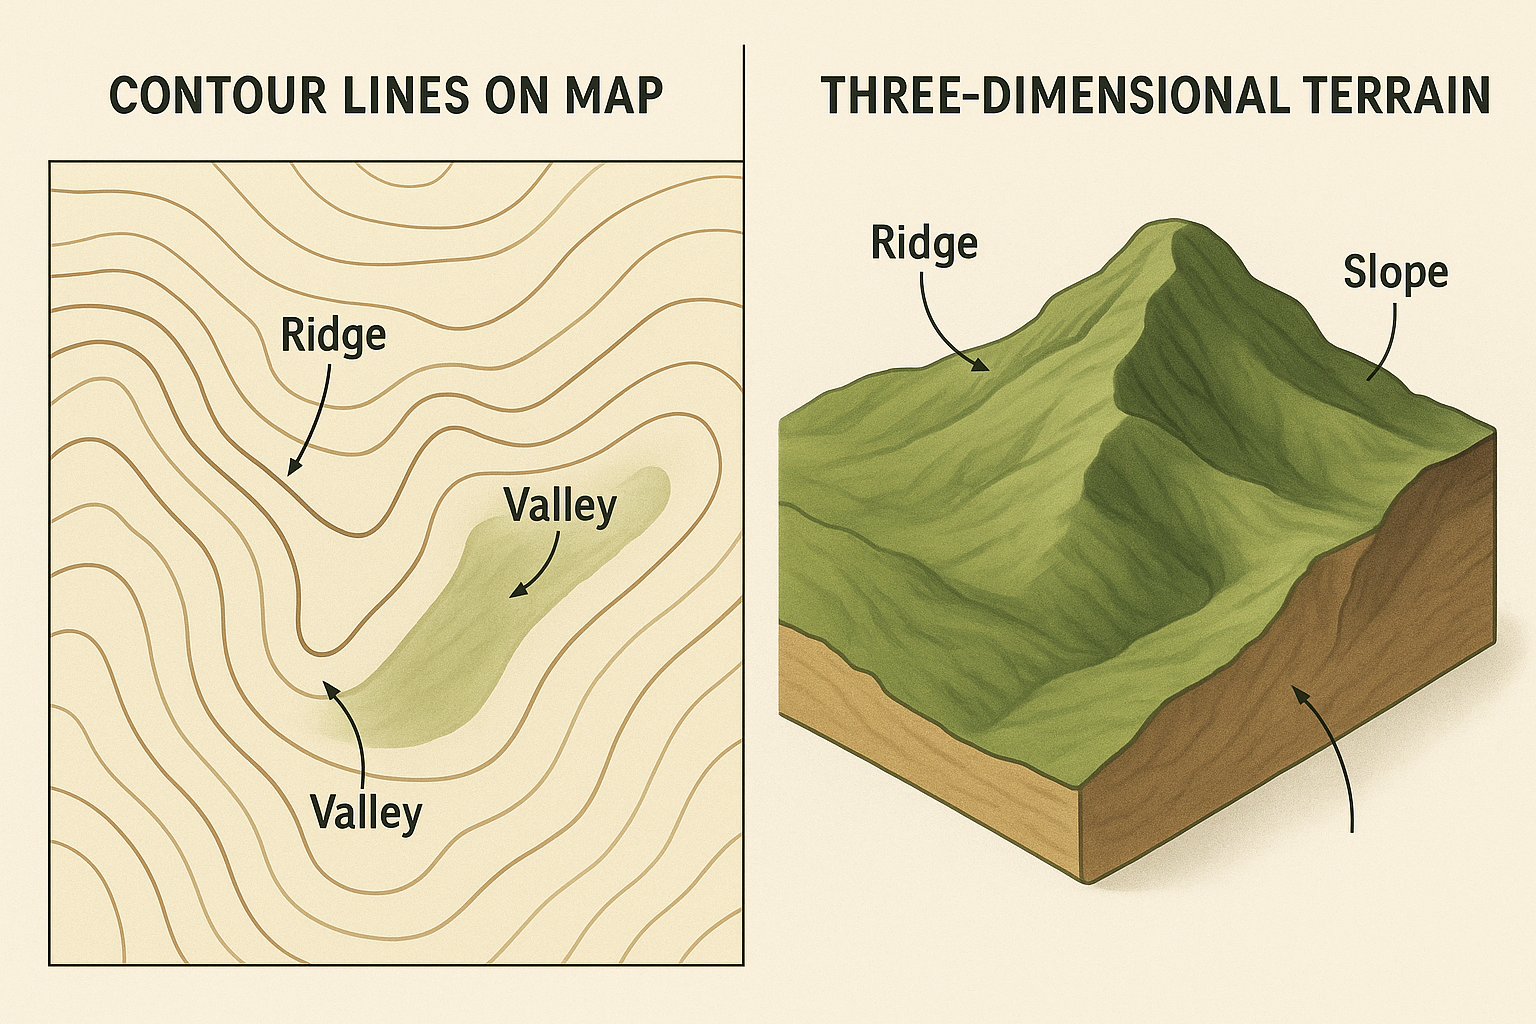
- Closed Contours: Circular or oval contour lines that close upon themselves indicate hills, peaks, or depressions. The pattern direction tells you whether you’re looking at an elevation or a valley.
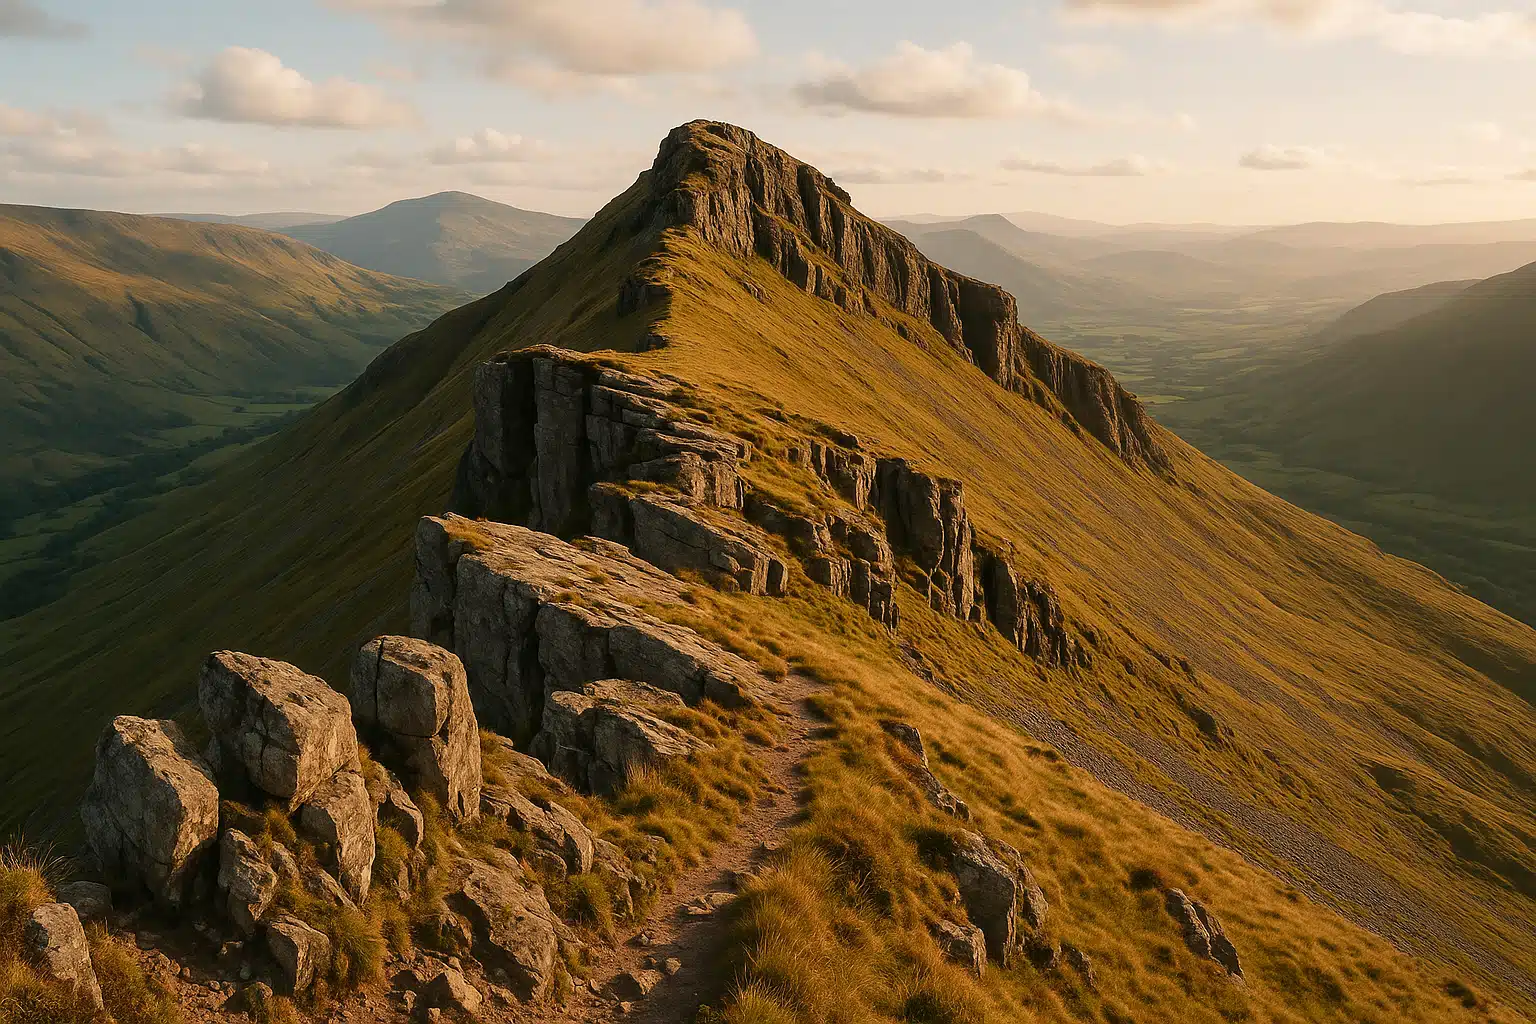
Recognizing Ridges and Valleys
Ridges and valleys are fundamental landscape features that often correlate with geological formations and potential mineral deposits:
- Ridge Identification: Ridges appear as areas where contour lines form V-shapes or U-shapes pointing toward lower elevations. The ridge crest runs along the highest points connecting these formations.
- Valley Recognition: Valleys display the opposite pattern, with contour lines forming V-shapes or U-shapes that point toward higher elevations. Water typically flows through valleys, which can be important for mineral formation and exposure.
- Saddles and Passes: These are low points along ridges where two higher areas meet, often appearing as hourglass-shaped contour patterns. These transitional zones can be geologically significant.
Additional Map Symbols and Features
Beyond contour lines, topographic maps include various symbols that provide valuable contextual information:
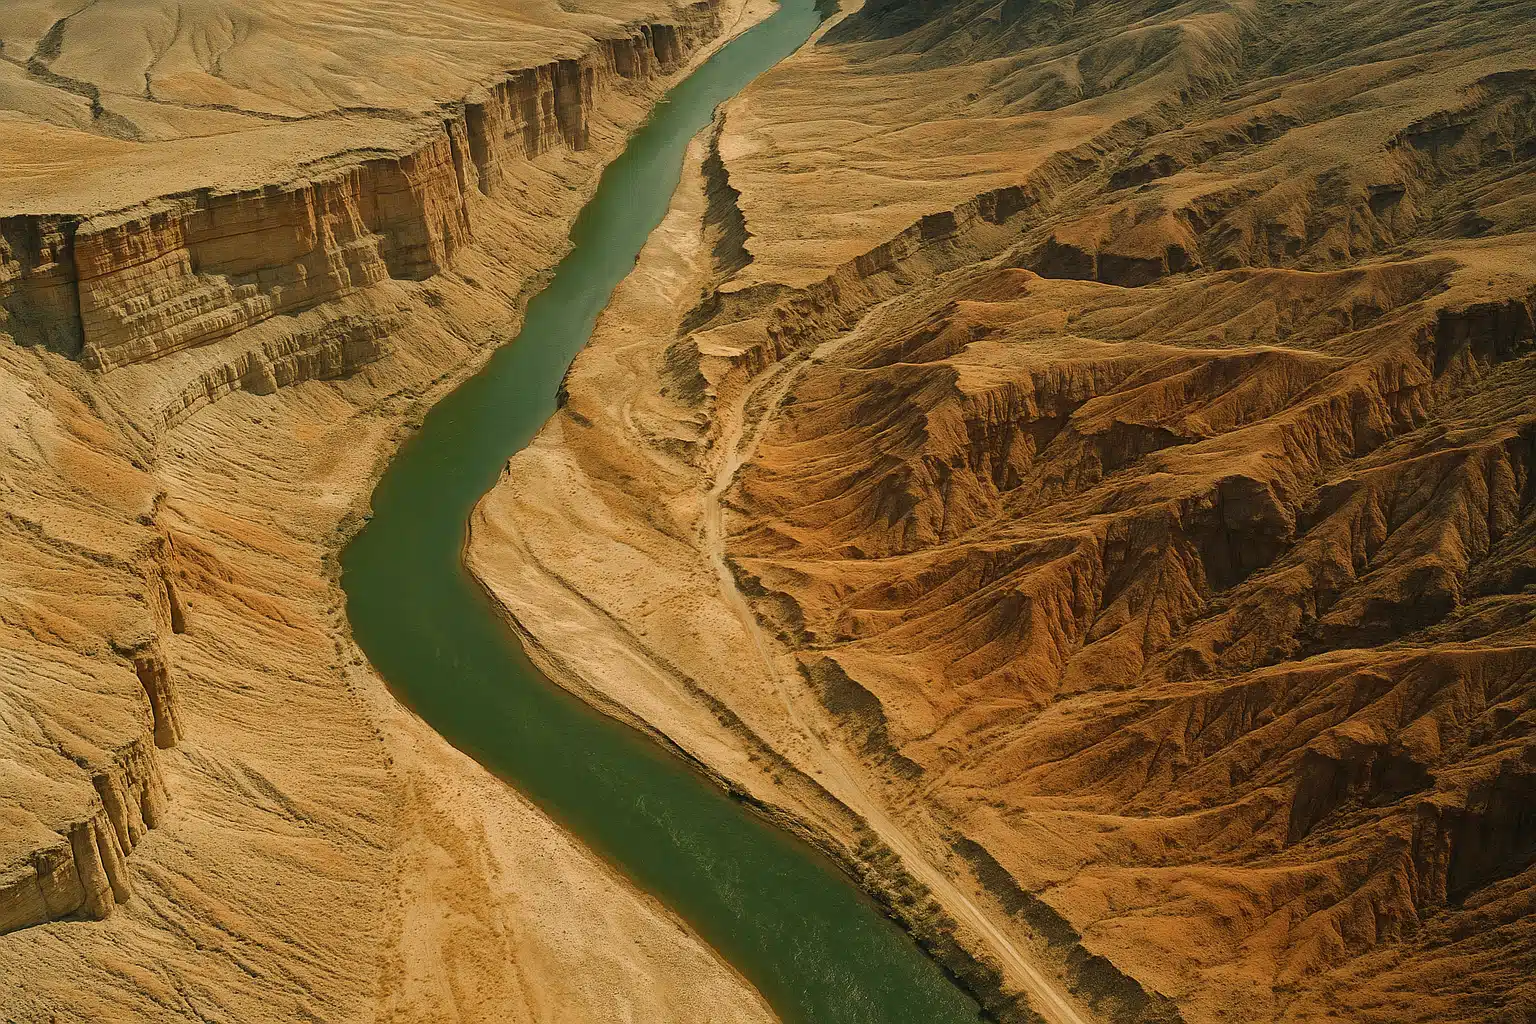
- Water Features: Rivers, streams, lakes, and wetlands are typically shown in blue and can indicate erosion patterns that expose mineral veins.
- Vegetation Indicators: Different colors or symbols may represent forests, grasslands, or bare ground, which can suggest soil composition and geological characteristics.
- Human-Made Features: Roads, trails, buildings, and quarries are marked and can indicate areas of previous geological disturbance or known mineral extraction.
- Rock Outcrops: Some detailed maps mark visible rock formations, which are particularly valuable for mineral prospecting.
Identifying Signs of Geological Disturbance
Geological disturbances—whether natural or human-caused—often expose mineral veins and crystals that would otherwise remain hidden beneath soil and vegetation. Learning to identify these features on topographic maps can significantly improve your prospecting success.
Natural Disturbances and Erosion
Natural processes continuously reshape the landscape, creating opportunities to discover exposed minerals:
- Stream and River Cuts: Flowing water erodes soil and rock, often exposing cross-sections of geological layers. Look for areas where waterways cut through hillsides or create steep banks—these erosional features frequently reveal mineral veins.
- Landslide Zones: Areas showing irregular contour patterns or abrupt changes in slope may indicate past landslides that have exposed fresh rock faces and potentially mineral-bearing formations.
- Cliff Faces and Escarpments: Vertical or near-vertical terrain features shown by very tightly packed contour lines represent exposed rock that hasn’t been covered by soil accumulation.
- Gully and Ravine Systems: Small drainage channels that cut into hillsides create miniature canyons where underlying geology becomes visible.
Human-Caused Disturbances
Human activities often create significant ground disturbances that can reveal geological features:
- Road Cuts and Construction Sites: Areas where roads have been carved through hills create artificial exposures of rock layers. These cuts are marked on topographic maps and represent excellent opportunities to examine geology firsthand.
- Quarries and Excavations: Active or abandoned mining and quarrying operations are typically marked on maps and indicate areas where significant rock and soil removal has occurred.
- Agricultural Terracing: Farming activities that reshape hillsides can disturb soil layers and bring subsurface materials to the surface.
- Logging and Clear-Cut Areas: While not always visible on older maps, cleared areas remove vegetation that normally obscures the ground, making surface minerals more accessible and visible.
Vegetation Changes as Geological Indicators
Variations in plant life can reveal important information about underlying geology and soil chemistry:
- Vegetation Boundaries: Distinct lines where vegetation types change may indicate different soil compositions or rock types beneath the surface.
- Sparse Vegetation Zones: Areas with unusually thin plant coverage might indicate mineral-rich soils that inhibit plant growth, or rocky ground close to the surface.
- Species Indicators: Certain plants thrive in mineral-rich environments. While this requires botanical knowledge beyond map reading, recognizing vegetation patterns on maps can guide field observation.
Locating Ridge Systems That May Contain Mineral Veins
Ridge formations are particularly significant for mineral prospecting because they often represent zones where geological forces have pushed mineral-bearing rock toward the surface. Understanding how to identify and evaluate ridges on topographic maps is a valuable skill for any rockhound.
Characteristics of Mineral-Bearing Ridges
Not all ridges are created equal when it comes to mineral potential. Look for these specific characteristics:
- Linear Ridge Patterns: Long, relatively straight ridges often follow fault lines or geological structures where mineral solutions have infiltrated fractures in the bedrock, creating quartz veins and crystal deposits.
- Resistant Rock Formations: Ridges typically form from harder, more erosion-resistant rock types. Quartz-bearing formations are often harder than surrounding materials, causing them to stand out as topographic highs.
- Ridge Intersections: Areas where multiple ridges meet or cross can indicate complex geological structures and potentially concentrated mineral deposits.
- Aspect and Orientation: The direction a ridge faces can affect weathering patterns and surface exposure. South-facing ridges (in the Northern Hemisphere) typically experience more weathering, which can expose minerals.
Proximity to Water Features
The relationship between ridges and nearby water bodies provides important clues about mineral exposure:
- Stream-Cut Ridges: Ridges that have been intersected by streams or rivers often show excellent exposures on their flanks where water has eroded away overlying soil.
- Headwater Zones: The upper reaches of drainage systems, often located near ridge crests, can accumulate crystals and minerals eroded from surrounding rock.
- Alluvial Deposits: Lower elevation areas adjacent to ridges may contain transported minerals washed down from higher elevations, serving as indicators of what exists upstream.
Analyzing Ridge Profiles
The shape and steepness of ridges provide information about their composition and mineral potential:
- Sharp, Narrow Ridges: These often indicate resistant rock layers, potentially including quartz-rich formations that stand vertically or at steep angles.
- Broad, Gentle Ridges: While potentially less dramatic, these can represent large-scale geological structures with extensive mineral zones.
- Asymmetrical Ridges: Ridges with one steep side and one gentle slope may indicate tilted rock layers, which can affect where minerals are most accessible.
Practical Application: From Map to Field
Understanding topographic maps in theory is valuable, but applying this knowledge in the field is where the real learning happens. Developing a systematic approach to exploration will maximize your success and safety.
Pre-Trip Map Analysis
Before heading into the field, conduct thorough map study to identify promising areas:
- Mark Potential Sites: Use highlighters or digital annotation tools to mark ridges, disturbance zones, and areas where geological features intersect.
- Plan Multiple Locations: Identify several potential sites in case your primary target is inaccessible or unproductive.
- Assess Accessibility: Note trails, roads, and terrain difficulty to plan realistic routes that match your physical capabilities and time constraints.
- Calculate Distances and Elevations: Use the map scale and contour intervals to estimate hiking distances and elevation changes you’ll encounter.
- Identify Safety Features: Note water sources, shelter options, and emergency exit routes in case conditions change.
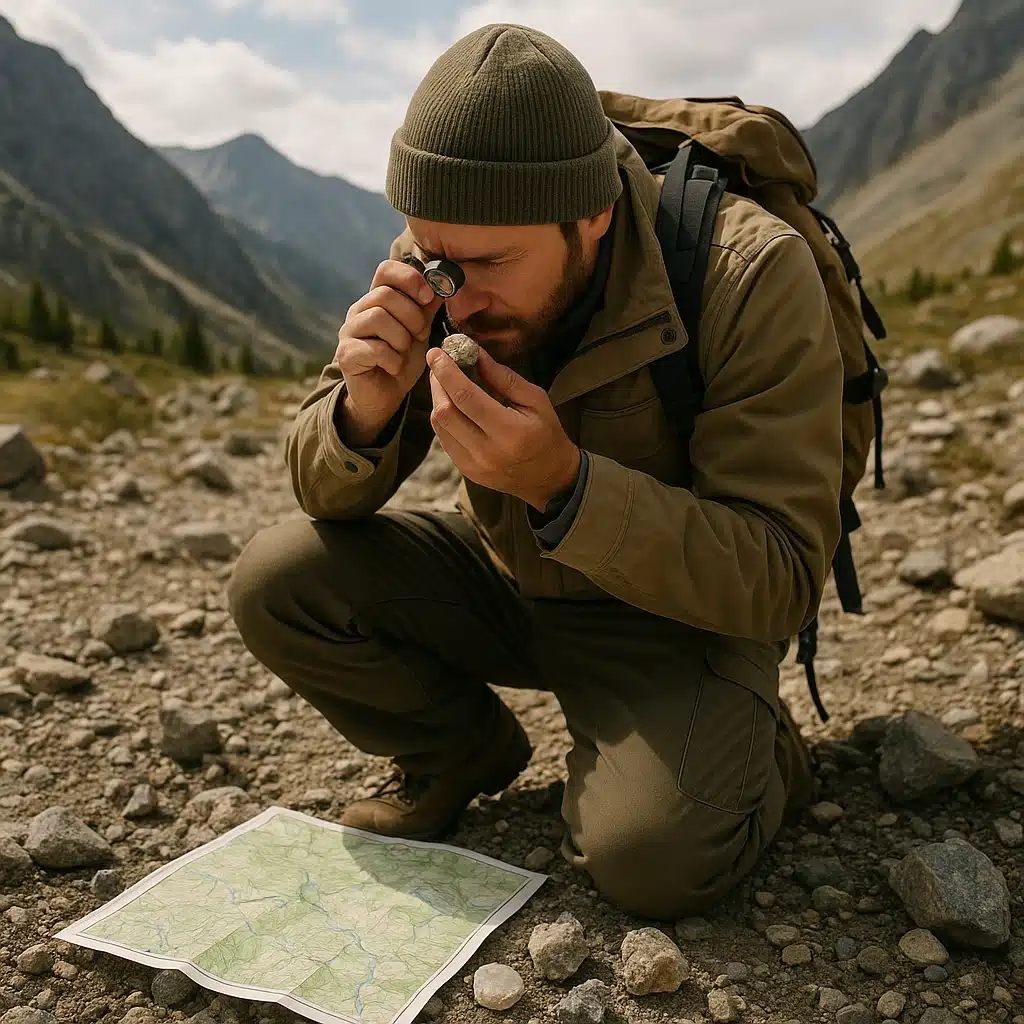
Field Verification Techniques
Once in the field, systematically verify what you’ve identified on the map:
- Orient Your Map: Use a compass or GPS to align your map with the actual terrain, ensuring you’re looking at the correct features.
- Identify Landmarks: Match prominent features you see (peaks, waterways, human structures) with their representations on the map to confirm your location.
- Follow Contours: As you move through terrain, consciously observe how the land rises and falls, correlating this with contour patterns on your map.
- Document Findings: Take photographs, record GPS coordinates, and make notes about what you discover at each location for future reference.
- Adjust Your Strategy: Be flexible—if an area doesn’t match expectations or proves unproductive, use your map reading skills to identify alternative nearby locations.
Safety Considerations
Exploring for minerals takes you into remote and potentially challenging terrain. Always prioritize safety:
- Share Your Plans: Inform someone of your intended location and expected return time.
- Carry Navigation Backup: Bring both physical maps and electronic devices, as technology can fail in remote areas.
- Weather Awareness: Check forecasts and be prepared for changing conditions, especially at higher elevations.
- Recognize Hazards: Steep slopes shown by tight contour lines can be dangerous, especially when wet. Unstable ground near cliff edges or old excavations requires caution.
- Know Your Limits: Choose terrain appropriate for your experience and fitness level, gradually building skills before attempting more challenging locations.
Common Misconceptions About Topographic Maps and Mineral Prospecting
As you develop your map reading and prospecting skills, it’s important to understand and avoid common misunderstandings that can lead to frustration or wasted effort.
Map Reading Misconceptions
- Misconception: All topographic maps provide the same level of detail. Reality: Maps vary significantly in scale, age, and detail level. A 1:24,000 scale map shows much more detail than a 1:100,000 scale map. Always check the map date, as landscapes change over time through development and natural processes.
- Misconception: Contour lines always appear smooth and regular. Reality: In areas of complex or irregular terrain, contour lines can be quite chaotic and difficult to interpret. This is normal and often indicates interesting geological features worth investigating.
- Misconception: Digital maps are always more current than paper maps. Reality: The currency of a map depends on when it was last updated, not its format. Some digital maps use outdated source data, while some paper maps are recently published with current information.
Prospecting Misconceptions
- Misconception: Every ridge or disturbance will yield mineral specimens. Reality: While these features increase probability, successful prospecting requires patience, multiple site visits, and often many unsuccessful attempts before making significant finds.
- Misconception: The best mineral sites are secret and impossible to find. Reality: While some productive sites are well-kept secrets, many excellent collecting locations are documented in regional guides, online forums, and rockhounding communities. Combining published information with your own map reading skills often yields the best results.
- Misconception: You need expensive equipment to find minerals. Reality: Basic tools—a hammer, chisel, hand lens, and collection bag—are sufficient for most recreational prospecting. The most important investment is time spent learning to read landscapes and geology.
- Misconception: All land is open for mineral collecting. Reality: Always research land ownership and access rights before exploring. Collecting may be prohibited on private property, in protected areas, or on certain public lands. Obtain necessary permissions and follow all regulations.
Skill Development Realities
- Misconception: Map reading is an innate skill you either have or don’t. Reality: Reading topographic maps is a learned skill that improves with practice. Everyone starts as a beginner, and regular use builds intuitive understanding over time.
- Misconception: You need extensive geological education to prospect successfully. Reality: While geological knowledge certainly helps, many successful amateur rockhounds learn through field experience, observation, and incremental knowledge building rather than formal education.

Advancing Your Skills: Next Steps
Once you’ve mastered the basics of topographic map reading for mineral prospecting, consider these advanced techniques and resources to further develop your expertise.
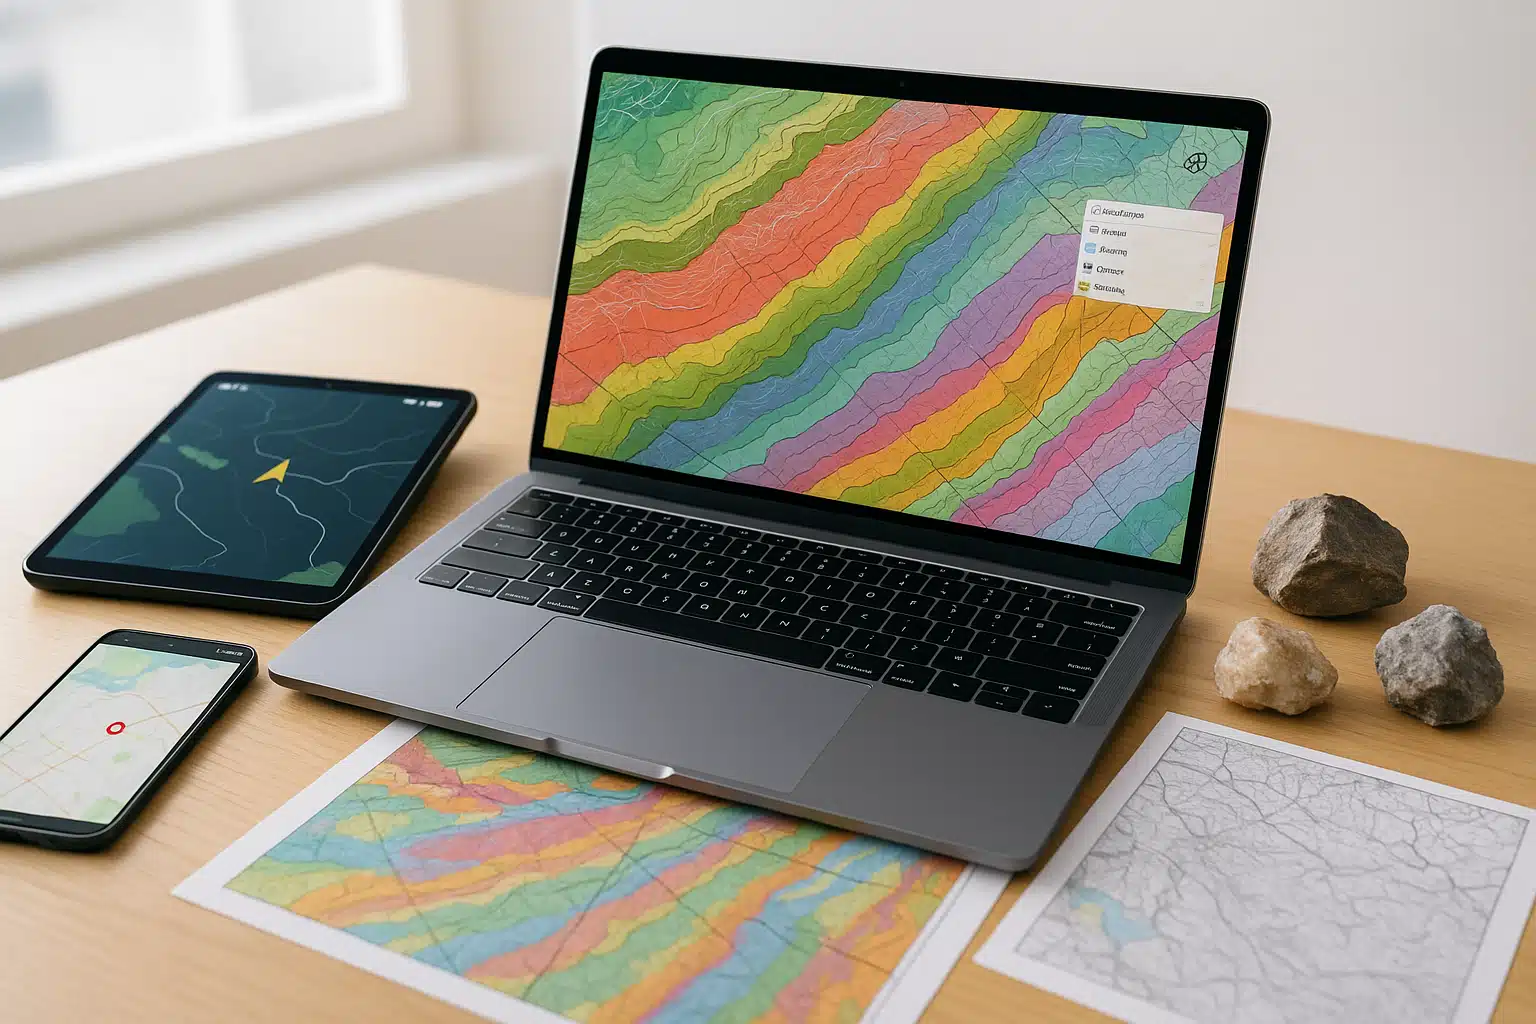
Integrating Geological Maps
Geological maps complement topographic maps by showing the types and ages of rocks at the surface. Learning to use both together provides a powerful prospecting advantage:
- Rock Type Identification: Geological maps use color coding to show different rock formations, helping you target areas with mineral-bearing potential.
- Structural Features: Faults, folds, and other geological structures marked on these maps often correlate with mineral concentrations.
- Contact Zones: Areas where different rock types meet can be particularly productive for certain minerals formed through geological interactions.
Digital Mapping Technologies
Modern technology offers powerful tools to enhance traditional map reading:
- GIS Software: Geographic Information Systems allow you to layer multiple map types, create custom annotations, and analyze terrain in sophisticated ways.
- Satellite Imagery: Services providing aerial and satellite photography let you see current ground conditions, vegetation patterns, and recent disturbances.
- 3D Terrain Visualization: Digital elevation models allow you to view landscapes from any angle, making it easier to understand complex topography.
- Mobile Applications: GPS-enabled mapping apps combine positioning, multiple map layers, and waypoint recording in portable devices.
Joining the Community
Connecting with other enthusiasts accelerates learning and opens up new opportunities:
- Rockhounding Clubs: Local and regional organizations often organize field trips, provide mentorship, and share knowledge about productive locations.
- Online Forums: Digital communities allow you to share finds, ask questions, and learn from experienced collectors worldwide.
- Workshops and Field Schools: Educational programs offer hands-on instruction in map reading, geology, and prospecting techniques.
- Mineral Shows and Exhibitions: These events provide opportunities to see exceptional specimens, meet dealers and collectors, and attend educational presentations.
Specialized Prospecting Techniques
As your skills advance, consider learning complementary techniques:
- Stream Sediment Sampling: Systematically collecting and examining material from waterways can reveal what minerals exist upstream.
- Geochemical Indicators: Learning to recognize soil discoloration and other chemical signs can point to subsurface mineral deposits.
- Geophysical Methods: Advanced hobbyists sometimes use metal detectors or other instruments to locate subsurface features.
- Systematic Grid Searching: Methodically covering areas in organized patterns increases your chances of finding localized deposits.
Conclusion: Your Journey Begins
Learning to read topographic maps for mineral prospecting opens up a world of outdoor exploration and geological discovery. While the concepts may seem complex at first, consistent practice in both map study and field application will rapidly build your confidence and competence.
Remember that successful prospecting combines multiple skills: map reading provides the navigation and terrain analysis foundation, geological knowledge helps you understand where minerals form, and field experience teaches you to recognize productive sites when you encounter them. Each expedition adds to your understanding, whether you return with spectacular specimens or simply with new knowledge about the landscape.
Start with easily accessible areas to practice your map reading skills without the pressure of difficult terrain. As you become more comfortable interpreting contour lines, identifying ridges, and recognizing disturbance features, gradually venture into more challenging and remote locations. Keep detailed records of your observations, successful sites, and lessons learned—this personal knowledge base becomes increasingly valuable over time.
Most importantly, approach this pursuit with patience and realistic expectations. The combination of outdoor exercise, intellectual challenge, navigation skills, and the possibility of discovering beautiful natural specimens makes topographic map-based prospecting a rewarding hobby regardless of whether every trip yields mineral treasures. The skills you develop will enhance all of your outdoor activities while connecting you more deeply with the geological forces that have shaped our planet.
Equip yourself with the proper tools, invest time in learning the fundamentals, respect the environment and land access regulations, and enjoy the journey of exploration. The earth’s treasures await those who learn to read the landscape and understand the stories written in stone.