Introduction
Have you ever tasted a rich, creamy tiramisu that left you craving more? The secret to this indulgent dessert often lies in its star ingredient: mascarpone cheese. This high-fat, acid-set cream cheese is not only a key player in tiramisu but can elevate many dishes worldwide, from cheesecakes to savory sauces and pasta dishes. In this comprehensive guide, we’ll explore how to make homemade mascarpone easily in your own kitchen, ensuring that your next dessert impresses everyone at the table. By the end, you’ll understand the simple steps involved and why homemade mascarpone can make all the difference in your culinary creations, whether you’re preparing traditional desserts or experimenting with contemporary fusion cuisine.
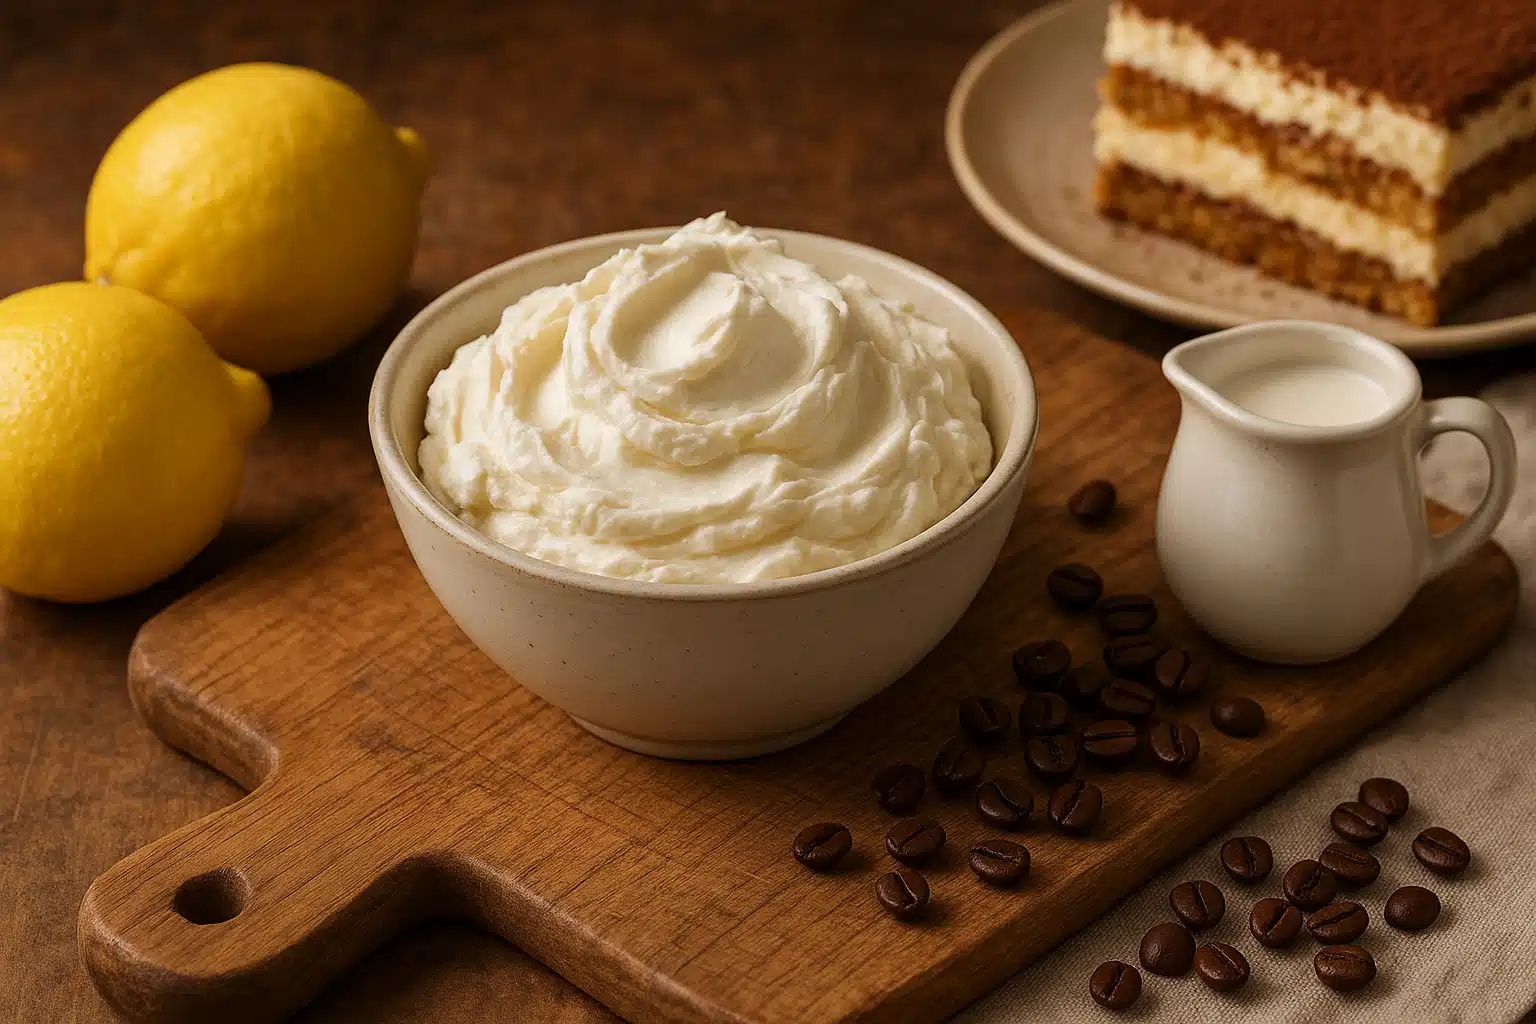
What is Mascarpone Cheese?
Mascarpone is a cream cheese originating from Italy, renowned for its rich, buttery flavor and velvety texture. Unlike regular cream cheese, mascarpone has a significantly higher fat content, which contributes to its luxurious mouthfeel and makes it a preferred ingredient in both professional kitchens and home cooking around the world. It’s made from just two basic ingredients: heavy cream and an acidic substance, commonly lemon juice or vinegar. The low acidity allows for a sweeter, more neutral profile, making it exceptionally versatile for desserts while also lending itself beautifully to savory applications.
What sets mascarpone apart from other soft cheeses is its unique production method. Rather than using bacterial cultures like traditional cream cheese, mascarpone is created through acid coagulation at high temperatures. This process results in a cheese that’s incredibly smooth, spreadable, and almost pudding-like in consistency. Its mild flavor profile makes it an ideal canvas for both sweet and savory ingredients, allowing it to enhance rather than overpower the other flavors in a dish.
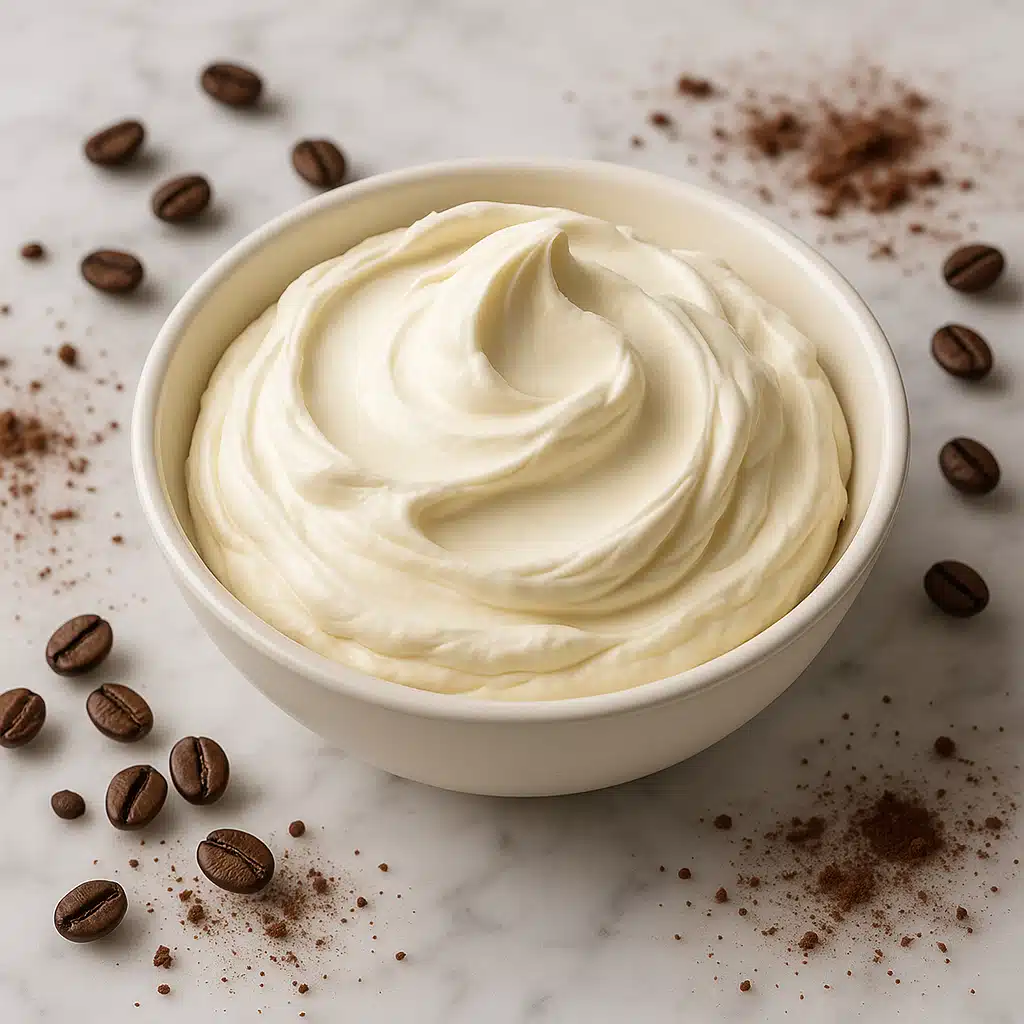
Key Characteristics of Mascarpone
- High Fat Content: Typically containing 60-75% fat, giving it its distinctively creamy texture and rich mouthfeel that melts beautifully in your mouth
- Smooth and Velvety: Mascarpone doesn’t have the tanginess of cream cheese or the graininess of ricotta, making it perfect for sweet dishes and delicate preparations
- Versatile Application: It can be used in both sweet and savory recipes, from classic desserts to modern savory pasta sauces and dips
- Neutral Flavor: The subtle, slightly sweet taste allows it to pair well with strong flavors like coffee, chocolate, citrus, and herbs
- Easy to Whip: Its consistency makes it ideal for incorporating into whipped cream or folding into other ingredients without deflating

The Process of Making Homemade Mascarpone
Creating your own mascarpone at home is surprisingly straightforward and requires minimal ingredients that you may already have in your kitchen. The process is far more forgiving than many other cheese-making techniques, making it an excellent introduction to homemade dairy products. The satisfaction of creating this luxurious ingredient from scratch, combined with the superior freshness and flavor compared to store-bought versions, makes it well worth the minimal effort required. Let’s break down the process step by step.
Ingredients You’ll Need
- 2 cups (480ml) heavy cream: The foundation of your mascarpone, providing the rich fat content necessary for proper texture
- 1 tablespoon (15ml) lemon juice or white vinegar: The acid that will coagulate the cream proteins and create the cheese structure
Optional additions for flavor variation include a pinch of salt for savory applications, or vanilla extract for sweet preparations, though traditional mascarpone contains only cream and acid.
Step-by-Step Instructions
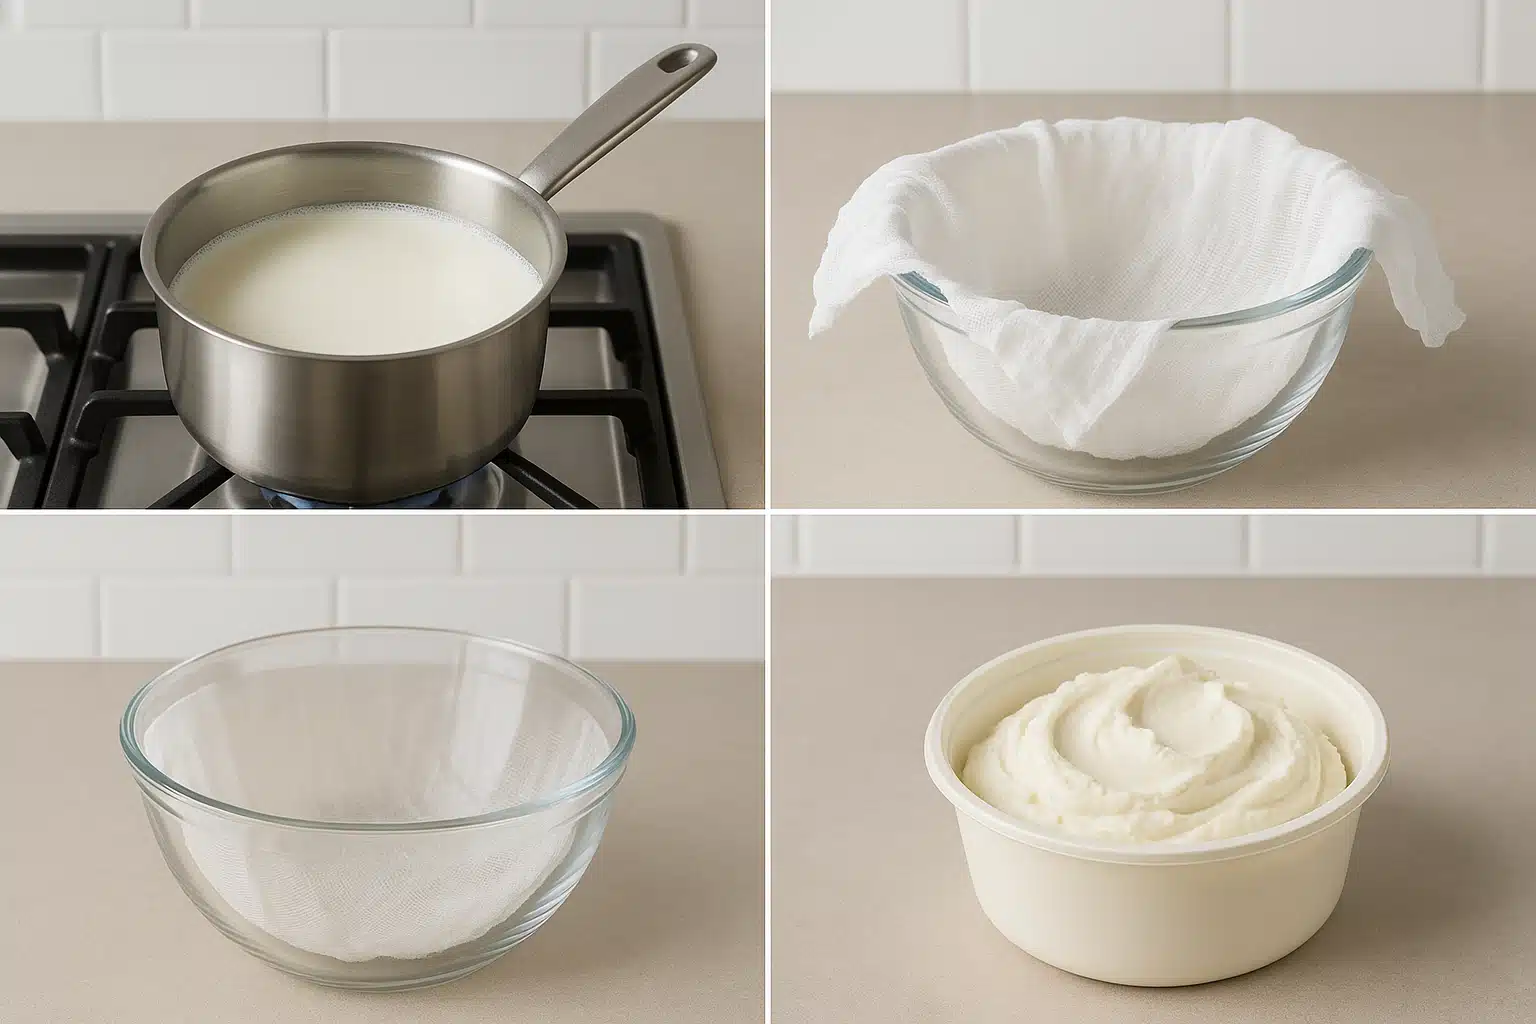
1. Heat the Cream: In a heavy-bottomed saucepan, gently heat the heavy cream over low to medium-low heat. Stir occasionally to prevent scorching and ensure even heating. Bring the cream to just below boiling point (around 185-190°F or 85-88°C). Use a cooking thermometer for accuracy, as proper temperature is crucial for successful coagulation. You’ll notice the cream will start to steam and small bubbles will form around the edges, but it should not reach a rolling boil.
2. Add the Acid: Once the cream reaches the correct temperature, remove the saucepan from the heat immediately. Add the lemon juice or vinegar all at once, and stir gently but thoroughly for about 30-60 seconds. You’ll notice the cream beginning to thicken slightly and take on a different texture almost immediately. This is the coagulation process beginning as the acid causes the cream proteins to bond together.
3. Let It Rest: Cover the saucepan with a lid or clean kitchen towel and let the mixture sit undisturbed at room temperature for 8-12 hours, or overnight. This resting period is essential, as it allows the cream to develop its characteristic flavor and achieve the proper thickness. During this time, the acid continues to work on the proteins, and the mixture will thicken considerably. Room temperature should be moderate—avoid extremely hot or cold environments.
4. Strain the Mixture: After the resting period, you’ll notice the mixture has thickened significantly and may have separated slightly, with some liquid visible. Line a fine-mesh sieve with several layers of cheesecloth, a clean flour sack towel, or coffee filters, and place it over a bowl with enough room for liquid to drain. Gently pour or spoon the thickened cream into the lined sieve. Let it drain for 2-4 hours, or until it reaches your desired consistency. The longer you drain it, the thicker your mascarpone will become. For tiramisu and most desserts, a medium-thick consistency works best.
5. Store Your Mascarpone: Once drained to your preferred thickness, transfer the mascarpone into an airtight container using a silicone spatula to scrape all the precious cheese from the cloth. Smooth the surface, cover tightly, and refrigerate. Homemade mascarpone will keep for about 5-7 days in the refrigerator, though it’s best used within the first few days for optimal freshness and flavor. The texture may firm up slightly when chilled but will soften when brought to room temperature or stirred.
Common Questions About Making Mascarpone
Why Use Heavy Cream?
Heavy cream, with its high fat content (typically 36-40%), is crucial for achieving the delightful creaminess and rich texture that mascarpone is known for worldwide. The fat content is what gives mascarpone its characteristic smooth, spreadable consistency and luxurious mouthfeel. Lower fat creams, such as light cream or half-and-half, won’t yield the same luxurious results because they lack sufficient fat to create the proper structure. The fat molecules are what hold the cheese together after coagulation, creating that signature velvety texture. Additionally, higher fat content contributes to better flavor and a more stable final product that won’t separate or become grainy.
What If My Mascarpone Isn’t Thick Enough?
If your mascarpone hasn’t reached the thickness you desire after the initial draining period, simply let it continue sitting in the sieve for additional time. The longer it drains, the thicker it becomes as more whey is removed. You can drain it for up to 6 hours or even longer if you prefer an exceptionally thick consistency. Alternatively, after draining, you can briefly whip the mascarpone with a hand mixer or in a stand mixer on low speed to incorporate air and achieve a smoother, fluffier texture. Be careful not to over-whip, as this can cause the fat to separate and create a butter-like consistency. If your mascarpone is too thin even after extended draining, it may be due to insufficient heating of the cream initially or using cream with lower fat content.
Can I Use Different Acids?
While lemon juice and white vinegar are the standard acidic agents used in mascarpone making, you can experiment with other acids for varied flavor profiles. Citric acid powder dissolved in a small amount of water is an excellent option that provides consistent results without adding any flavor. Lime juice can substitute for lemon juice if you want a slightly different citrus note. Some cheese-makers use tartaric acid or even buttermilk, though buttermilk will result in a tangier product more similar to cream cheese. However, be cautious with the amount you use, as different acids have varying strengths. Too much acid can make the mascarpone sour or cause it to curdle too quickly, resulting in a grainy texture. Start with the recommended amount and adjust in future batches based on your results and taste preferences.
Can I Make Mascarpone Without a Thermometer?
While a thermometer ensures the most consistent results, you can make mascarpone without one by watching for visual cues. Heat the cream until it’s steaming heavily and small bubbles form around the edges of the pan, but before it reaches a full boil. This typically occurs just before the boiling point. However, investing in an inexpensive cooking thermometer will dramatically improve your success rate and consistency, making it a worthwhile addition to your kitchen tools, especially if you plan to make mascarpone regularly or explore other culinary techniques that require temperature precision.
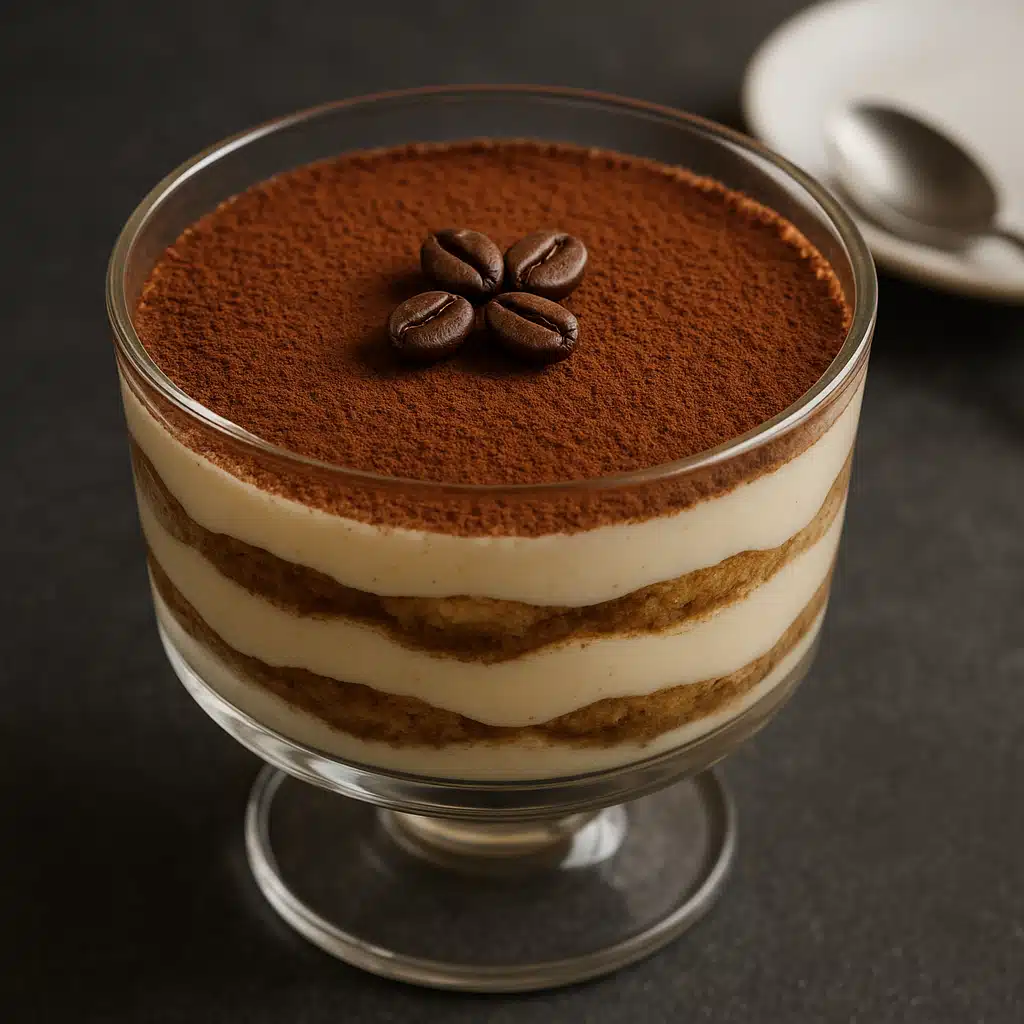
How Should I Use Homemade Mascarpone?
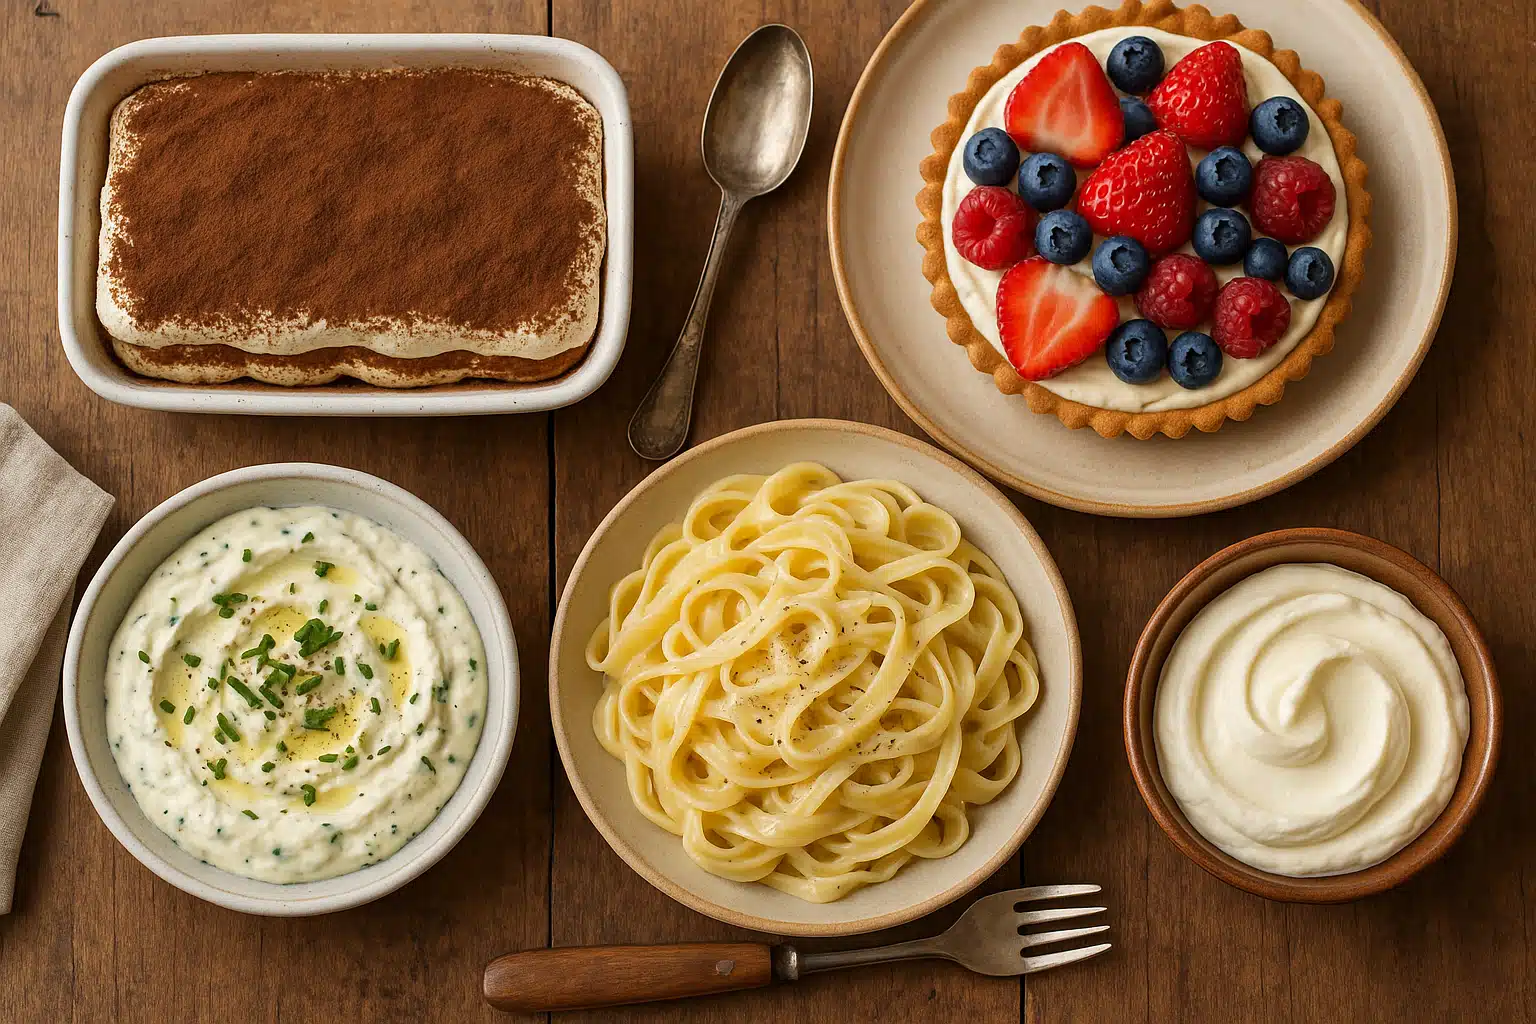
Homemade mascarpone is incredibly versatile and can be used in countless recipes. The most famous application is in tiramisu, where it’s whipped with eggs and sugar to create the luscious cream layer. It’s also excellent in cheesecakes, providing a lighter, more delicate flavor than traditional cream cheese. Use it as a spread on toast or pastries, dolloped on fresh fruit, folded into whipped cream for enhanced richness, or stirred into pasta sauces for added creaminess. It can replace cream cheese in most recipes for a more refined, less tangy result. In savory applications, try it with herbs and garlic as a dip, mixed into risotto, or as a topping for soups and roasted vegetables.
Common Mistakes to Avoid
Even though making mascarpone is relatively simple, there are several common pitfalls that can affect your results. Being aware of these mistakes will help ensure success every time you make this delicious cheese at home.
Boiling the Cream
Be careful not to let the cream reach a full rolling boil, as this can alter both the texture and flavor of your finished mascarpone. When cream boils vigorously, it can cause the proteins to coagulate too quickly and unevenly, resulting in a grainy or curdled texture rather than the smooth, creamy consistency you’re aiming for. Boiling can also cause the cream to develop a cooked flavor that will be noticeable in the final product. The ideal temperature is just below boiling—hot enough to activate the coagulation process when acid is added, but gentle enough to maintain the cream’s delicate structure. Keep the heat moderate and watch the cream carefully as it approaches temperature.
Skipping the Resting Period
Allowing the mixture to rest for the full 8-12 hours is essential for achieving the right thickness, texture, and flavor development. Don’t rush this step, even though it requires patience. During this resting period, the acid continues to work on the cream proteins, the mixture thickens naturally, and flavors mellow and develop. Cutting this time short will result in mascarpone that’s too thin, hasn’t developed proper structure, and may have a sharper, less refined taste. Plan ahead and start your mascarpone the day before you need it, allowing it to rest overnight. This passive time requires no effort on your part but makes all the difference in the final quality.
Not Straining Long Enough
If you want a thicker, more authentic mascarpone texture, be patient and let it drain for an adequate amount of time. Many home cooks remove their mascarpone from the straining setup too early, resulting in a product that’s too thin and runny for proper use in recipes like tiramisu. The whey (liquid) needs time to separate from the cheese solids. Depending on the final consistency you desire, this can take anywhere from 2 to 6 hours. For desserts, a medium-thick consistency is usually ideal—thick enough to hold its shape but still creamy and spreadable. Remember, you can always thin mascarpone by stirring it, but you can’t easily thicken it once it’s removed from the straining setup.
Using Low-Quality or Low-Fat Cream
The quality of your cream directly impacts the quality of your mascarpone. Always use the best quality heavy cream you can find, preferably organic or from grass-fed sources if available. Check the fat content—it should be at least 36%, though 40% is even better. Avoid ultra-pasteurized cream if possible, as it can sometimes produce less predictable results due to the high-heat processing it’s undergone, though it can still work. Cream with added stabilizers or thickeners may also affect your results. Read the ingredients label—ideally, it should contain only cream and perhaps a small amount of natural thickener. The better your starting ingredient, the better your finished mascarpone will taste.
Stirring Too Vigorously After Adding Acid
When you add the acid to the hot cream, stir gently and briefly—about 30-60 seconds is sufficient. Over-stirring or vigorous mixing can break up the curds that are forming and result in a grainy texture instead of the smooth, creamy consistency you want. The goal is simply to distribute the acid evenly throughout the cream, not to whip or beat the mixture. Use a gentle folding or stirring motion, then leave the mixture alone to work its magic during the resting period.
Incorrect Storage
Store your mascarpone in an airtight container in the refrigerator immediately after preparation. Mascarpone is a fresh cheese with no preservatives, so it’s perishable and can absorb odors from other foods in your refrigerator if not properly sealed. Use a container with a tight-fitting lid and consume within 5-7 days for best quality and food safety. Don’t freeze mascarpone, as the high fat content and delicate texture don’t respond well to freezing and thawing—the texture will become grainy and separated. If you’re concerned about waste, simply halve the recipe to make a smaller batch.

Tips for Perfect Mascarpone Every Time
Beyond avoiding common mistakes, these additional tips will help you achieve consistently excellent results with your homemade mascarpone.
- Temperature Consistency: Ensure your resting environment maintains a relatively stable room temperature, ideally between 68-72°F (20-22°C). Avoid placing the mixture in direct sunlight or near heat sources.
- Clean Equipment: Make sure all your equipment is thoroughly clean and dry. Any residual soap, water, or food particles can affect the coagulation process or introduce unwanted bacteria.
- Gentle Handling: Throughout the process, handle the mixture gently. Aggressive stirring, shaking, or mixing can damage the delicate structure you’re creating.
- Taste Test: Before using your mascarpone in a recipe, taste it. It should be mild, slightly sweet, and creamy with no sour or off flavors. This helps you catch any issues before incorporating it into a larger dish.
- Batch Sizing: This recipe can be easily doubled or halved depending on your needs. However, if making a large batch, you may need a larger straining setup to accommodate the volume.
- Season Appropriately: If using mascarpone in savory applications, consider adding a small pinch of salt during the heating phase for better flavor integration.
Creative Ways to Use Your Homemade Mascarpone
Once you’ve mastered making mascarpone, you’ll find countless ways to incorporate this luxurious ingredient into your cooking and baking. Here are some inspiring ideas to get you started.
Sweet Applications
- Classic Tiramisu: The most famous use, where mascarpone is whipped with egg yolks and sugar, then layered with coffee-soaked ladyfingers and cocoa powder
- Fruit Tarts: Use as a creamy base in fruit tarts, spread on the pastry before arranging fresh berries or stone fruits
- Pancake or Waffle Topping: Dollop on breakfast items with honey or maple syrup and fresh fruit for an indulgent morning treat
- Cheesecake: Replace some or all of the cream cheese in cheesecake recipes for a lighter, more delicate dessert
- Frosting: Whip with powdered sugar and vanilla for an elegant, less-sweet frosting for cakes and cupcakes
- Stuffed French Toast: Spread between slices before dipping in egg mixture for an extra-decadent breakfast
- Fruit Dip: Mix with honey and a splash of vanilla for a quick dip for fresh fruit platters
Savory Applications
- Pasta Sauces: Stir into tomato-based or cream sauces at the end of cooking for added richness and smooth texture
- Risotto Finishing: Fold into risotto in place of butter and parmesan for a creamy, luxurious finish
- Herb Dip: Mix with fresh herbs, garlic, and lemon zest for a sophisticated dip for vegetables or crackers
- Soup Garnish: Dollop on top of tomato, butternut squash, or mushroom soups for added creaminess
- Stuffed Chicken or Pork: Mix with sun-dried tomatoes, spinach, or mushrooms as a filling for stuffed meats
- Pizza or Flatbread: Use as a base instead of tomato sauce, topped with vegetables and herbs
- Mashed Potatoes: Stir in for ultra-creamy, restaurant-quality mashed potatoes
Conclusion
Making homemade mascarpone is not only easy and accessible but also incredibly rewarding, resulting in a fresher, richer flavor that’s perfect for tiramisu, cheesecakes, savory pasta dishes, and countless other culinary creations. With just two simple ingredients—heavy cream and an acidic agent—you can create a luxurious ingredient that will enhance your cooking and baking repertoire, impress your family and friends, and give you a deeper appreciation for artisanal food preparation.
The process requires minimal active time but does call for patience during the resting and straining periods. However, the superior taste, texture, and satisfaction of creating this delicacy from scratch make it well worth the wait. Homemade mascarpone lacks the preservatives and stabilizers found in commercial versions, resulting in a purer, more authentic flavor that truly elevates any dish it touches.
Whether you’re an experienced home cook looking to expand your skills or a beginner wanting to try your hand at cheese-making, mascarpone is an excellent place to start. The technique is forgiving, the ingredients are readily available in most parts of the world, and the results are consistently impressive when you follow the guidelines outlined in this guide.
The next time you’re planning to make tiramisu, preparing a special dessert for guests, or simply want to elevate your everyday cooking, remember that the secret to impressing everyone may just be that delightful homemade mascarpone in your refrigerator. Once you experience the difference that fresh, homemade mascarpone makes, you’ll find it difficult to return to store-bought versions. Happy cooking, and enjoy the creamy, luxurious results of your cheese-making adventure!