Cheese is a beloved staple in cuisines around the world, from mild and creamy varieties to sharp and aged options. But have you ever considered taking your cheese experience to the next level by infusing it with herbs, spices, or other flavorings? Flavored cheeses offer an exciting way to enhance your cooking, entertaining, and snacking, bringing new dimensions of taste to familiar favorites.
However, creating flavored cheese at home requires attention to food safety practices. Adding ingredients like fresh herbs, dried spices, garlic, or even fruit can introduce moisture and other factors that may encourage unwanted mold growth or spoilage. Understanding how to safely incorporate these flavors ensures that your homemade creations are not only delicious but also safe to consume.
In this comprehensive guide, we’ll walk you through everything you need to know about making flavored cheese at home. You’ll learn about the science behind flavor infusion, essential safety considerations, step-by-step techniques, storage best practices, and answers to common questions. Whether you’re a beginner or an experienced home cheesemaker, this guide will help you create flavorful, safe, and impressive cheese varieties.
What is Flavored Cheese?
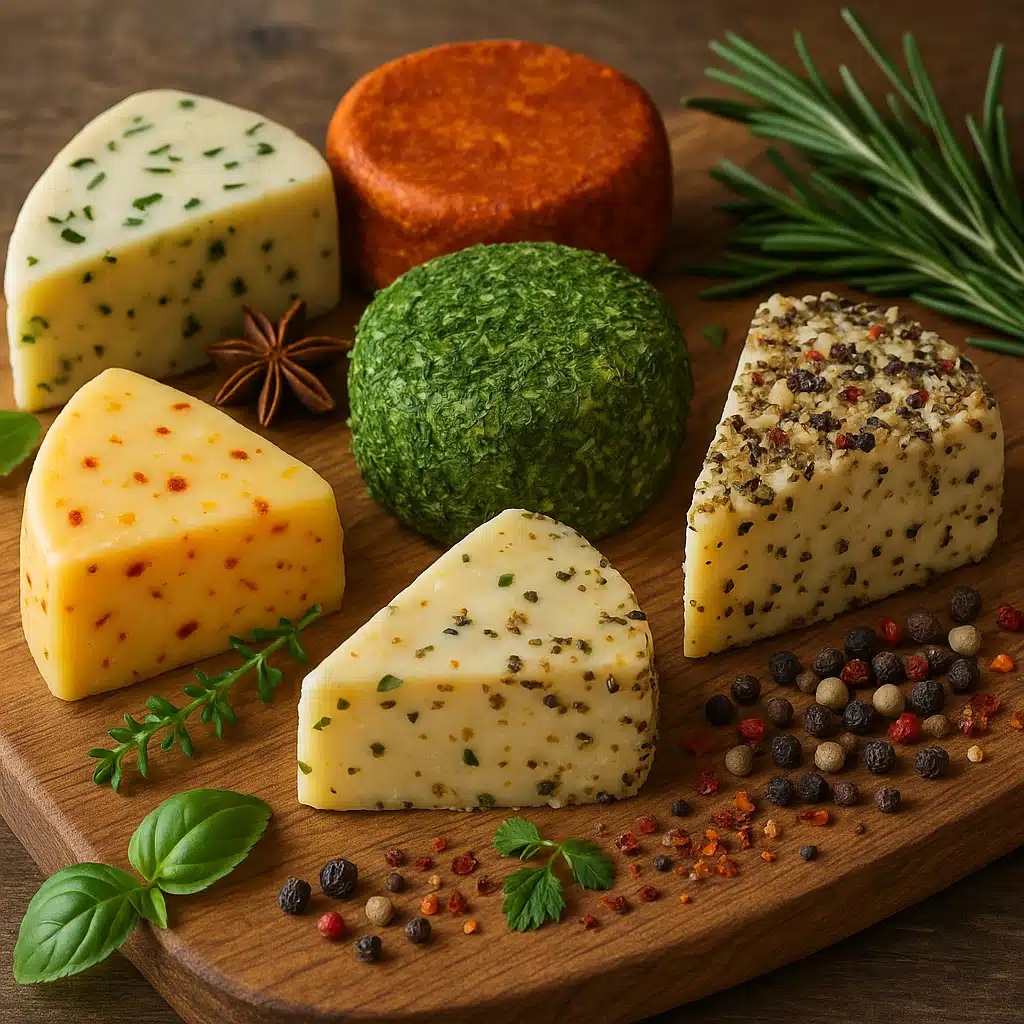
Flavored cheese refers to any cheese that has been enhanced with additional ingredients beyond the basic milk, cultures, and rennet used in traditional cheesemaking. These additions can include dried or fresh herbs such as basil, dill, rosemary, and thyme; spices like black pepper, paprika, cumin, or chili flakes; aromatics such as garlic or onion; and even sweet elements like dried fruit, honey, or nuts.
The process of flavoring cheese can occur at different stages of production. Ingredients may be mixed directly into the cheese curds before pressing, folded into soft cheeses after they’ve set, rubbed onto the exterior rind of aging cheeses, or layered within the cheese structure. Each method produces different flavor profiles and textures, allowing for endless creativity and customization.
Flavored cheeses have gained popularity worldwide because they offer versatility in the kitchen. They can be served as part of a cheese platter, melted into dishes for added complexity, spread on crackers or bread, or incorporated into recipes ranging from salads to pasta dishes. The ability to control ingredients and flavor intensity makes homemade flavored cheese particularly appealing to food enthusiasts and those with specific dietary preferences.
Understanding the Safety Concerns
While flavoring cheese opens up exciting culinary possibilities, it also introduces potential food safety challenges that must be carefully managed. The primary concern when adding ingredients to cheese is the introduction of additional moisture, which can create an environment conducive to unwanted microbial growth, including mold, bacteria, and yeast.
Cheese itself is a preserved food product with built-in safety mechanisms. The aging process, salt content, acidity levels, and reduced moisture all work together to inhibit harmful microorganisms. However, when you add fresh herbs, which contain significant water content, or ingredients that haven’t been properly dried or prepared, you disrupt this delicate balance. Excess moisture can lead to premature spoilage, off-flavors, and potentially unsafe conditions.
Another consideration is the introduction of external contaminants. Any ingredient added to cheese must be clean and properly handled to avoid introducing unwanted bacteria or mold spores. Using contaminated utensils, working with dirty hands, or adding ingredients that have been improperly stored can compromise the safety and quality of your finished product.
Temperature control is equally important. Flavored cheeses must be stored at appropriate temperatures to slow microbial growth. Room temperature storage is generally unsuitable for most flavored cheeses, particularly those containing fresh ingredients or soft cheese bases. Proper refrigeration and, in some cases, freezing are essential for maintaining both safety and quality.
Understanding these risks doesn’t mean you should avoid making flavored cheese—it simply means you need to follow best practices to ensure safe and successful results every time.
Choosing the Right Ingredients
Selecting appropriate ingredients is the foundation of successful and safe flavored cheese making. The key principle is to prioritize ingredients with low moisture content and high quality. Dried herbs and spices are generally the safest choices because the drying process removes most of the water that could promote spoilage.
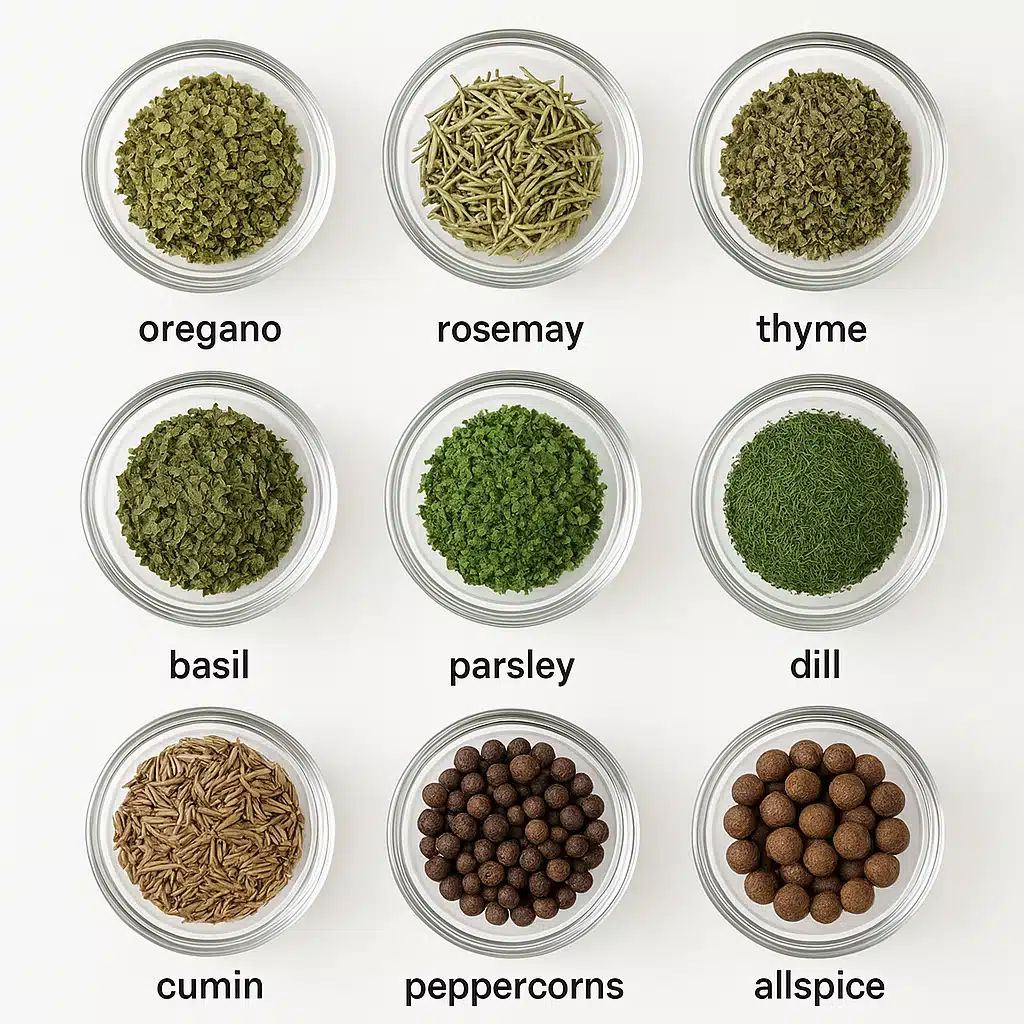
When selecting dried herbs, look for products that are vibrant in color and aromatic, indicating freshness and potency. Common choices include dried basil, oregano, thyme, rosemary, dill, parsley, and chives. Whole spices such as peppercorns, coriander seeds, fennel seeds, and cumin can be used whole or freshly ground for maximum flavor impact. Ground spices like paprika, turmeric, cayenne pepper, and garlic powder are also excellent options.
If you prefer using fresh herbs for their bright, vibrant flavors, take extra precautions. Wash them thoroughly and dry them completely using a salad spinner or clean kitchen towels. Even small amounts of residual water can cause problems. Consider using fresh herbs in smaller quantities and consuming the cheese within a shorter timeframe. Some cheesemakers blanch fresh herbs briefly to reduce microbial load, though this may slightly alter their flavor.
Other flavoring options include dried fruit such as cranberries, apricots, or figs, which should be chopped into small pieces. Nuts like walnuts, almonds, or pistachios add texture and flavor but should be toasted first to reduce moisture and enhance taste. Olives, sun-dried tomatoes, and roasted garlic can also be incorporated, provided they are well-drained and not packed in excess oil or liquid.
Always source your ingredients from reputable suppliers and check expiration dates. Store your flavoring ingredients in airtight containers in cool, dry, dark locations to maintain their quality until you’re ready to use them.
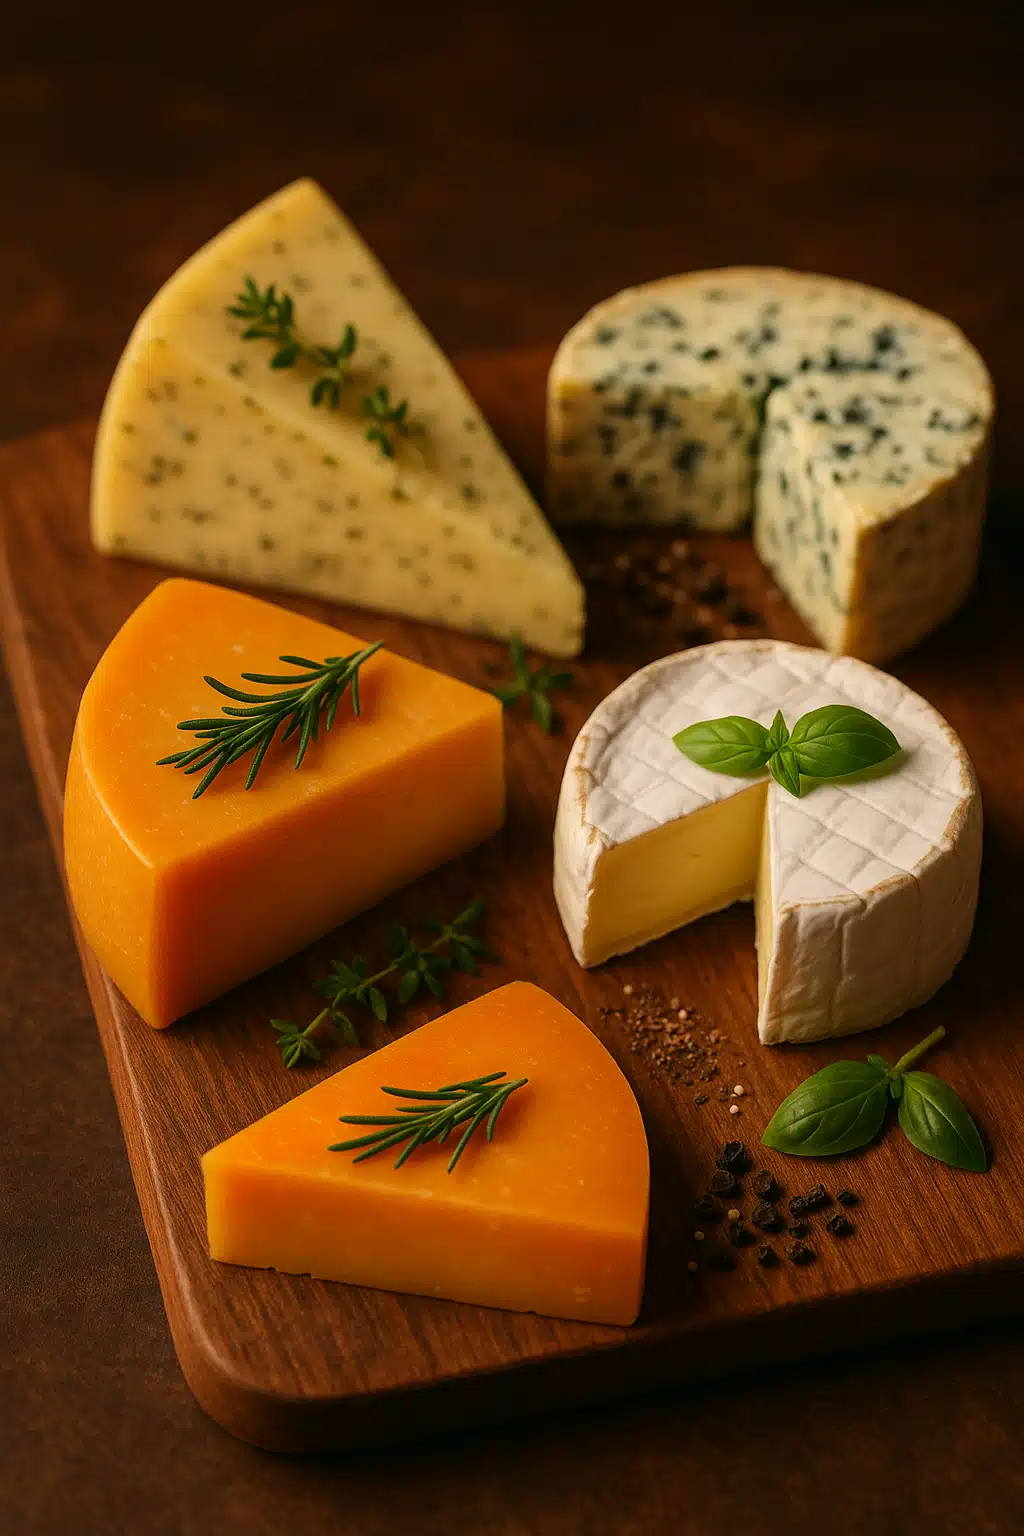
Selecting the Best Base Cheese
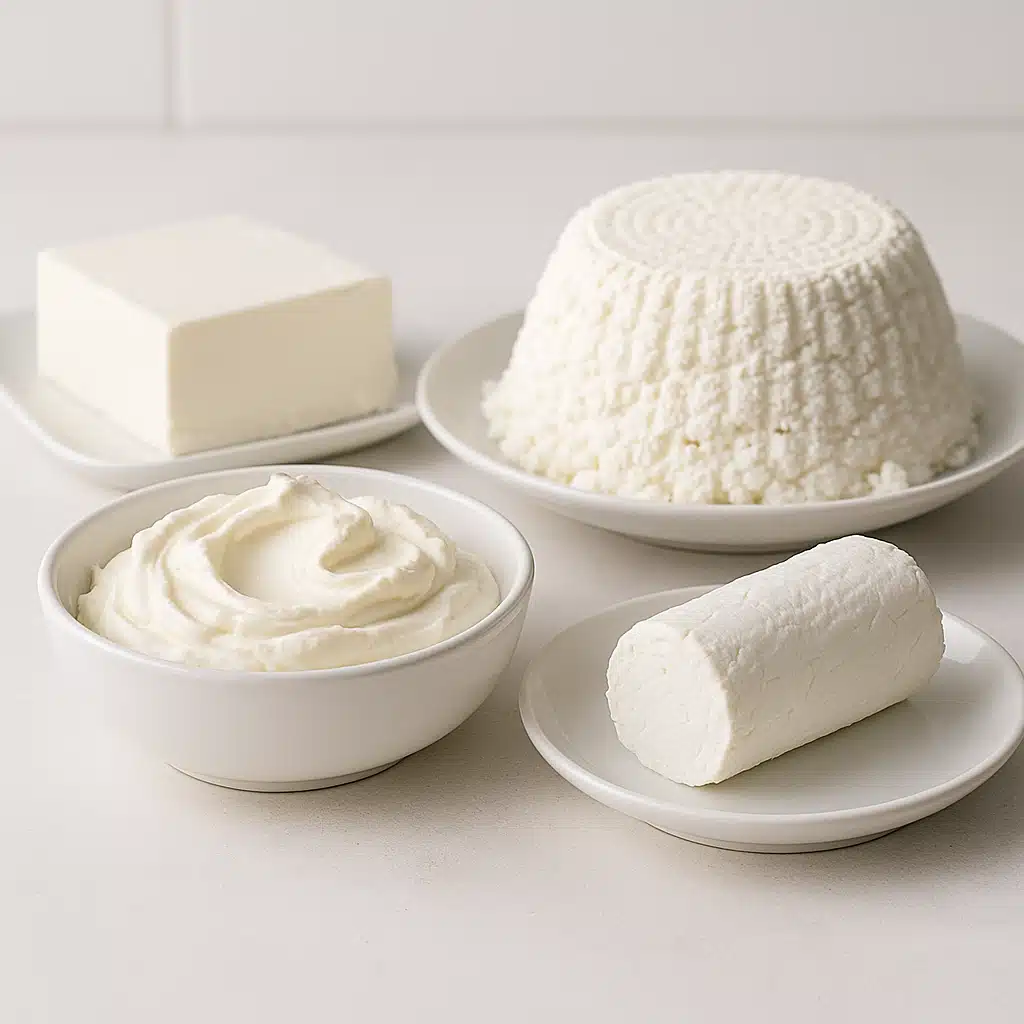
The type of cheese you choose as your base significantly affects both the flavoring process and the final result. Soft, fresh cheeses are the easiest to work with for beginners because they readily accept added ingredients and require minimal aging or specialized equipment.
Cream cheese is an excellent starting point due to its mild flavor, smooth texture, and wide availability. It serves as a neutral canvas that allows herbs and spices to shine without competing flavors. Ricotta cheese offers a slightly grainy texture and delicate taste, making it ideal for both savory and sweet flavor combinations. Fresh goat cheese (chèvre) has a distinctive tangy profile that pairs beautifully with herbs like thyme, rosemary, and lavender.
Cottage cheese can be flavored for use in dips and spreads, though its chunky texture limits some applications. Mascarpone, with its rich, creamy consistency, works wonderfully with both savory ingredients like herbs and sweet additions like honey or vanilla.
Semi-soft cheeses such as young cheddar, Monterey Jack, or Havarti can also be flavored, though the process may require more advanced techniques such as mixing ingredients into curds before pressing. These cheeses benefit from slightly longer aging periods to allow flavors to meld.
Harder, aged cheeses can be flavored by incorporating ingredients into the exterior or creating flavor-rubbed rinds, but this requires more specialized knowledge and equipment. For most home cheesemakers, starting with soft, fresh varieties offers the best balance of ease, safety, and delicious results.
Step-by-Step Guide to Safely Flavoring Cheese
Creating flavored cheese at home is a straightforward process when you follow proper techniques and safety protocols. Here is a detailed, step-by-step guide to help you achieve excellent results.
Step 1: Prepare Your Workspace
Begin by thoroughly cleaning your work surface, utensils, and hands. Use hot, soapy water and consider sanitizing with a food-safe sanitizer. A clean environment is essential for preventing contamination and ensuring the safety of your finished product.
Step 2: Select and Prepare Your Base Cheese
Choose a fresh, high-quality cheese appropriate for flavoring. If using cream cheese, allow it to come to room temperature for about 30 minutes to make mixing easier. For ricotta or cottage cheese, you may want to drain excess liquid through cheesecloth or a fine-mesh strainer to reduce moisture content.
Step 3: Prepare Your Flavoring Ingredients
Measure out your dried herbs, spices, or other flavoring ingredients. If using fresh herbs, ensure they are completely dry. Chop or crush ingredients as needed to achieve the desired texture and distribution. Remember that a little goes a long way—start with small amounts and adjust to taste.
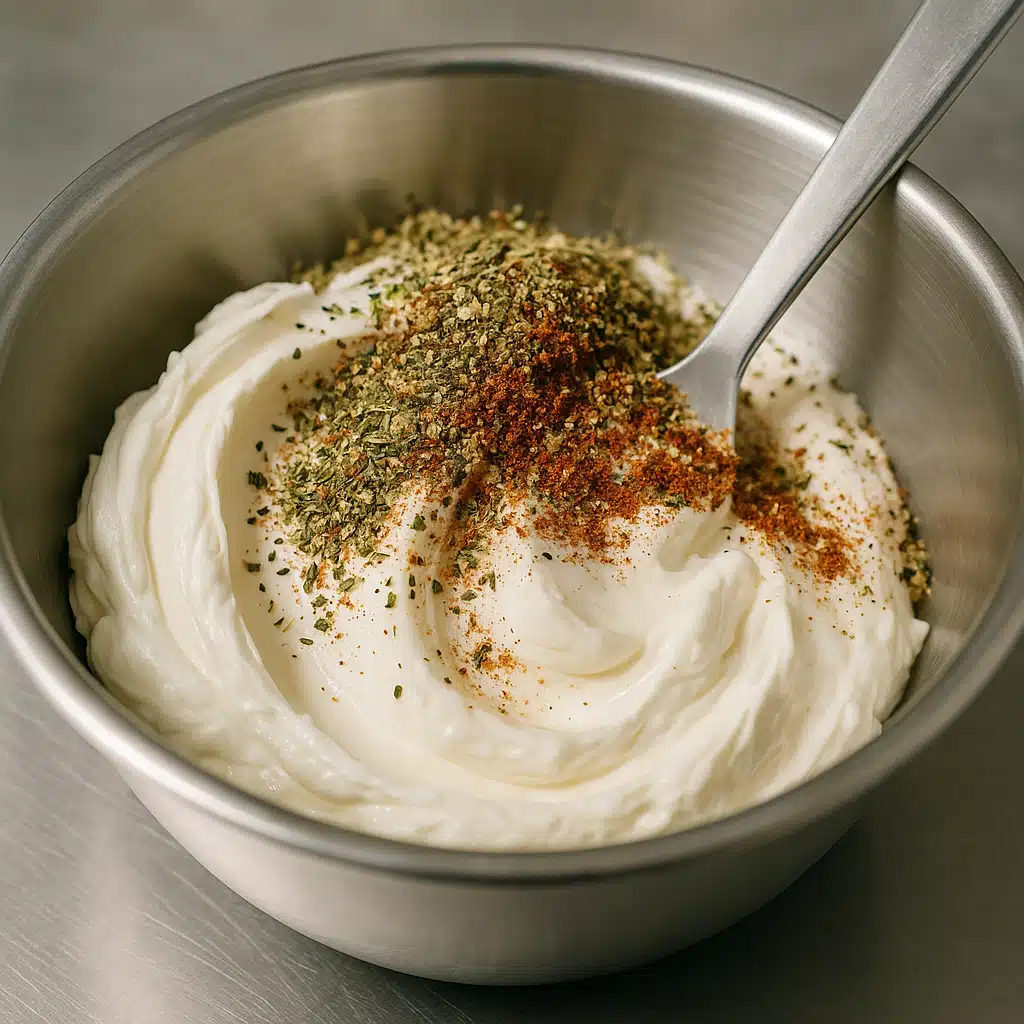
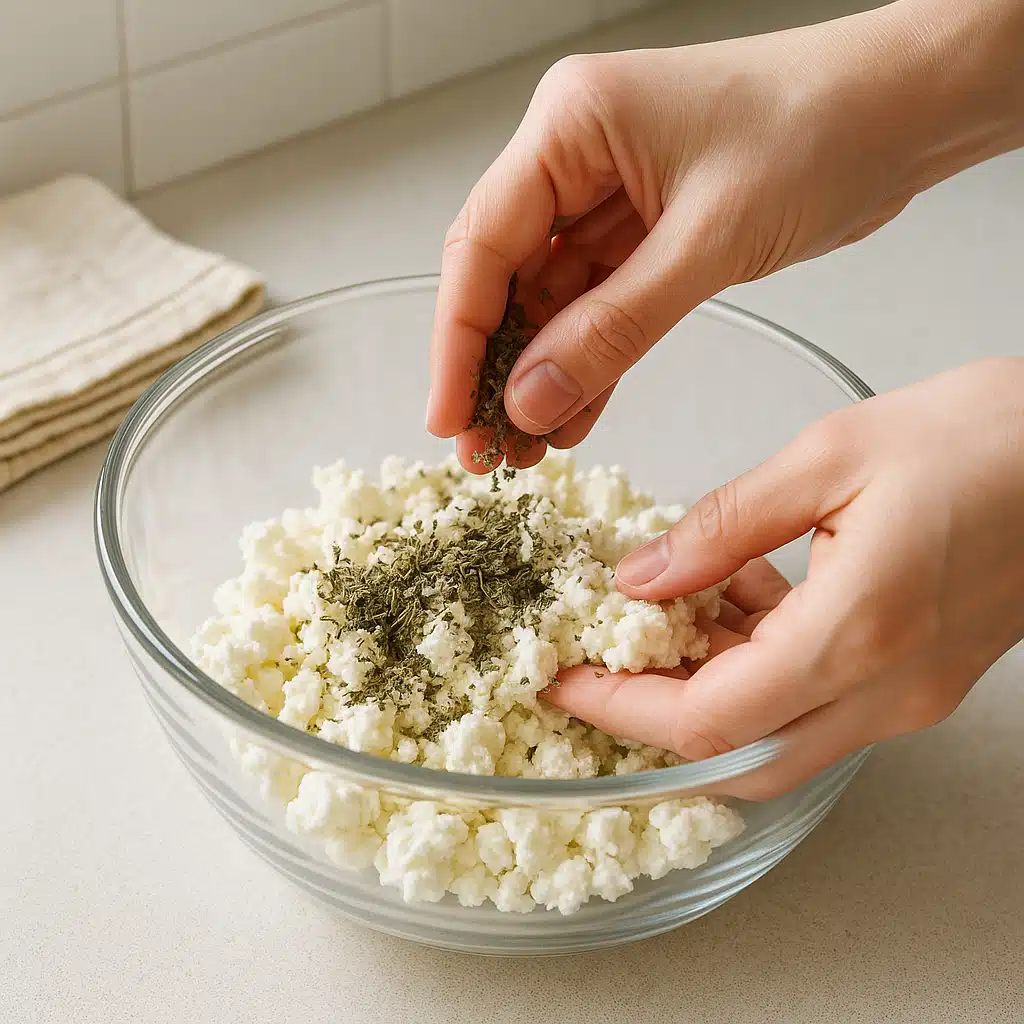
Step 4: Combine Cheese and Flavorings
Place your base cheese in a clean mixing bowl. Add your prepared flavoring ingredients gradually. Using a spatula, spoon, or clean hands, fold the ingredients gently into the cheese. Mix until evenly distributed, but avoid over-mixing, which can make the cheese too soft or change its texture. Soft, fresh cheeses require only gentle folding to maintain their structure.
Step 5: Taste and Adjust
Sample a small amount of your flavored cheese mixture. Assess the flavor intensity and adjust as needed by adding more herbs, spices, or even a pinch of salt to enhance the overall taste. Remember that flavors will develop and intensify slightly during storage, so avoid over-seasoning initially.
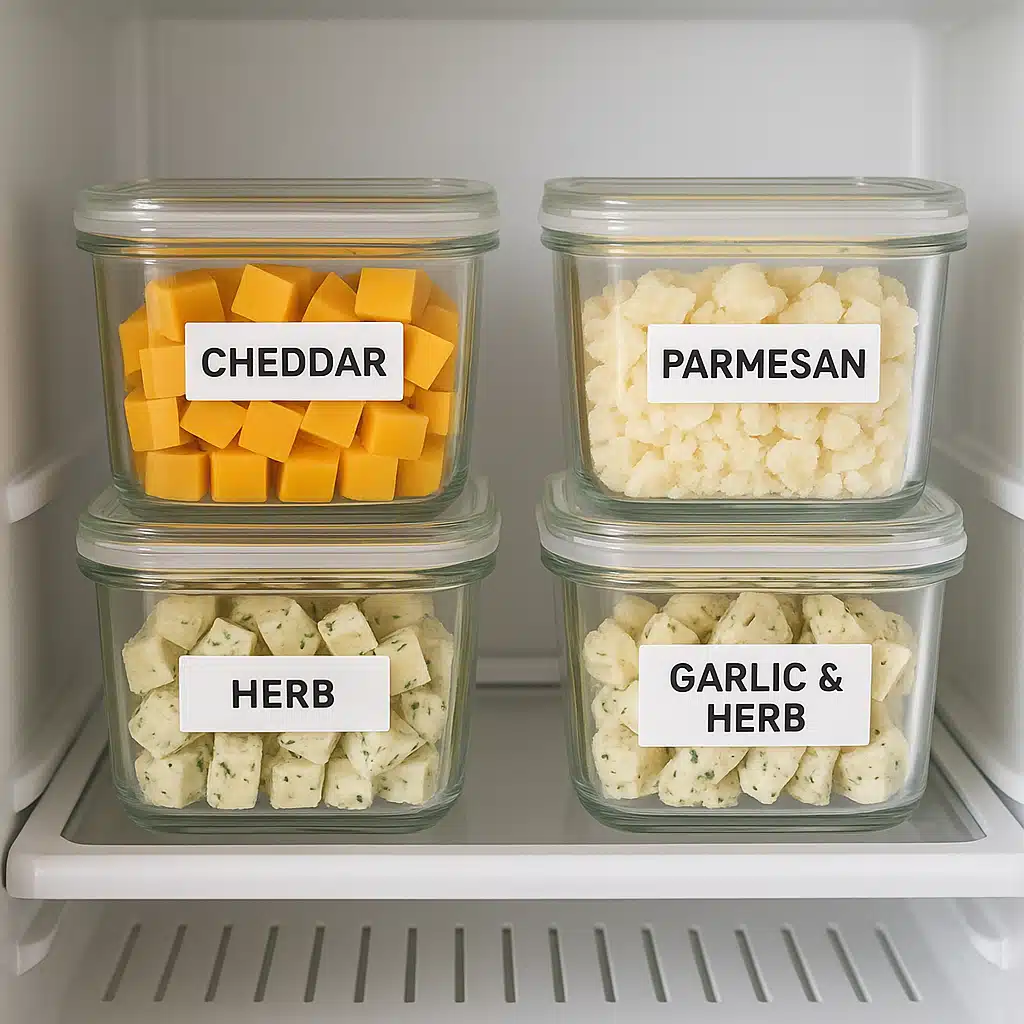
Step 6: Package for Storage
Transfer your flavored cheese to a clean, airtight container. Glass containers with tight-fitting lids or food-grade plastic containers work well. Press the cheese down gently to remove air pockets, which can promote oxidation and spoilage. Label the container with the date of preparation and the ingredients used for easy reference.
Step 7: Refrigerate Promptly
Place your flavored cheese in the refrigerator immediately after preparation. Proper refrigeration slows microbial growth and helps preserve freshness. Most flavored soft cheeses should be stored at temperatures between 1°C and 4°C (34°F to 40°F).
Step 8: Allow Flavors to Develop
For best results, allow your flavored cheese to rest in the refrigerator for at least several hours, or ideally overnight, before serving. This resting period allows the flavors to meld and develop complexity.
Proper Storage and Shelf Life
Proper storage is critical for maintaining both the safety and quality of your flavored cheese. The shelf life of homemade flavored cheese depends on several factors, including the type of base cheese used, the ingredients added, the moisture content, and storage conditions.
Most homemade flavored soft cheeses will remain fresh for approximately 5 to 7 days when stored properly in the refrigerator. Cheeses made with dried herbs and spices typically last longer than those containing fresh ingredients. Always store your flavored cheese in airtight containers to prevent it from absorbing odors from other foods and to minimize exposure to air, which can cause drying and oxidation.
Check your cheese regularly for signs of spoilage. Normal aging may cause slight changes in texture or mild intensification of flavors, but any unusual odors, visible mold growth (unless intentional and safe varieties), significant color changes, or off-tastes indicate that the cheese should be discarded. When in doubt, it’s always safer to throw it out rather than risk foodborne illness.
If you’ve made a large batch and want to extend shelf life, consider freezing portions of your flavored cheese. While freezing can alter texture slightly, making the cheese more crumbly upon thawing, it significantly extends storage time. Wrap cheese tightly in plastic wrap, then place in freezer-safe containers or bags, removing as much air as possible. Properly frozen flavored cheese can last for up to three months. Thaw frozen cheese slowly in the refrigerator before use.
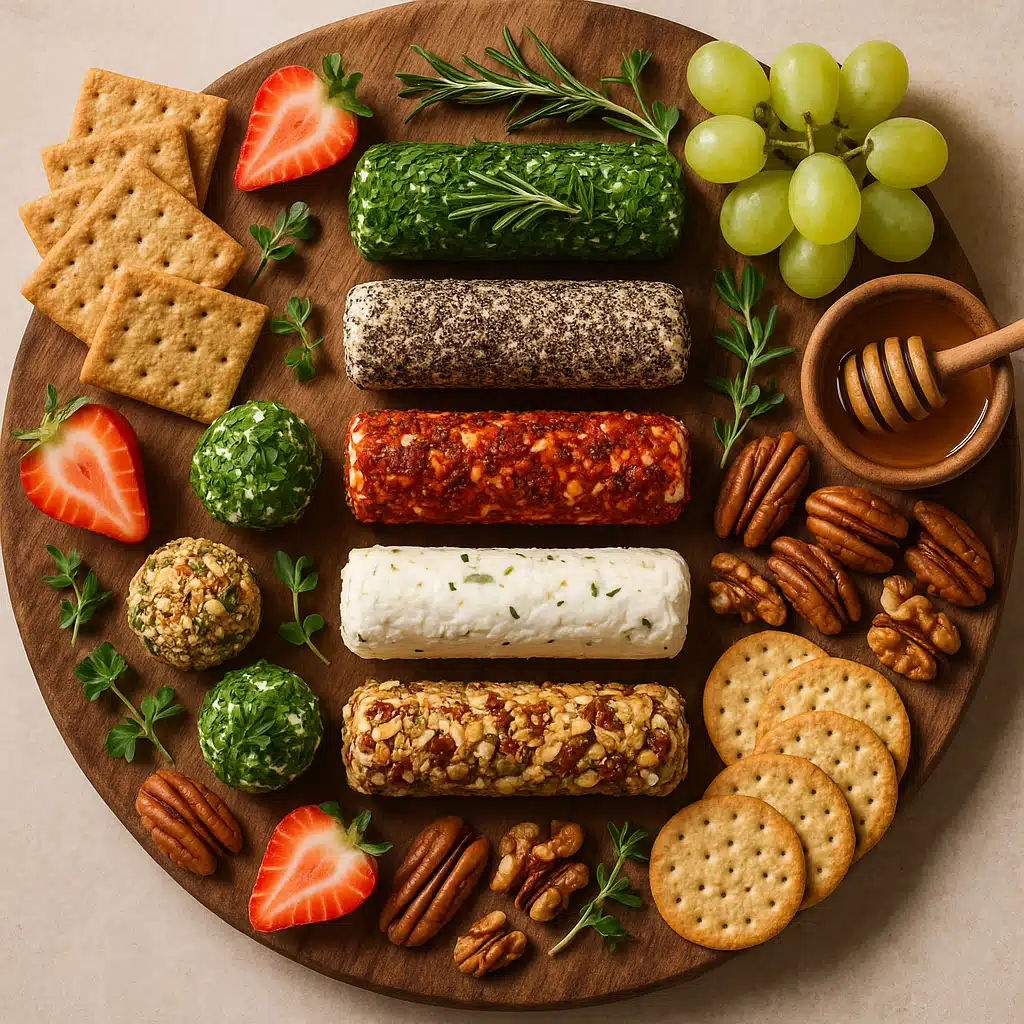
For entertaining or gifting purposes, you can also shape your flavored cheese into logs or balls, then roll them in additional herbs, nuts, or spices to create an attractive presentation while adding another layer of flavor protection.
Creative Flavor Combinations to Try
Once you’ve mastered the basic techniques of safely flavoring cheese, the creative possibilities are virtually endless. Here are some tried-and-tested flavor combinations that work beautifully with various cheese bases and can inspire your own experiments.
Mediterranean Herb Blend: Combine dried basil, oregano, thyme, and a touch of garlic powder with cream cheese or fresh goat cheese. Add finely chopped sun-dried tomatoes and a drizzle of olive oil for extra richness. This combination is perfect for spreading on crusty bread or crackers.
Spicy Pepper Mix: Mix crushed red pepper flakes, black pepper, and a hint of smoked paprika into cream cheese or ricotta. This creates a cheese with a pleasant heat that pairs wonderfully with vegetables or as a sandwich spread.
Garden Fresh: Fold finely chopped dried dill, chives, and parsley into soft cheese along with a squeeze of lemon zest (ensure the zest is completely dry). This light, refreshing combination is ideal for spring and summer entertaining.
Honey and Lavender: For a sweet-savory option, blend a small amount of dried culinary lavender and a drizzle of honey into goat cheese or mascarpone. This elegant combination works beautifully on a cheese board with fruit and nuts.
Smoky Chipotle: Mix chipotle powder, cumin, and a touch of lime zest into cream cheese for a Southwestern-inspired flavor profile. Serve with tortilla chips or use as a topping for grilled vegetables.
Italian Inspired: Combine dried Italian herb blend, grated hard cheese like Parmesan, and finely chopped dried tomatoes into ricotta or cream cheese. This mixture is excellent for stuffing pasta or layering in savory dishes.
Everything Bagel Style: Mix sesame seeds, poppy seeds, dried minced garlic, dried minced onion, and coarse salt into cream cheese for a popular flavor combination that’s perfect for breakfast or brunch.
When creating your own combinations, consider balance and complementary flavors. Start with small batches to test new ideas before making larger quantities. Keep notes on your successful combinations so you can replicate them in the future.
Common Questions About Making Flavored Cheese
As you begin your journey into flavored cheese making, you may have questions about specific techniques, ingredients, or safety concerns. Here are answers to some of the most frequently asked questions.
Can I use fresh herbs instead of dried?
Yes, you can use fresh herbs, but they require extra precautions due to their higher moisture content. Wash fresh herbs thoroughly, dry them completely using a salad spinner or towels, and use them in smaller quantities than dried herbs. Cheeses made with fresh herbs should be consumed within 3 to 5 days and monitored closely for any signs of spoilage.
How much flavoring should I add?
As a general guideline, start with about 1 to 2 tablespoons of dried herbs or spices per 200-250 grams (approximately 1 cup) of cheese. You can always add more after tasting, but it’s difficult to reduce overly strong flavors. Different herbs and spices vary in potency, so adjust accordingly.
What if I see mold on my flavored cheese?
If you notice mold growth on your flavored cheese (and it’s not an intentional, safe variety used in certain cheese types), it’s best to discard the entire product. Unlike hard aged cheeses where you might cut away moldy portions, soft cheeses can have mold roots that penetrate throughout the product, making it unsafe to consume.
Can I flavor cheese that I’ve purchased from the store?
Absolutely! Purchasing plain cream cheese, goat cheese, or ricotta from the store and adding your own flavorings is an excellent way to start. This approach is often more convenient and accessible than making cheese entirely from scratch, while still allowing for creativity and customization.
How long does flavored cheese last in the refrigerator?
Most homemade flavored soft cheeses will stay fresh for 5 to 7 days when properly stored in airtight containers in the refrigerator. Always check for signs of spoilage such as off odors, discoloration, or mold before consuming.
Can I freeze flavored cheese?
Yes, flavored cheese can be frozen, though the texture may become slightly more crumbly upon thawing. Wrap tightly in plastic wrap and store in freezer-safe containers for up to three months. Thaw slowly in the refrigerator before use.
Is it safe to add garlic or onion?
Dried garlic powder and onion powder are safe and convenient options. If using fresh garlic or onion, they must be finely minced and used in small quantities. Be aware that fresh alliums can introduce moisture and should be consumed within a shorter timeframe. Some recipes call for roasted garlic, which has reduced moisture and adds a mellow, sweet flavor.
What’s the best way to serve flavored cheese?
Flavored cheese is incredibly versatile. Serve it as part of a cheese board with crackers, bread, fresh vegetables, and fruit. Use it as a spread for sandwiches and wraps, a topping for baked potatoes or grilled meats, or incorporate it into recipes such as stuffed pasta, dips, or appetizers.
Tools and Equipment for Flavored Cheese Making
While making flavored cheese doesn’t require extensive specialized equipment, having the right tools makes the process easier, safer, and more enjoyable. Here are the essential items you’ll want to have on hand.
Mixing Bowls: A set of stainless steel or glass mixing bowls in various sizes is essential for combining cheese and flavorings. These materials are non-reactive, easy to clean, and don’t retain odors.
Spatulas and Spoons: Silicone or wooden spatulas and spoons are ideal for folding ingredients into soft cheese without damaging the texture. They’re also gentle on non-stick surfaces if you’re using coated bowls.
Measuring Spoons and Cups: Accurate measurement is important for achieving consistent results and proper flavor balance. A complete set of measuring spoons and cups ensures precision in your recipes.
Cheese Grater or Microplane: Useful for grating hard cheeses to add to soft cheese bases, or for zesting citrus (make sure zest is dried before adding).
Storage Containers: Airtight glass or food-grade plastic containers in various sizes for storing finished flavored cheese. Look for containers with tight-sealing lids to prevent moisture loss and contamination.
Fine-Mesh Strainer or Cheesecloth: Helpful for draining excess liquid from ricotta or cottage cheese before flavoring, reducing overall moisture content.
Kitchen Scale: A digital kitchen scale allows for precise measurement of cheese and ingredients, which is particularly useful when scaling recipes up or down.
Labels and Markers: Food-safe labels or markers for dating and identifying your flavored cheese varieties. Proper labeling helps track freshness and identify contents at a glance.
Thermometer: A refrigerator thermometer ensures your storage area maintains the proper temperature for food safety (between 1°C and 4°C or 34°F to 40°F).
Investing in quality tools makes the cheese-making process more efficient and helps ensure consistent, safe results. Many of these items are multi-purpose and useful for other cooking projects as well.
Troubleshooting Common Issues
Even when following best practices, you may occasionally encounter challenges when making flavored cheese. Here are some common issues and how to address them.
Cheese is too wet or runny: This usually indicates excess moisture from the base cheese or from fresh ingredients. Next time, drain your base cheese more thoroughly before adding flavorings, or use only dried herbs and spices. You can try straining the mixture through cheesecloth to remove excess liquid, though this may also remove some flavoring.
Flavors are too weak: If your cheese lacks flavor impact, you may have added too little seasoning. Remember that flavors develop over time, so allow the cheese to rest for at least several hours or overnight. If it’s still too mild, add more herbs or spices gradually, tasting as you go.
Flavors are too strong or bitter: Over-seasoning or using old, stale herbs can result in overpowering or off flavors. Start with smaller amounts of strong seasonings like garlic, hot peppers, or pungent herbs. Always use fresh, high-quality dried herbs and spices, and check expiration dates.
Cheese has an off smell or taste: This may indicate spoilage or contamination. Always work in a clean environment with sanitized tools. If cheese develops unusual odors or flavors, discard it immediately to avoid potential foodborne illness.
Texture became grainy or separated: Overmixing or incorporating cold cheese can cause texture issues. Allow cheese to come to room temperature before mixing, and fold ingredients gently rather than whipping or beating vigorously.
Mold appeared quickly: This suggests either contamination during preparation or too much moisture in the final product. Review your sanitation practices, ensure all tools and surfaces are clean, and consider using only dried ingredients or reducing fresh herb quantities.
Cheese dried out in storage: Insufficient sealing or prolonged storage can cause dehydration. Always use airtight containers and press plastic wrap directly onto the cheese surface before sealing to minimize air exposure.
Learning from these challenges will help you refine your technique and create better flavored cheeses with each batch.
Serving and Presentation Ideas
The presentation of your flavored cheese can enhance the eating experience and make your creations even more appealing for entertaining, gifting, or everyday enjoyment. Here are some creative serving and presentation ideas.
Cheese Boards and Platters: Arrange your flavored cheese alongside complementary items such as crackers, sliced baguette, fresh vegetables, dried or fresh fruit, nuts, olives, and honey. Create visual interest by varying colors, textures, and heights. Include small serving utensils for each cheese variety.
Cheese Logs and Balls: Shape soft flavored cheese into logs or balls, then roll them in additional coatings such as chopped nuts, seeds, dried herbs, crushed peppercorns, or paprika. This creates an attractive exterior and adds textural contrast.
Individual Portions: Use small ramekins or glass jars to portion out flavored cheese for individual servings at dinner parties or as gifts. Top each portion with a small garnish of the herbs or spices used in the recipe.
Layered Presentations: Create visually striking layered presentations by alternating plain cheese with flavored varieties in clear glass containers. This works particularly well with different colored ingredients like red paprika, green herbs, or golden turmeric.
Stuffed Vegetables: Use flavored cheese to stuff cherry tomatoes, mini bell peppers, celery sticks, or mushroom caps for elegant appetizers.
Grilled or Toasted: Spread herb-flavored cheese on bread and grill or toast for elevated sandwiches or bruschetta. The heat intensifies the flavors and creates delicious, aromatic results.
Garnishing: Reserve a small amount of the herbs or spices used in your recipe to sprinkle on top of the finished cheese as a garnish. This provides visual cues about the flavors inside and creates a more polished presentation.
Remember that the eating experience begins with visual appeal. Taking a few extra moments to thoughtfully present your flavored cheese elevates it from a simple homemade product to an artisan creation worth celebrating.
Expanding Your Skills: Advanced Techniques
Once you’ve mastered basic flavored cheese making with soft cheeses and dried ingredients, you may want to explore more advanced techniques that offer new creative possibilities and flavor dimensions.
Making Cheese from Scratch: Instead of starting with purchased cheese, consider making your own fresh cheese from milk. Simple cheeses like paneer, queso fresco, or farmhouse cheese can be made at home with just milk, acid (lemon juice or vinegar), and basic equipment. You can then flavor these homemade cheeses using the techniques you’ve learned.
Infused Oils and Liquids: Create herb-infused oils by gently heating oil with dried herbs, then cooling and straining. Use these infused oils in small amounts to add both flavor and moisture in a controlled way. Similarly, cheese can be briefly marinated in wine, beer, or flavored broths before serving for unique taste profiles.
Smoking: Cold-smoking cheese adds a distinctive smoky flavor without cooking. This requires specialized equipment such as a cold smoke generator, but the results are impressive. Smoke cheese before or after adding other flavorings for layered complexity.
Aging Flavored Cheese: While most flavored cheeses are best enjoyed fresh, some semi-hard varieties benefit from brief aging periods. This requires temperature and humidity control, but allows flavors to develop and integrate more fully.
Fermented Additions: Incorporate fermented ingredients like miso paste, fermented garlic, or cultured vegetables for complex umami flavors. Use these powerful ingredients sparingly as their flavors are intense.
Cheese Blends: Combine multiple cheese types as your base—for example, mixing cream cheese with aged cheddar or blending goat cheese with mascarpone. This creates unique textures and flavor foundations for your additions.
As you develop confidence and experience, these advanced techniques will expand your repertoire and allow you to create truly unique artisan cheese products that reflect your personal taste and creativity.
Health and Nutritional Considerations
When making flavored cheese at home, you have complete control over the ingredients, which offers several health and nutritional advantages compared to commercially produced flavored cheeses.
Reduced Sodium: Many commercial flavored cheeses contain high levels