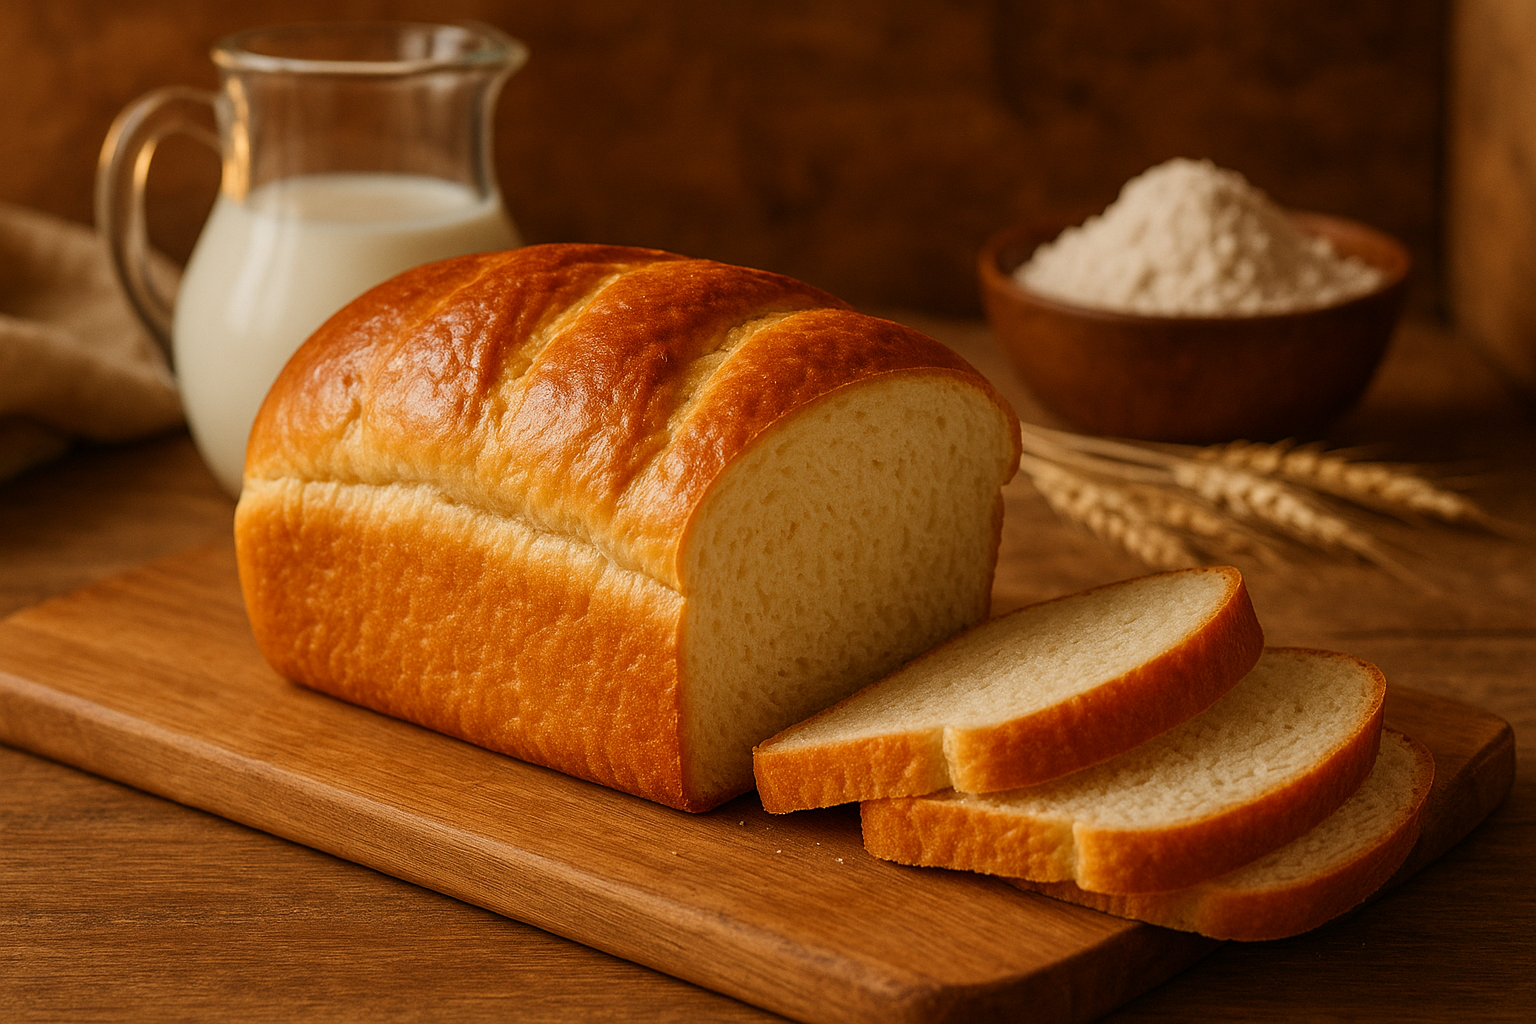
Understanding the Benefits of Whey in Bread Baking
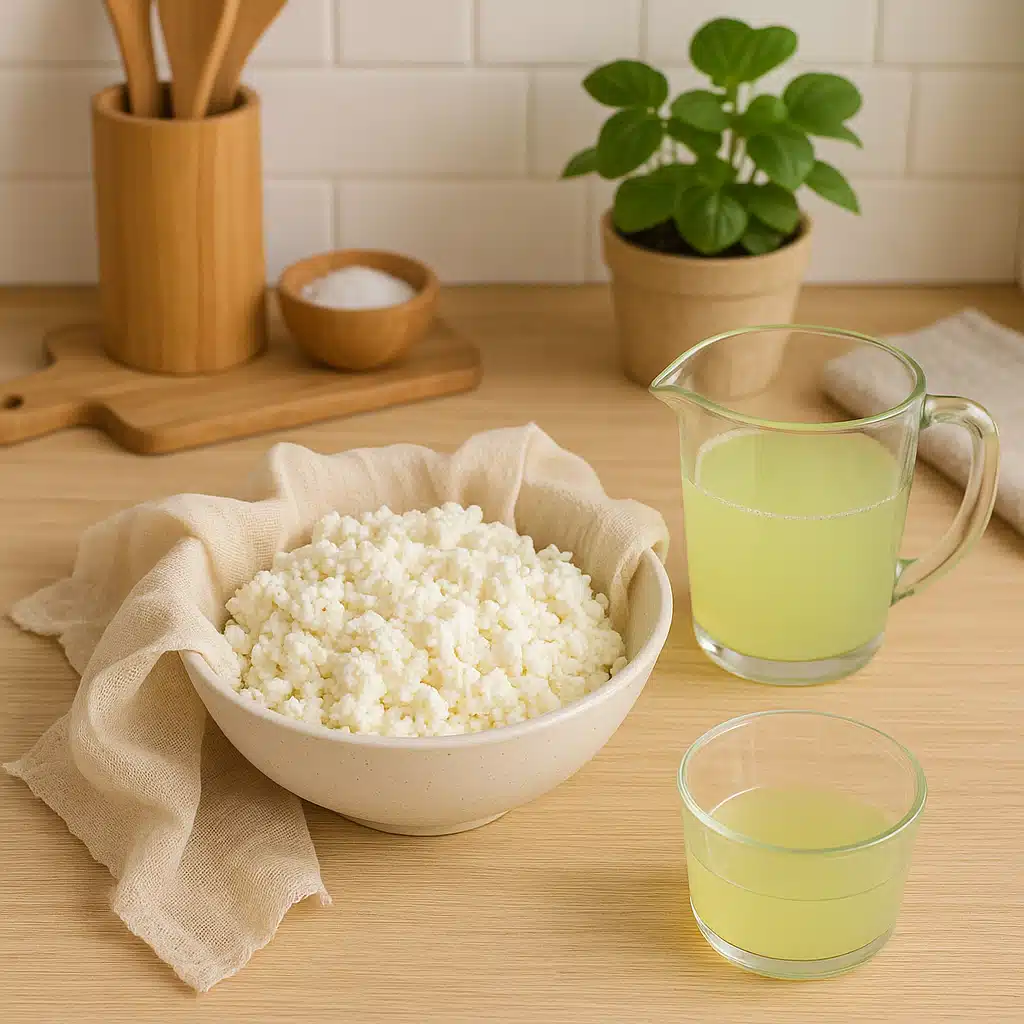
Whey, the liquid byproduct of cheese and yogurt production, is a valuable ingredient that often goes unnoticed in home kitchens worldwide. Whether you’re making fresh cheese, Greek yogurt, or paneer, you’re left with this protein-rich liquid that holds remarkable potential for baking. Instead of discarding it, you can transform whey into an exceptional sandwich bread that’s softer, more nutritious, and longer-lasting than conventional recipes.
This comprehensive guide explores how to harness the power of whey to create bakery-quality sandwich loaves at home. You’ll discover the science behind why whey works so well in bread, detailed instructions for perfecting your technique, and practical tips to ensure consistent results every time you bake.
The Science Behind Baking with Whey
Incorporating whey into bread recipes offers multiple advantages that improve both the quality and nutritional profile of your homemade loaves. Understanding these benefits helps you appreciate why this ingredient deserves a place in your baking routine:
- Superior Moisture Retention: Whey contains lactose and proteins that bind water molecules, helping bread maintain softness for several days after baking. This means your loaves stay fresh longer without becoming dry or crumbly.
- Enhanced Nutritional Value: Rich in complete proteins, B vitamins, calcium, and other essential minerals, whey significantly boosts the nutritional content of your bread compared to recipes using only water.
- Improved Flavor Complexity: The natural sugars and mild acidity in whey contribute a subtle depth of flavor with gentle tangy notes that complement rather than overpower the bread’s taste.
- Better Crust Color: The lactose in whey undergoes caramelization during baking, producing a beautiful golden-brown crust that’s visually appealing and adds pleasant texture.
- Sustainable Kitchen Practice: Using whey reduces food waste, turning a byproduct into a valuable ingredient and making your home cooking more environmentally conscious.
Essential Ingredients for Whey Sandwich Bread
Gathering the right ingredients is the first step toward baking success. This recipe uses simple, widely available components that work together to create an exceptionally soft loaf:
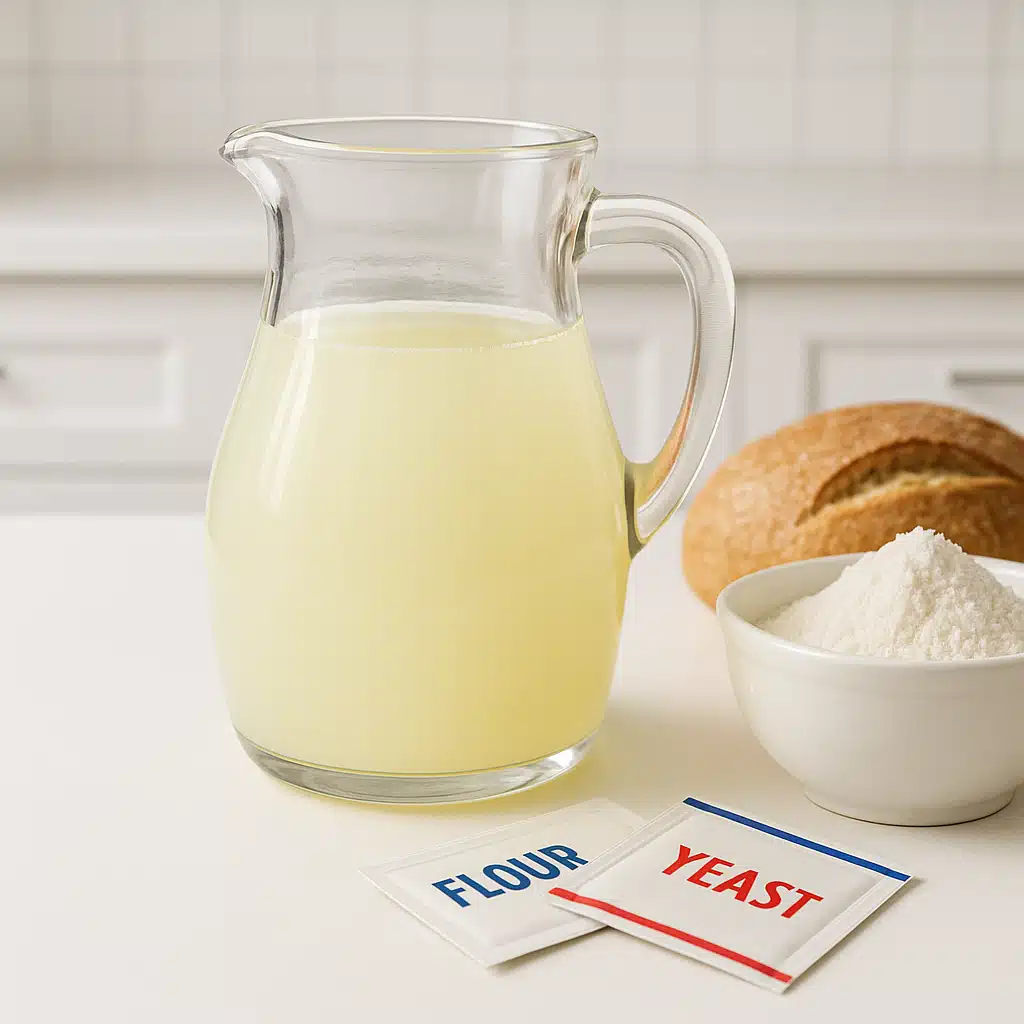
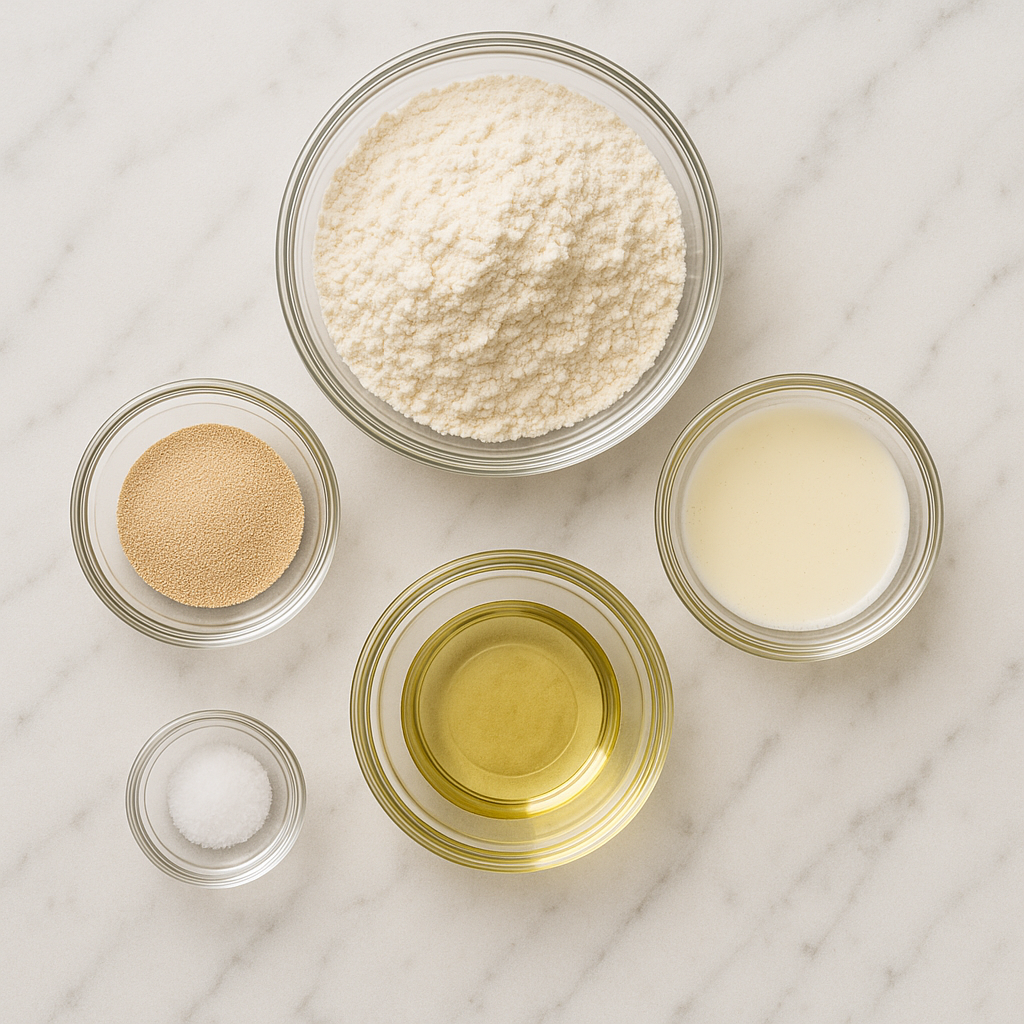
- 240 ml (1 cup) whey: Should be at room temperature for optimal yeast activation. Can be fresh or previously refrigerated (bring to room temperature before using).
- 2 teaspoons active dry yeast: The leavening agent that creates the bread’s airy structure. Instant yeast can be substituted in equal amounts.
- 2 tablespoons granulated sugar: Feeds the yeast and adds subtle sweetness that balances the whey’s tanginess.
- 360-400 grams (3-3⅓ cups) all-purpose flour: Forms the structural foundation of your bread. Bread flour can be used for a chewier texture.
- 1 teaspoon salt: Essential for flavor development and controlling yeast activity.
- 2 tablespoons oil or melted butter: Adds richness, improves texture, and helps keep the crumb tender. Neutral oils or olive oil work equally well.
Complete Step-by-Step Baking Instructions
Follow this detailed process to create your perfect whey sandwich bread. Each step is designed to develop flavor, texture, and structure:
Step 1: Activate Your Yeast
In a large mixing bowl, combine the room-temperature whey with sugar and yeast. Stir gently to dissolve the ingredients, then set aside for 5-10 minutes. You’ll know the yeast is active when the mixture becomes foamy and bubbly on the surface. If no foam appears, your yeast may be expired or the whey temperature was incorrect—start over with fresh yeast and properly warmed whey.
Step 2: Build Your Dough
Add the salt and oil to your activated yeast mixture, then begin incorporating the flour gradually. Start with about two-thirds of the flour, mixing with a wooden spoon or sturdy spatula. Continue adding flour until the mixture forms a shaggy dough that pulls away from the bowl sides. The exact amount needed varies based on flour type, humidity, and whey consistency.
Step 3: Knead to Perfection
Transfer the dough to a lightly floured work surface. Knead for 8-12 minutes using the push-fold-turn method: push the dough away with your palms, fold it back over itself, rotate a quarter turn, and repeat. Proper kneading develops gluten networks that give bread its structure and soft, elastic texture. The dough is ready when it becomes smooth, springs back when poked, and feels slightly tacky but not sticky.

Step 4: First Rise (Bulk Fermentation)
Lightly oil a clean bowl and place your kneaded dough inside, turning it to coat all surfaces with oil. Cover with a clean kitchen towel, plastic wrap, or reusable bowl cover. Place in a warm, draft-free location—ideally between 24-27°C (75-80°F). Allow the dough to rise for 1-2 hours until it doubles in size. The timing varies with room temperature: warmer environments speed fermentation while cooler spaces slow it down.
Step 5: Shape Your Loaf
Once doubled, gently press down on the dough to release accumulated gases (this is called “punching down”). Turn it out onto your work surface and shape it into a rectangle roughly the width of your loaf pan. Roll the dough tightly from the short end, creating surface tension that helps the loaf maintain its shape during the final rise and baking. Pinch the seam closed and place seam-side down in a greased loaf pan (approximately 9×5 inches or 23×13 cm).
Step 6: Second Rise (Proofing)
Cover the shaped loaf and return it to your warm spot for 30-60 minutes. The dough should rise about one inch above the pan rim and spring back slowly when gently pressed. This second rise creates the final texture and ensures an even crumb structure throughout your finished bread.
Step 7: Bake to Golden Perfection
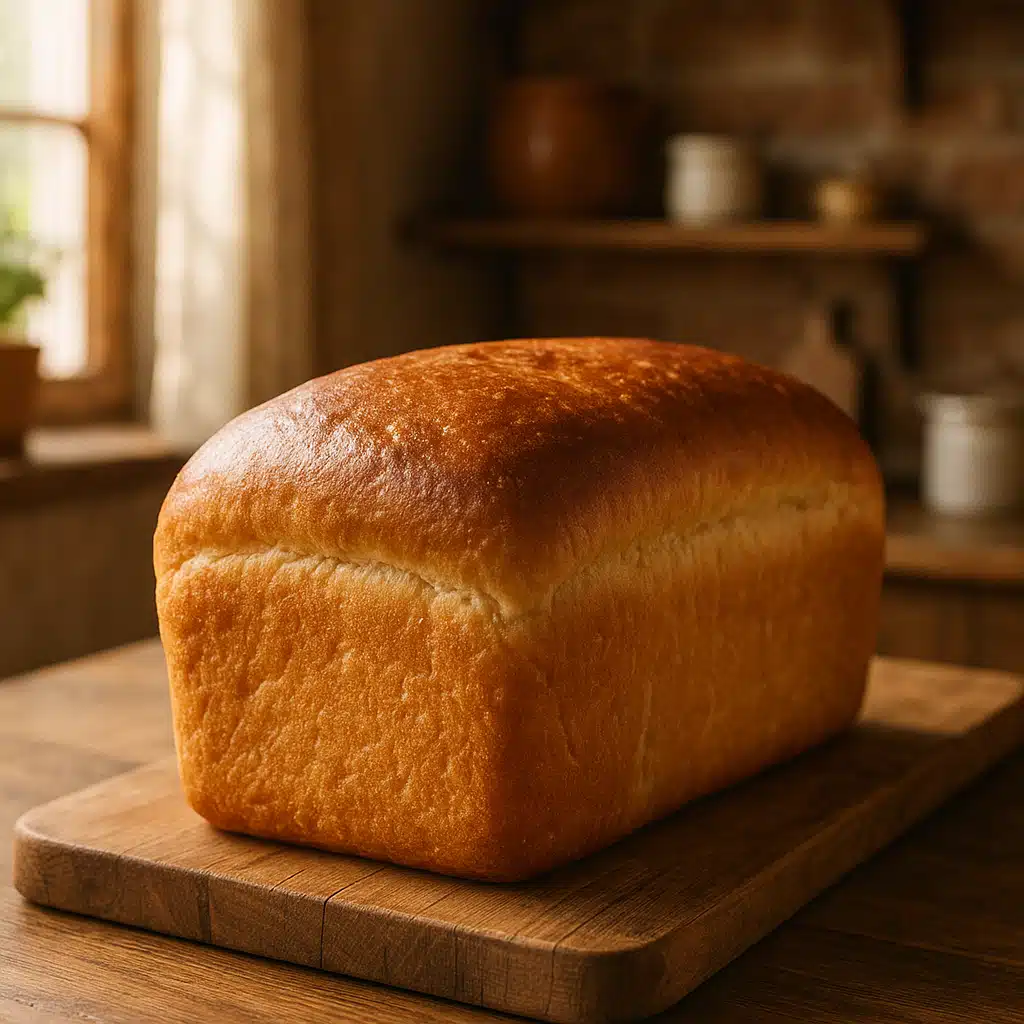
Preheat your oven to 175°C (350°F) during the final 15 minutes of proofing. Place the loaf on the center rack and bake for 30-35 minutes until the top is golden brown and the internal temperature reaches 90-95°C (195-205°F) when measured with an instant-read thermometer. The bread should sound hollow when tapped on the bottom.
Step 8: Cooling and Storage
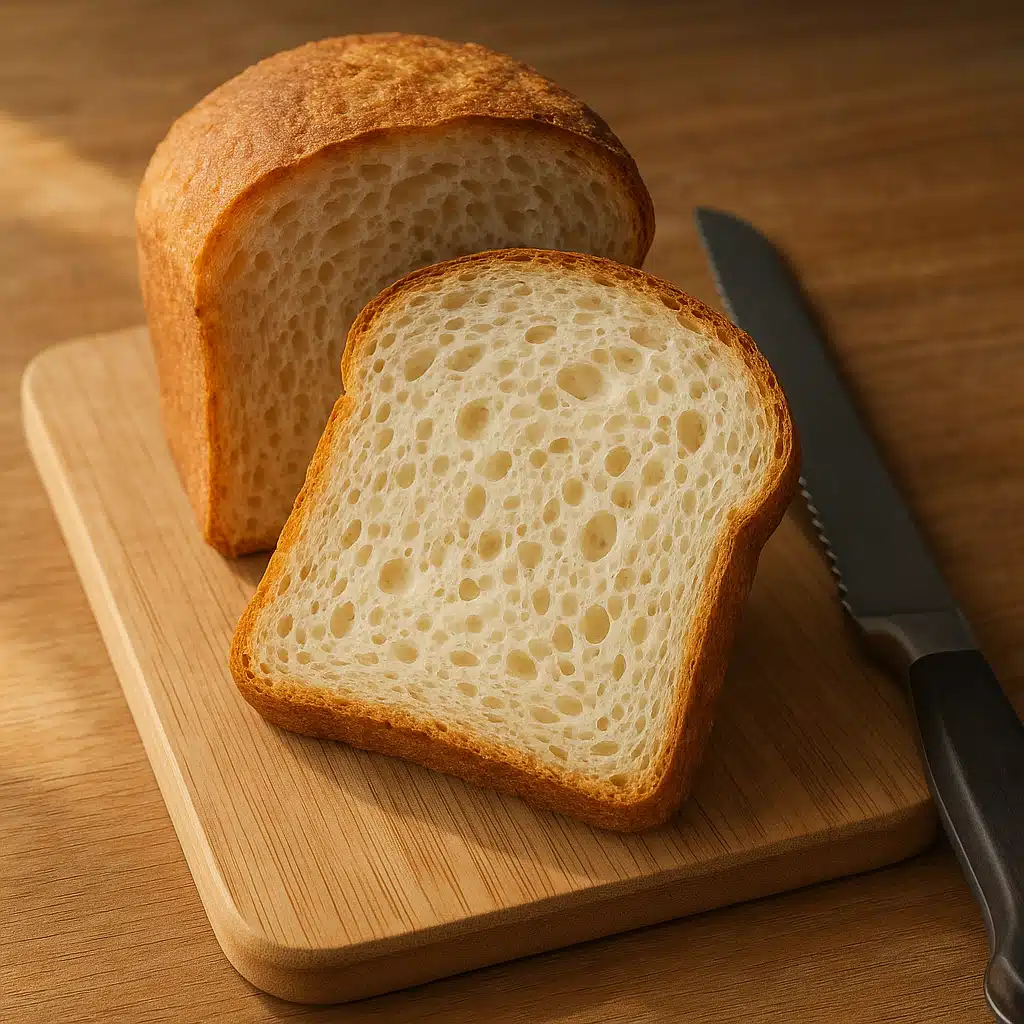
Remove the bread from the oven and let it rest in the pan for 5 minutes, then turn it out onto a wire cooling rack. Allow it to cool completely before slicing—cutting into warm bread releases excess moisture and can make the texture gummy. Once cooled, the bread is ready to enjoy and can be stored properly for maximum freshness.

Professional Tips for Consistently Soft Bread
These expert techniques will help you achieve bakery-quality results every time you make whey bread:
- Use Fresh Whey When Possible: Whey maintains optimal quality for up to one week when refrigerated. Fresher whey produces better flavor and more predictable results. If you’ve frozen whey, thaw it completely and bring to room temperature before using.
- Adjust Flour Quantities Flexibly: Whey consistency varies depending on how it was produced. Start with less flour than specified and add more gradually until you achieve the right dough consistency—soft and slightly tacky but manageable.
- Monitor Rising Times Carefully: Temperature significantly affects yeast activity. In cooler environments, rising may take longer; in warmer conditions, watch closely to prevent overproofing. Visual cues (doubled size, finger-poke test) are more reliable than strict time limits.
- Create Ideal Rising Conditions: If your kitchen is cool, create a warm environment by placing dough in an oven with just the light on, near (not on) a warm stovetop, or in a sunny spot. Avoid temperatures above 35°C (95°F) as excessive heat kills yeast.
- Test Doneness Accurately: While color and sound are helpful indicators, an instant-read thermometer provides certainty. Bread is fully baked when the internal temperature reaches 90-95°C (195-205°F).
- Store Bread Properly: Once completely cooled, store bread in an airtight container or sealed plastic bag at room temperature for up to 4 days. For longer storage, slice and freeze for up to 3 months, toasting slices directly from frozen.
Common Mistakes and How to Avoid Them
Understanding potential pitfalls helps you troubleshoot problems and improve your baking skills:
- Insufficient Kneading: Under-kneaded dough lacks gluten development, resulting in dense, crumbly bread that doesn’t rise properly. Knead until the dough is smooth, elastic, and passes the “windowpane test”—when stretched thin, it forms a translucent membrane without tearing.
- Overproofing the Dough: Allowing dough to rise too long exhausts the yeast and weakens gluten structure. Overproofed dough may collapse during baking, creating a dense, sunken loaf. If dough has risen beyond doubling, gently deflate it, reshape, and allow a shorter second rise.
- Incorrect Oven Temperature: Baking at the wrong temperature affects texture and crust development. Too hot causes over-browning before the interior cooks; too cool produces pale, dense bread. Always preheat fully and verify temperature with an oven thermometer if your bread consistently over- or under-bakes.
- Using Water That’s Too Hot or Cold: Whey temperature critically affects yeast performance. Liquid cooler than 21°C (70°F) slows activation; hotter than 43°C (110°F) kills yeast. Room temperature or slightly warm (around 38°C/100°F) is ideal.
- Skipping the Cooling Step: Cutting into hot bread releases steam that should remain in the loaf, resulting in gummy texture and accelerated staling. Patience during cooling ensures the best texture and easier slicing.
- Not Measuring Ingredients Accurately: Baking is precise chemistry. When possible, weigh ingredients rather than using volume measurements for more consistent results, especially with flour.
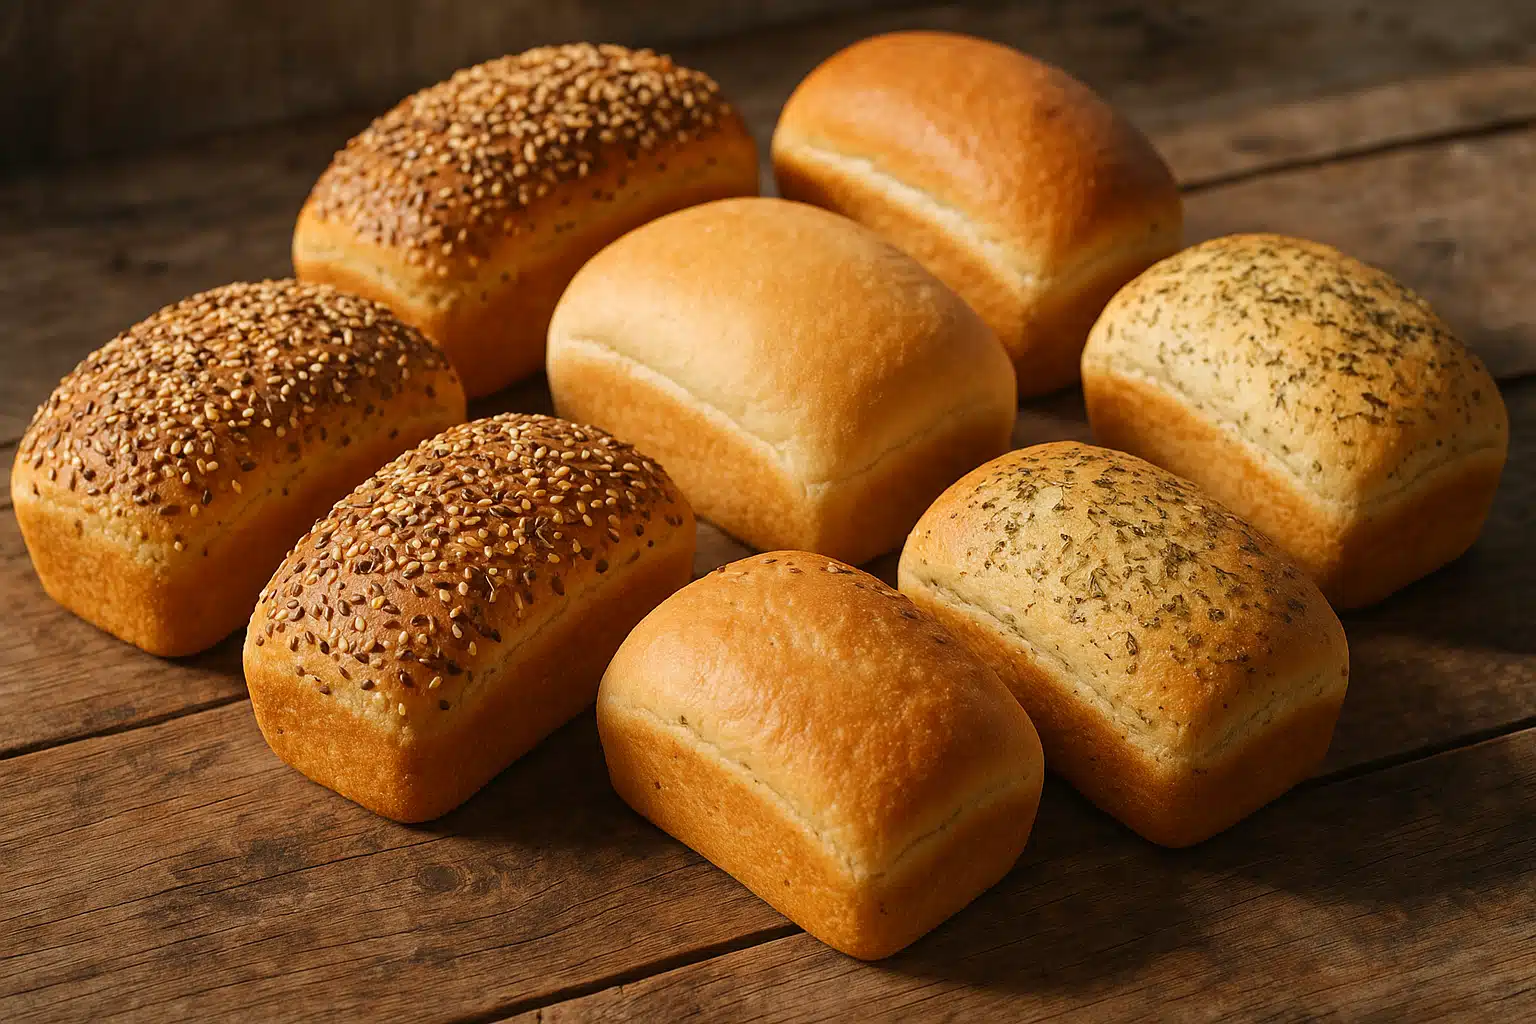
Variations and Customization Ideas
Once you’ve mastered the basic recipe, experiment with these variations to create unique flavors and textures:
- Whole Grain Versions: Replace up to half the all-purpose flour with whole wheat, spelt, or other whole grain flours for added nutrition and nutty flavor. You may need slightly more liquid as whole grains absorb more moisture.
- Herb-Infused Bread: Add 1-2 tablespoons of dried herbs (rosemary, thyme, oregano, or Italian seasoning) to the dough for savory sandwich bread perfect with deli meats or cheese.
- Seeded Loaves: Incorporate 3-4 tablespoons of seeds (sunflower, sesame, flax, or pumpkin) into the dough or brush the top with water and sprinkle with seeds before baking.
- Slightly Sweet Bread: Increase sugar to 3-4 tablespoons and add a teaspoon of vanilla extract for a subtly sweet loaf ideal for breakfast toast or peanut butter sandwiches.
- Enriched Dough: Add an egg to the liquid ingredients for an even softer, richer crumb similar to brioche-style bread.
Nutritional Benefits of Whey Bread
Beyond superior taste and texture, whey bread offers meaningful nutritional advantages compared to standard recipes made with water:
- Higher Protein Content: Whey contains complete proteins with all essential amino acids, significantly boosting the protein content of each slice compared to water-based bread.
- Improved Mineral Profile: Rich in calcium, phosphorus, and potassium, whey contributes to bone health and essential bodily functions.
- B-Vitamin Enrichment: Whey provides B-complex vitamins including riboflavin and B12, supporting energy metabolism and nervous system function.
- Better Satiety: The protein and nutrient density helps you feel fuller longer, making sandwiches more satisfying and potentially supporting portion control.
While whey bread isn’t a superfood, these incremental nutritional improvements add value when bread is a regular part of your diet, making it a smarter choice for health-conscious home bakers.
Sustainable Cooking: Maximizing Kitchen Resources
Using whey in baking represents a broader philosophy of resourceful cooking that reduces waste while creating delicious results. If you regularly make cheese, yogurt, or other dairy products at home, you likely produce substantial amounts of whey. Rather than discarding this nutrient-rich byproduct, incorporating it into bread and other recipes maximizes the value of your ingredients and minimizes environmental impact.
Beyond bread, whey can replace water or milk in pancakes, waffles, smoothies, soups, and even plant watering. Developing habits that utilize every part of your ingredients aligns with sustainable living principles while expanding your culinary repertoire and reducing grocery costs.
Frequently Asked Questions
Can I use whey from any type of cheese or yogurt?
Yes, whey from any cheese-making or yogurt-straining process works well in bread. The flavor may vary slightly—whey from sweeter cheeses produces milder bread while whey from cultured products like yogurt may contribute more tanginess. All types provide similar functional benefits in baking.
What if I don’t have whey? Can I substitute something else?
If whey isn’t available, you can substitute equal amounts of milk, buttermilk, or even water. However, you’ll lose some of the unique benefits—milk provides richness but less protein than whey, while water creates a more basic bread. Buttermilk offers similar tanginess but different nutritional properties.
How long does whey bread stay fresh?
Thanks to whey’s moisture-retaining properties, this bread typically stays soft and fresh for 3-4 days at room temperature when properly stored in an airtight container or sealed bag. This is notably longer than many water-based breads, which often become dry after 2 days.
Can I make this bread in a bread machine?
Absolutely. Add ingredients to your bread machine according to the manufacturer’s instructions (usually liquids first, then dry ingredients, with yeast last). Select the basic or white bread setting with medium crust. The whey works perfectly in automated bread-making processes.
Is this bread suitable for people with lactose intolerance?
Whey contains lactose, so individuals with lactose intolerance may experience symptoms. However, the lactose content is relatively low compared to drinking milk directly, and some people with mild intolerance tolerate baked goods with whey better than fresh dairy. Those with severe intolerance or dairy allergies should avoid this recipe or substitute water or non-dairy milk alternatives.
Final Thoughts on Whey Bread Baking
Creating homemade sandwich bread with whey transforms a humble byproduct into an exceptional staple that surpasses commercial alternatives in softness, flavor, nutrition, and freshness. This recipe demonstrates that sustainable cooking doesn’t require sacrifice—quite the opposite. By using ingredients you might otherwise discard, you create superior results while reducing waste and maximizing the value of your kitchen efforts.
Whether you’re an experienced bread baker looking to expand your repertoire or a beginner seeking an approachable project with impressive results, whey bread offers a rewarding experience. The soft texture makes perfect sandwiches, the subtle flavor complements both sweet and savory toppings, and the extended freshness means less frequent baking or food waste.
As you develop your bread-baking skills, you’ll find endless opportunities to customize this foundational recipe, creating signature loaves that reflect your preferences and creativity. The next time you find yourself with whey from cheesemaking or yogurt preparation, remember that you’re holding the secret ingredient to extraordinarily soft, delicious, and nutritious homemade bread.