What is Gjetost? Discovering the Art of Traditional Whey Cheese
Gjetost represents a fascinating tradition in cheesemaking that transforms what many consider a waste product—whey—into a uniquely delicious, caramel-colored delicacy. This distinctive cheese offers a sweet, fudge-like experience that differs dramatically from conventional cheese varieties. Whether you’re a cheese enthusiast, home cook looking to expand your culinary repertoire, or someone interested in sustainable food practices, understanding and creating this traditional whey cheese opens up exciting possibilities in your kitchen.
In this comprehensive guide, we’ll explore everything you need to know about this remarkable cheese: what makes it unique, how it’s traditionally made, the techniques you can use at home, and why this centuries-old method of utilizing whey deserves a place in modern kitchens worldwide.
Understanding Whey-Based Brown Cheese
Gjetost (pronounced “yeh-toast” or “yed-ost”) belongs to a category of cheeses made primarily from whey—the liquid byproduct that remains after milk is curdled and strained during traditional cheesemaking. While most cheeses are made from milk curds, this brown cheese is created through an entirely different process: slowly caramelizing whey until its natural sugars transform into a sweet, complex flavor profile.
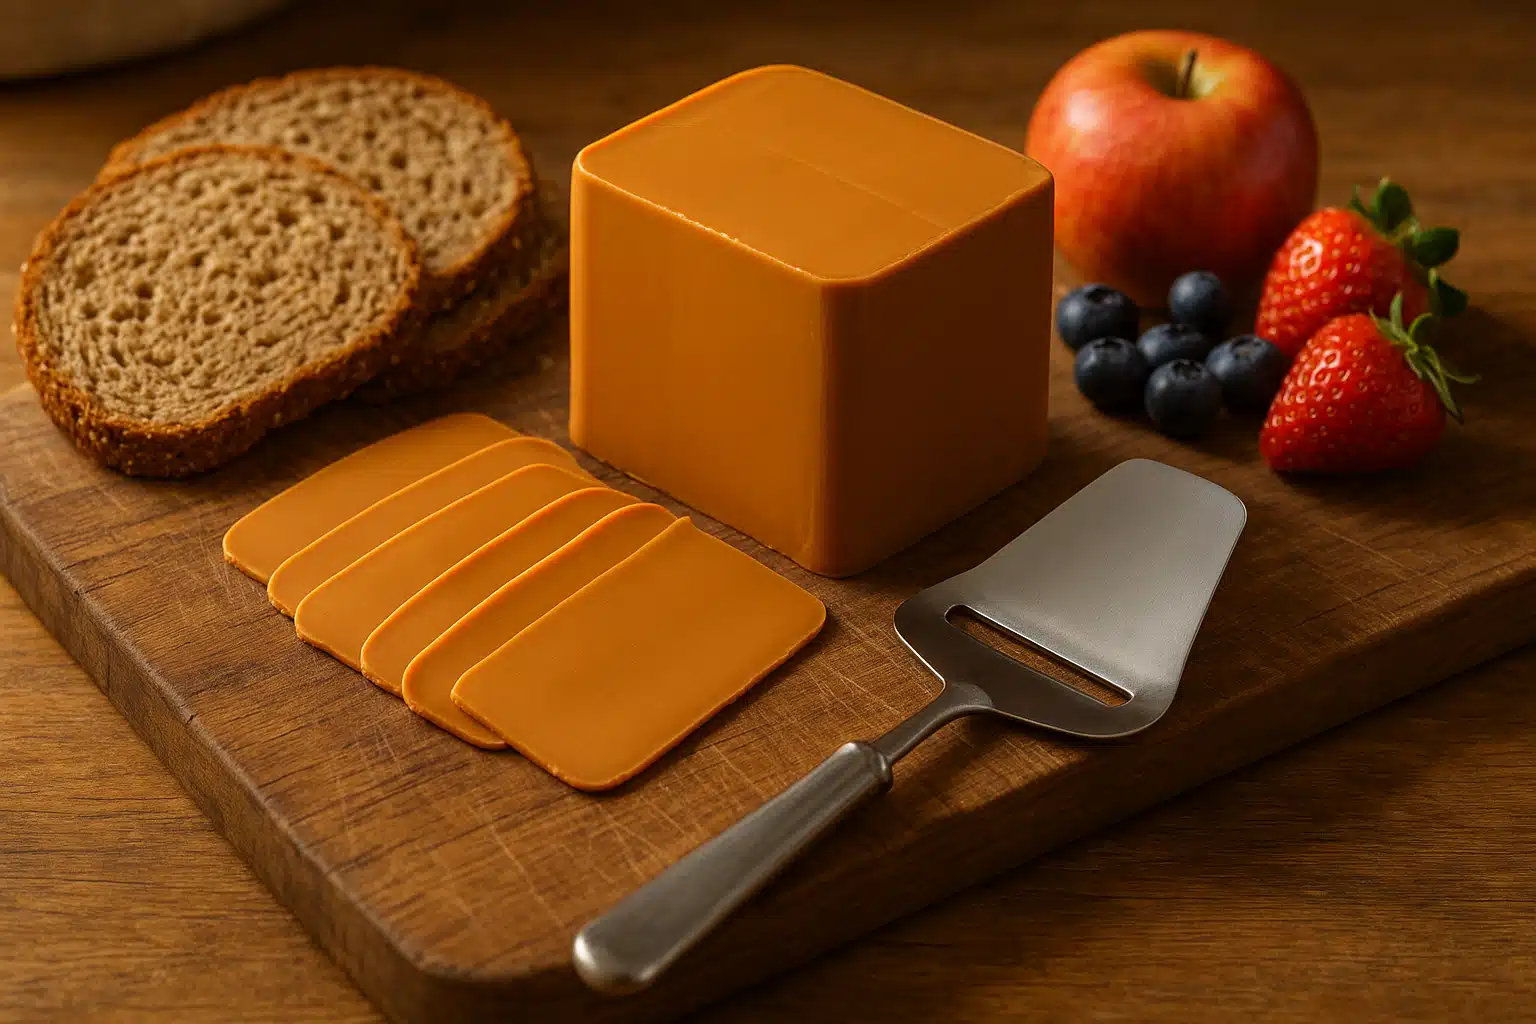
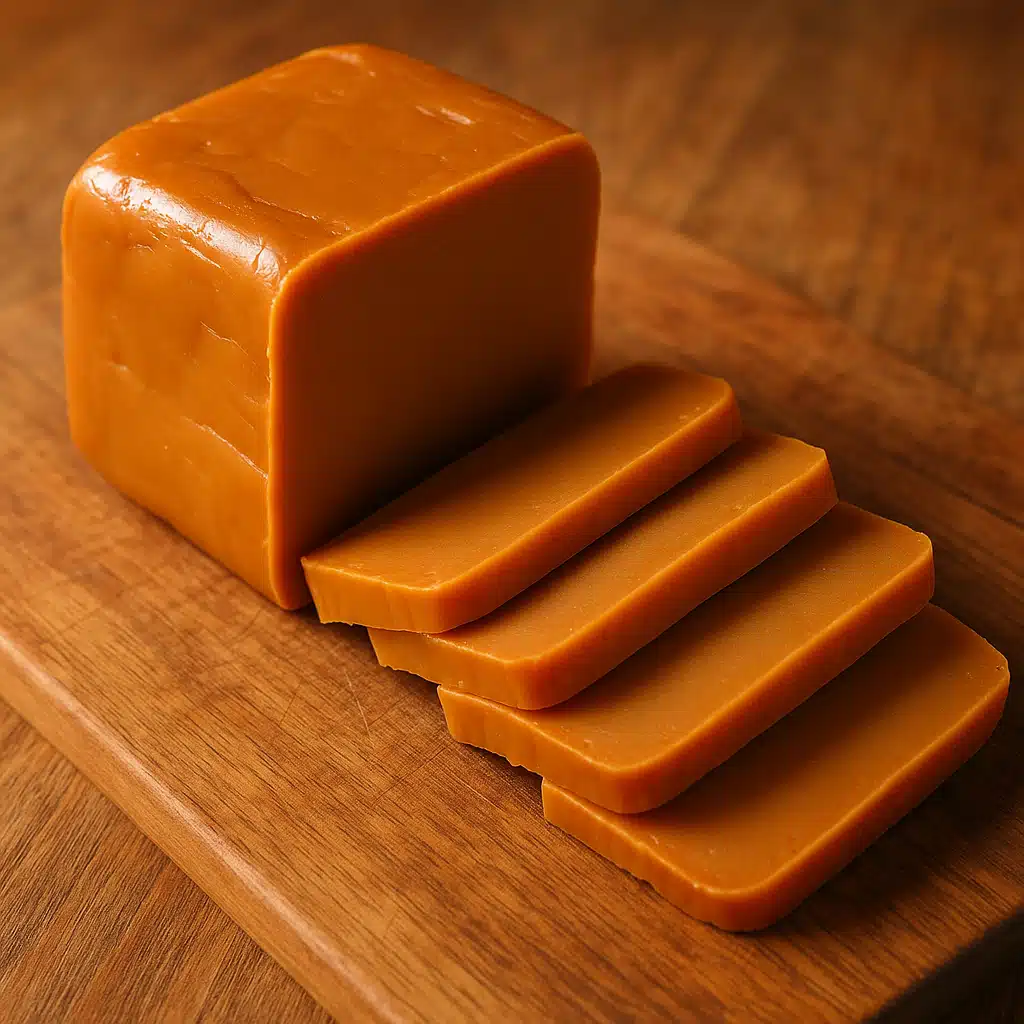
The result is a product with a distinctive brown color, ranging from light caramel to deep toffee, and a texture that can be sliced but melts smoothly on the tongue. The flavor combines sweetness with subtle tanginess, often described as reminiscent of caramel, butterscotch, or dulce de leche, with savory undertones that remind you it’s still cheese.
This cheese has roots in Scandinavian culinary traditions, where resourcefulness and minimal waste have always been valued principles. By utilizing whey that would otherwise be discarded, traditional cheesemakers created a product that became beloved for both its unique taste and its representation of sustainable food practices.
The Science Behind Whey Caramelization
Understanding what happens during the making process helps you appreciate why this cheese is so special. Whey contains lactose (milk sugar), proteins, and minerals. When heated for extended periods, the lactose undergoes caramelization—a chemical process where sugars break down and reform into hundreds of new flavor compounds.
As the whey reduces, water evaporates and the concentration of sugars and proteins increases. The Maillard reaction—the same process that browns meat and toasts bread—also occurs between the proteins and sugars, creating additional depth of flavor and the characteristic brown color. This dual process of caramelization and the Maillard reaction is what gives the cheese its complex, sweet-savory profile that can’t be replicated by simply adding sugar to regular cheese.
The final texture depends on how far you reduce the mixture. Less reduction creates a softer, spreadable product, while more extensive reduction yields a firmer cheese that can be sliced cleanly. Most traditional versions aim for a texture similar to firm fudge that can be cut into thin slices.

How to Make Whey Cheese at Home: Step-by-Step Process
Creating your own whey-based brown cheese at home is a rewarding project that requires minimal ingredients but does demand patience and attention. Here’s a comprehensive guide to the process:
Essential Ingredients
- Fresh whey: Approximately 4-5 liters (about 1-1.5 gallons) to yield a reasonable amount of finished cheese. Whey should be from milk-based cheese production, preferably used within 24 hours of creation.
- Cream: 250-500ml (1-2 cups) of heavy cream adds richness and helps achieve the proper texture. The higher fat content creates a smoother mouthfeel.
- Milk (optional): Some recipes include whole milk (500ml-1 liter) to increase yield and add body to the final product.
- Salt: A small amount (1-2 teaspoons) balances the sweetness and enhances overall flavor.
Equipment Needed
- Large, heavy-bottomed pot (stainless steel or enameled cast iron works best)
- Long-handled wooden spoon or heat-resistant silicone spatula
- Thermometer (optional but helpful)
- Molds or containers for shaping (small loaf pans, plastic containers, or traditional cheese molds)
- Parchment paper or plastic wrap
The Cooking Process
Step 1: Initial Heating and Reduction
Pour your fresh whey into the large pot. If using milk, add it at this stage. Place the pot over medium-high heat and bring the liquid to a boil. Once boiling, reduce the heat to maintain a steady simmer. The liquid should be actively bubbling but not violently boiling.
Step 2: The Long Simmer
This is where patience becomes essential. You’ll need to simmer the whey for 2-4 hours, depending on the quantity and desired final consistency. Stir occasionally during the first hour, then more frequently as the mixture thickens. The liquid will gradually reduce in volume and begin to change color from pale yellow-white to golden, then progressively darker shades of brown.
Step 3: Adding Cream
When the mixture has reduced by approximately three-quarters and has reached a golden-brown color, add the cream. Stir thoroughly to incorporate. The mixture will lighten slightly with the cream addition but will continue to darken as cooking progresses.
Step 4: Final Reduction and Caramelization
Continue cooking, now stirring almost constantly. The mixture will become thicker and begin to pull away from the sides of the pot when stirred. The color will deepen to a rich caramel or toffee brown. This stage typically takes 30-60 minutes. Add salt during this phase, adjusting to taste.
Step 5: Testing for Doneness
The mixture is ready when it forms a thick mass that holds its shape briefly when dropped from a spoon, similar to thick fudge or peanut butter consistency. If you have a thermometer, the temperature will typically be around 115-120°C (240-250°F).
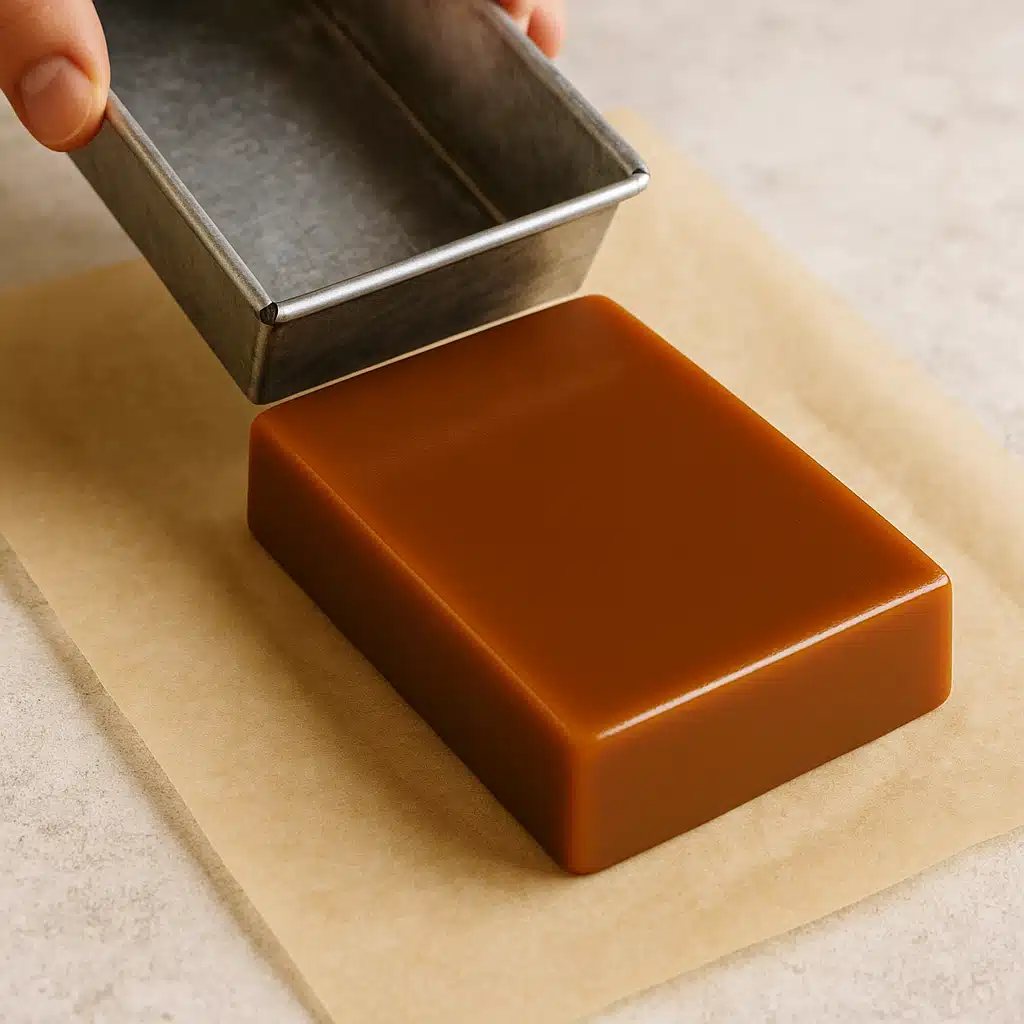
Step 6: Molding and Cooling
Quickly transfer the hot mixture into your prepared molds lined with parchment paper or lightly oiled. Work fast as the mixture sets rapidly. Smooth the top with a spatula. Allow to cool at room temperature for 30-60 minutes, then transfer to the refrigerator to firm up completely, usually 4-6 hours or overnight.
Sourcing Whey for Cheesemaking
The quality of your whey directly impacts the final product. Here are several ways to obtain suitable whey:
- From your own cheesemaking: If you make cheese at home, save the whey from ricotta, paneer, or other fresh cheese production. This is the most accessible option for home cooks.
- Local cheesemakers: Small-scale artisan cheese producers often have whey available and may sell or give it away, as many struggle with whey disposal.
- Dairy farms: Some dairy operations that produce cheese may provide whey to interested individuals.
- Making whey specifically: You can create whey by warming milk and adding acid (lemon juice or vinegar), which separates the curds from the whey. Use the curds for ricotta or paneer, and the whey for your brown cheese.
For best results, use fresh whey within 24 hours of production. Older whey can develop off-flavors that will carry through to your finished cheese. The whey should smell fresh and slightly sweet, not sour or unpleasant.
Varieties and Flavor Profiles
Traditional recipes vary based on the type of milk whey used and additional ingredients:
- Pure whey versions: Made exclusively from whey, these have the most pronounced caramel flavor and firmest texture.
- Enriched versions: Adding cream and milk creates a richer, slightly milder flavor and softer texture.
- Goat whey varieties: Using whey from goat’s milk produces a tangier, more complex flavor profile.
- Mixed milk versions: Combining whey from different milk types (cow, goat, sheep) creates unique flavor combinations.
The degree of caramelization also significantly affects flavor. Lighter caramelization produces a milder, sweeter cheese, while extended cooking creates deeper, more complex flavors with slight bitterness balancing the sweetness—similar to the difference between caramel and butterscotch.
Culinary Uses and Serving Suggestions
This versatile cheese works beautifully in both sweet and savory applications:
Traditional Serving Methods
- Sliced on bread or crackers: The classic presentation, often enjoyed at breakfast or as a snack. The sweet-savory profile pairs exceptionally well with whole grain breads.
- With fresh fruit: Apples, pears, and grapes complement the caramel notes beautifully.
- On crisp breads: Thin slices on crispbread or flatbread create a satisfying contrast of textures.
- With coffee or tea: The sweetness makes it an excellent accompaniment to morning or afternoon beverages.
Creative Culinary Applications
- Melted in sauces: Adds unique sweetness and complexity to cream sauces for pasta or vegetables.
- Grated over waffles or pancakes: A sophisticated alternative to syrup, especially when combined with berries.
- In desserts: Incorporated into cheesecakes, ice cream, or used as a topping for baked goods.
- With cured meats: The sweet-savory combination works surprisingly well with prosciutto or salami on a cheese board.
- Stirred into oatmeal or porridge: Melts into hot cereal, adding richness and flavor.
- In sandwiches: Pairs well with smoked meats, bitter greens, or sharp vegetables like radishes.

Storage and Shelf Life
Proper storage ensures your whey cheese maintains its quality and flavor:
- Refrigeration: Store wrapped tightly in parchment paper or wax paper, then placed in an airtight container or wrapped in plastic wrap. This prevents it from drying out while allowing it to breathe slightly.
- Shelf life: When properly stored, the cheese keeps for 2-3 months in the refrigerator. The high sugar content acts as a natural preservative.
- Freezing: Can be frozen for up to 6 months. Wrap portions individually in parchment, then plastic wrap, then foil. Thaw in the refrigerator overnight before use.
- Signs of spoilage: Mold development, off odors, or significant texture changes indicate the cheese should be discarded. Small amounts of surface moisture are normal.
Common Challenges and Troubleshooting
Even experienced cooks may encounter issues when making whey cheese. Here are solutions to common problems:
Mixture Won’t Thicken
Problem: After hours of cooking, the mixture remains thin and won’t reach the proper consistency.
Solutions: Ensure you’re maintaining an adequate simmer—too low heat extends cooking time dramatically. Verify you’re using actual whey, not just liquid from store-bought yogurt or other products. Consider adding a small amount of whole milk to increase solids. Be patient—the final thickening happens relatively quickly after hours of gradual reduction.
Burned or Bitter Flavor
Problem: The finished cheese tastes burnt or excessively bitter.
Solutions: This results from too-high heat or insufficient stirring during the final stages. Use a heavy-bottomed pot for even heat distribution. Reduce heat during the final hour and stir constantly. If you notice brown bits forming on the pot bottom, reduce heat immediately and stir more vigorously. Some slight bitterness is characteristic, but it should be balanced with sweetness.
Grainy Texture
Problem: Instead of smooth and fudge-like, the cheese is grainy or crystalline.
Solutions: This often occurs from overheating during the final stages or from lactose crystallization. Maintain temperature below 125°C (257°F). Ensure thorough, constant stirring during the final reduction. Adding cream helps create a smoother texture. If graininess develops, you can blend the warm mixture briefly with an immersion blender before molding.
Too Soft or Won’t Set
Problem: The cheese remains spreadable rather than sliceable even after refrigeration.
Solutions: The mixture wasn’t reduced sufficiently. Return it to the pot and continue cooking until it reaches the proper consistency. The mixture should pull away from the pot sides and hold its shape when dropped from a spoon. Remember that it will firm considerably upon refrigeration, so slightly softer than your target consistency while hot is appropriate.
Too Hard or Dry
Problem: The finished product is rock-hard and difficult to slice.
Solutions: Over-reduction caused this. Next time, remove from heat slightly earlier. For current batch, you can grate the hard cheese for use as a topping, or warm small amounts gently to soften for spreading. Increasing the cream proportion in future batches creates a softer final product.
Nutritional Considerations
Understanding the nutritional profile helps you incorporate this cheese appropriately into your diet:
- Higher in sugar: Due to the concentrated lactose, this cheese contains significantly more natural sugars than regular cheese—typically 40-45% carbohydrates compared to less than 5% in most cheeses.
- Protein content: Contains moderate protein (8-12g per 100g) from the whey proteins, though less than curd-based cheeses.
- Fat content: Varies based on cream addition, typically 20-30% fat in enriched versions, lower in pure whey versions.
- Lactose: Not suitable for lactose-intolerant individuals, as it contains concentrated lactose despite the caramelization process.
- Portion awareness: The sweet flavor makes it easy to consume larger portions, so mindful eating is recommended given the caloric density.
Sustainability and Food Waste Reduction
One of the most compelling aspects of making whey cheese is its role in reducing food waste. The global cheese industry produces enormous quantities of whey as a byproduct—approximately 9 liters of whey for every kilogram of cheese produced. While commercial operations have developed uses for whey (protein powders, animal feed, food additives), home cheesemakers often discard it.
Transforming this nutrient-rich liquid into a delicious product embodies sustainable cooking principles. You’re converting a waste stream into a valuable food product, maximizing the utility of the original milk, and participating in a tradition developed precisely for this purpose in regions where nothing could be wasted.
For home cooks interested in sustainability, making whey cheese completes the circle of home dairy processing. Make fresh cheese from milk, use the curds immediately, and transform the whey into a shelf-stable product that captures the remaining nutrients and flavors.

Comparing Commercial and Homemade Versions
If you’re curious about this cheese before committing to making it yourself, commercial versions are available through specialty food retailers and online sources. These products give you a reference point for flavor and texture, though homemade versions offer distinct advantages:
Commercial advantages: Consistency, convenience, traditional production methods from experienced makers, and no time investment. Commercial producers have perfected their recipes over generations and can achieve reliable results.
Homemade advantages: Ability to control ingredients and sweetness level, satisfaction of creating a traditional product from scratch, utilization of your own whey, and cost savings if you already produce whey from other projects. You can also adjust the recipe to your preferences—slightly sweeter, firmer texture, addition of spices or flavorings.
Many enthusiasts recommend trying a commercial version first to understand the target outcome, then experimenting with homemade production. This approach gives you a clear benchmark for your own attempts.
Cultural Context and Traditional Uses
While we’ve focused on the practical aspects of making and using this cheese, understanding its cultural context enriches the experience. In Scandinavian regions, this cheese has been produced for centuries, developing from the practical need to utilize every component of precious milk in agricultural societies where nothing could be wasted.
Traditional consumption patterns treat it as an everyday food rather than a specialty item—sliced thin on bread for breakfast, packed in lunch boxes, served as a quick snack. This normalization of a product that seems exotic to other cultures reminds us that “unusual” foods are simply traditional ones from different contexts.
The production method also reveals historical ingenuity. Before modern food preservation, the caramelization process created a shelf-stable product from a quickly-perishable liquid. The high sugar content acts as a natural preservative, allowing the cheese to keep for months without refrigeration—a crucial quality in pre-refrigeration times.
Advanced Techniques and Variations
Once you’ve mastered the basic recipe, consider these advanced variations:
Flavored Versions
- Spiced varieties: Add cardamom, cinnamon, or vanilla during the final cooking stage for aromatic complexity.
- Coffee-enhanced: Incorporate strong brewed coffee or espresso powder for a mocha-like variation.
- Cocoa version: Stir in high-quality cocoa powder during the final stages for a chocolate twist.
- Herb-infused: Experimental savory versions using herbs like thyme or rosemary create unique cheese-course options.
Texture Modifications
- Spreadable style: Reduce less extensively and add extra cream for a soft, spreadable consistency similar to dulce de leche.
- Extra-firm style: Continue cooking longer for a very hard cheese that can be grated like parmesan for use as a sweet topping.
- Layered approach: Create batches with different reduction levels and layer them in the mold for visual interest and varied texture in one piece.
Equipment for Regular Production
If you plan to make whey cheese regularly, certain equipment investments improve the process and results:
Frequently Asked Questions
Can I use whey from Greek yogurt production?
While technically possible, yogurt whey produces inferior results. It’s more acidic and contains less lactose than cheese whey, resulting in a different flavor profile and texture. True cheese whey from cheese curd production is ideal. If using yogurt whey, expect a tangier, less sweet final product and potentially longer cooking times.
Is this cheese actually healthy despite the sugar content?
The sugar is naturally occurring lactose, not added refined sugar, and the cheese provides protein, calcium, and other nutrients from milk. However, the concentrated nature means it’s calorie-dense and high in natural sugars. Like any rich food, it’s best enjoyed in moderate portions as part of a balanced diet. The key is treating it more like a condiment or flavoring agent than eating large quantities as you might with regular cheese.
Why is constant stirring so important near the end?
As the mixture thickens and sugars caramelize, it becomes prone to scorching on the pot bottom. Burnt portions create bitter flavors that permeate the entire batch. Constant stirring distributes heat evenly, prevents hot spots, and ensures uniform caramelization. Think of it like making caramel sauce—inattention for even a minute can ruin hours of work.
Can I make a dairy-free version?
Not really. The entire process depends on lactose (milk sugar) caramelizing, and the proteins in whey contribute to texture. Plant-based milk alternatives don’t produce comparable whey or contain lactose. You could create a vaguely similar caramel spread from plant milks, but it wouldn’t replicate the unique characteristics of traditional whey cheese.
How do I know if my whey is still good to use?
Fresh whey should smell clean, slightly sweet, and milky—similar to fresh milk. It should be pale yellow or greenish-yellow in color. If it smells sour, fermented, or unpleasant, or if it has developed mold, don’t use it. Ideally, use whey within 24 hours of production. If you must store it, refrigerate immediately in a clean, covered container and use within 3-4 days maximum, though fresher is always better for cheesemaking.
Final Thoughts: Embracing Traditional Whey Cheese
Creating whey-based brown cheese at home represents more than just making an unusual food product. It connects you to centuries of culinary tradition, demonstrates sustainable cooking practices, and produces a genuinely unique cheese that can enhance your cooking repertoire in surprising ways.
The process requires patience and attention, but the skills you develop—recognizing caramelization stages, managing long, slow cooking, and controlling texture through reduction—translate to many other cooking techniques. The satisfaction of transforming a waste product into something delicious and the connection to traditional food preservation methods make the time investment worthwhile.
Whether you’re a home cheesemaker looking to utilize your whey, a culinary enthusiast interested in traditional techniques, or simply someone who enjoys unusual and delicious foods, making your own whey cheese opens up new possibilities. The sweet-savory flavor profile, versatile uses, and impressive nature of creating this product from scratch make it a rewarding project for adventurous cooks worldwide.
Start with a small batch using whey from a simple cheese project, follow the process carefully, and you’ll discover why this traditional cheese has remained beloved for centuries. The first slice, with its complex caramel notes and smooth, fudgy texture, makes every minute of stirring worthwhile.