
Understanding the Appeal of Homemade Processed Cheese
Processed cheese products have long been celebrated for their smooth, creamy texture and exceptional melting properties. However, many home cooks around the world are now seeking ways to recreate these qualities using natural ingredients and transparent preparation methods. This guide will walk you through creating a homemade version of smooth, meltable cheese that delivers the same satisfying texture while giving you complete control over what goes into your food.
Whether you’re concerned about additives, interested in exploring cheese-making techniques, or simply looking to elevate your cooking with fresher ingredients, this comprehensive guide will provide everything you need to know. By the end, you’ll understand the science behind smooth melting cheese, master the technique for making it at home, and discover countless ways to incorporate it into your favorite dishes.
The Benefits of Making Your Own Smooth Melting Cheese
Creating your own processed-style cheese at home offers numerous advantages that extend beyond simple cost savings. Understanding these benefits will help you appreciate why this culinary project is worth your time and effort.
Complete Ingredient Transparency
When you make cheese at home, you have absolute control over every ingredient that goes into the final product. Commercial processed cheese often contains emulsifiers, stabilizers, artificial colors, and preservatives that some consumers prefer to avoid. By preparing your own version, you can select high-quality natural cheeses, choose organic dairy products, and eliminate any ingredients that don’t align with your dietary preferences or restrictions.
Superior Flavor Profile
Natural cheese varieties offer complex, nuanced flavors that develop during the aging process. When you use real aged cheddar, quality mozzarella, and fresh cream cheese as your base, the resulting product has a depth and richness that mass-produced alternatives simply cannot match. You can also customize the flavor by adjusting the cheese blend, adding spices, or incorporating ingredients like roasted garlic or herbs.
Nutritional Advantages
Homemade versions typically contain more protein and calcium from real cheese, with fewer additives and lower sodium content than their commercial counterparts. You can further optimize the nutritional profile by choosing low-fat dairy options, adding nutritional yeast for extra B vitamins, or incorporating other wholesome ingredients that support your health goals.
Customization and Versatility
Making your own melting cheese allows you to tailor the flavor, texture, and melting properties to suit specific recipes or personal preferences. You might create a sharper version for adult palates, a milder blend for children, or a spicier variation with added peppers for entertaining.
Essential Ingredients for Homemade Melting Cheese
The key to successful homemade smooth melting cheese lies in selecting the right ingredients and understanding their individual roles in the final product. Each component contributes specific properties that work together to create that signature creamy texture and superior melt.
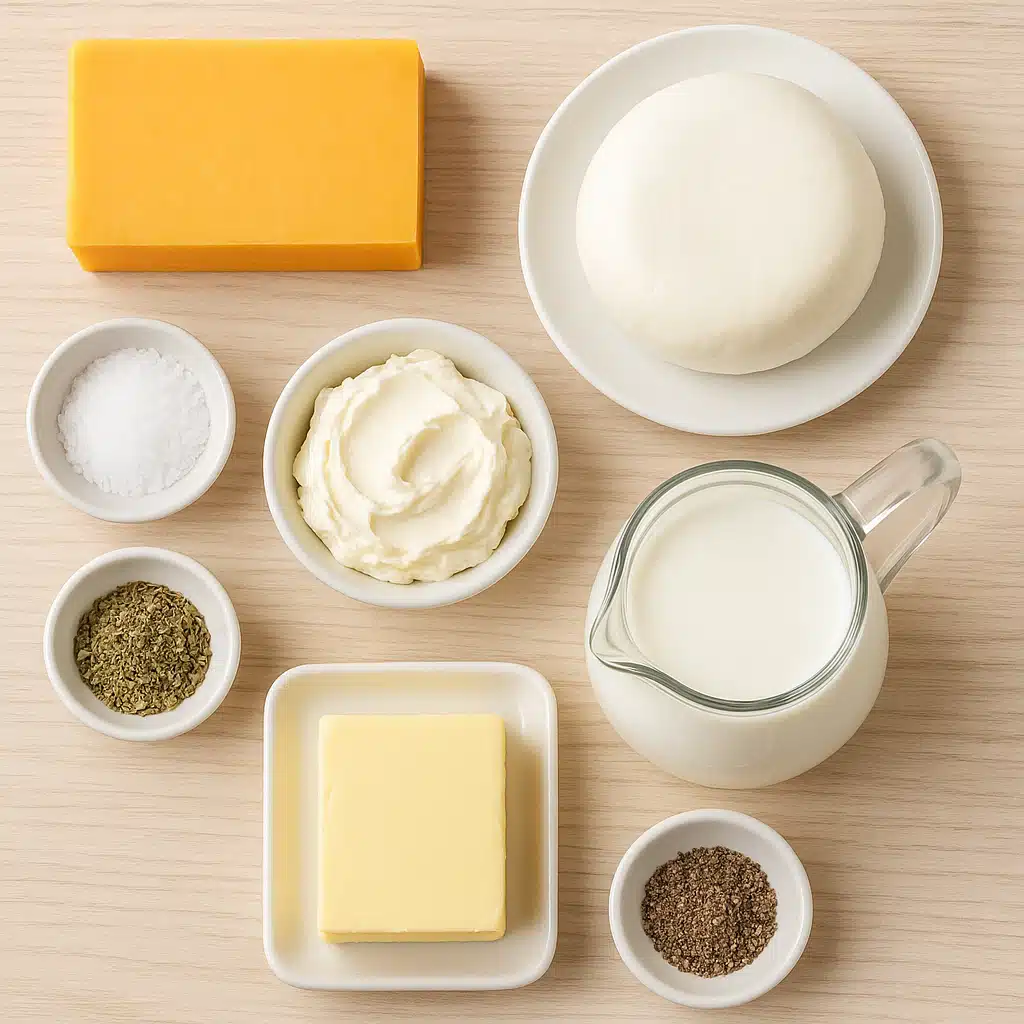
Cheese Base Selection
A combination of different cheese types creates the ideal flavor and texture. Sharp or medium cheddar provides the primary flavor foundation and golden color. Mozzarella contributes excellent melting properties and a mild, creamy taste. Cream cheese adds smoothness and helps create that silky texture. A typical ratio might be 60% cheddar, 25% mozzarella, and 15% cream cheese, though you can adjust these proportions based on your preferences.
Liquid Components
Whole milk creates the creamiest texture, though you can use reduced-fat milk if desired. For those with dairy sensitivities or following plant-based diets, alternatives such as oat milk, cashew milk, or soy milk can be substituted with excellent results. The liquid helps achieve the right consistency and ensures the cheese melts smoothly when reheated.
Fat and Richness
Butter contributes richness, mouthfeel, and helps with the emulsification process. It also enhances the overall flavor profile. For plant-based versions, use vegan butter or additional plant-based cream.
Binding and Stabilizing Agents
Cornstarch acts as a binder and stabilizer, helping all the ingredients come together into a cohesive mixture that sets properly when cooled. It also improves the texture when the cheese is melted for cooking. Some recipes use gelatin or agar-agar as alternative stabilizers.
Seasonings and Flavor Enhancers
Salt enhances all the flavors and is essential for proper taste balance. Paprika adds a subtle warmth and can contribute to the golden color. Mustard powder provides a slight tang and depth that complements the cheese flavors beautifully. Optional additions include garlic powder, onion powder, white pepper, or cayenne for those who enjoy heat.

Step-by-Step Preparation Method
Creating homemade smooth melting cheese requires attention to temperature, timing, and technique. Following these detailed steps will ensure consistent, successful results every time you make it.
Preparation and Setup
Begin by bringing all your cheese and butter to room temperature, which ensures smooth melting and proper emulsification. Grate or cube the cheddar and mozzarella into small, uniform pieces to promote even melting. Prepare your storage container by lightly greasing it with butter or lining it with parchment paper for easy removal once the cheese has set.
Creating the Cheese Base
Place a heavy-bottomed saucepan over low to medium-low heat. Add the grated cheddar, mozzarella, and cream cheese to the pan. Stir constantly with a wooden spoon or silicone spatula, allowing the cheeses to melt gradually and evenly. Rushing this process with high heat can cause the proteins to separate and result in a grainy texture. Patience during this stage is crucial for achieving that signature smooth consistency.
Incorporating Liquids
Once the cheese has fully melted into a cohesive mass, begin adding the milk in small increments while stirring continuously. Add the butter and continue stirring until everything is completely integrated. The mixture should become noticeably smoother and more fluid as the liquid incorporates.
Adding the Stabilizer
In a small bowl, create a slurry by mixing the cornstarch with a small amount of cold milk or water until completely smooth with no lumps. Slowly pour this slurry into the cheese mixture while stirring constantly. Continue cooking for another two to three minutes, stirring continuously, until the mixture thickens noticeably. This step is essential for achieving the proper texture and ensuring the cheese sets correctly when cooled.
Seasoning and Finishing
Remove the pan from heat and stir in your salt, paprika, mustard powder, and any other seasonings you’re using. Taste and adjust the seasoning as needed, keeping in mind that flavors will mellow slightly as the cheese cools.
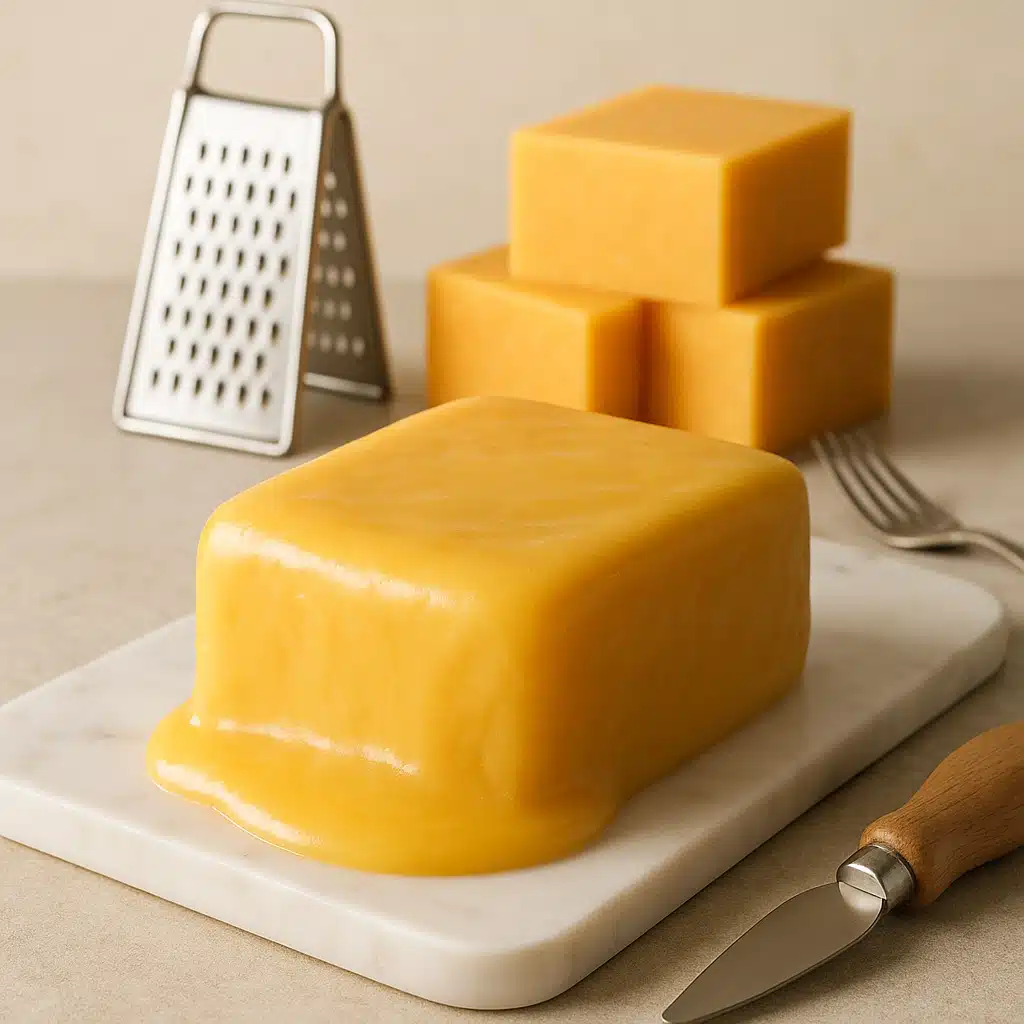
Setting and Storage
Pour the hot cheese mixture into your prepared container, smoothing the top with a spatula. Allow it to cool at room temperature for about thirty minutes, then cover and transfer to the refrigerator. The cheese will firm up significantly as it cools and should be fully set within three to four hours. For best slicing results, refrigerate overnight before use.

Culinary Applications and Recipe Ideas
Your homemade smooth melting cheese is incredibly versatile and can be used in countless recipes where you want that creamy, meltable quality. Understanding the various applications will help you get the most value from your cheese-making efforts.
Classic Macaroni and Cheese
This is perhaps the most iconic use for smooth melting cheese. Simply cube your homemade cheese and melt it with a small amount of milk over gentle heat, stirring until completely smooth. Toss with cooked pasta of your choice for a comforting dish that’s popular worldwide. The homemade version offers superior flavor and a cleaner ingredient list compared to boxed versions, making it ideal for family meals.
Cheese Dip for Entertaining
Melt cubed cheese with diced tomatoes, peppers, onions, and spices to create a crowd-pleasing appetizer dip. This preparation is perfect for serving with tortilla chips, vegetable sticks, or bread at gatherings. You can customize the flavor profile with additions like jalapeños for heat, cooked ground meat for heartiness, or black beans for extra protein and fiber.
Gourmet Grilled Cheese Sandwiches
Slice your homemade cheese thinly and layer it between bread slices for an elevated version of this beloved comfort food. The cheese melts beautifully and creates those desirable cheese pulls. Experiment with different bread types, add sliced tomatoes or caramelized onions, or pair it with soup for a complete meal.
Cheese Sauce for Vegetables
Transform simple steamed vegetables into an appealing side dish by drizzling them with melted cheese sauce. This technique is particularly effective for encouraging children to eat more vegetables. Broccoli, cauliflower, carrots, and potatoes all pair wonderfully with smooth cheese sauce.
Breakfast Applications
Use slices in breakfast sandwiches, melt it over scrambled eggs, or incorporate it into omelets for added creaminess and flavor. The smooth melting properties make it ideal for morning dishes where you want cheese to integrate seamlessly without overwhelming other ingredients.
Baked Dishes and Casseroles
Cube or grate your homemade cheese into casseroles, potato gratins, or baked pasta dishes. It melts evenly and creates a creamy texture throughout the dish. It’s particularly excellent in layered dishes where you want consistent cheese distribution without pockets of unmelted cheese.

Frequently Asked Questions and Troubleshooting
As you begin making your own smooth melting cheese, you may encounter questions or challenges. Here are comprehensive answers to the most common concerns.
Can I Modify the Cheese Varieties?
Absolutely. The beauty of making your own cheese is the ability to customize it to your taste preferences. You can substitute Colby, Monterey Jack, Gouda, or Swiss for part of the cheddar to create different flavor profiles. Keep in mind that each cheese has different melting properties and moisture content, so you may need to adjust the amount of liquid slightly. Aged cheeses tend to have stronger flavors, while younger cheeses are milder. Experiment with different combinations to find your preferred blend.
How Long Does Homemade Melting Cheese Last?
When stored properly in an airtight container in the refrigerator, homemade melting cheese typically remains fresh for seven to ten days. For extended storage, you can freeze it for up to three months. Wrap individual portions tightly in plastic wrap, then place in a freezer-safe bag or container. Thaw in the refrigerator overnight before use. Note that freezing may slightly affect the texture, making it slightly more crumbly, though it will still melt beautifully when heated.
Can This Be Made Dairy-Free?
Yes, with some modifications. Use plant-based cheese alternatives designed for melting, such as those made from cashews, almonds, or coconut oil. Substitute plant-based milk (oat, soy, or cashew work particularly well) and vegan butter. You may need to add a bit more cornstarch or use agar-agar as a setting agent since plant-based cheeses behave differently than dairy cheese. Nutritional yeast can enhance the cheesy flavor in vegan versions. The texture and flavor will differ from dairy-based versions, but many people find the results satisfying.
Why Did My Cheese Turn Out Grainy?
Graininess typically results from overheating, which causes the proteins in cheese to separate and clump together. Always use low to medium-low heat and be patient during the melting process. Constant stirring also helps maintain a smooth consistency. Using pre-shredded cheese can contribute to graininess due to anti-caking agents; always grate cheese from a block when possible. If your cheese does become grainy, try adding a small amount of warm milk while stirring vigorously to help re-emulsify it.
Can I Make This Without Cornstarch?
While cornstarch provides the best texture and stability, you can use alternatives. Arrowroot powder works similarly and can be substituted in equal amounts. Tapioca starch is another option. Some recipes use unflavored gelatin or agar-agar powder, though these create a slightly different texture. For a more natural approach without any starch, you can use additional cream cheese and reduce the liquid slightly, though the setting properties won’t be quite as firm.
Why Isn’t My Cheese Setting Properly?
If your cheese remains too soft after refrigeration, you likely used too much liquid or insufficient cornstarch. The mixture should be noticeably thick before pouring it into the mold. If you notice it’s too thin while still warm, return it to the heat and stir in additional cornstarch slurry (one tablespoon cornstarch mixed with two tablespoons cold water) and cook for another few minutes. Allow adequate cooling time in the refrigerator—at least four hours, preferably overnight.
Can I Add Extra Flavors or Ingredients?
Definitely. Once you’ve mastered the basic recipe, experiment with additions like roasted garlic, sun-dried tomatoes, herbs such as chives or dill, hot sauce, smoked paprika, or diced jalapeños. Add these ingredients after the cheese has melted and just before pouring into the mold. Be cautious with wet ingredients, as too much additional moisture can affect the setting properties. Finely chopped additions work better than large pieces for even distribution and proper setting.

Nutritional Considerations and Dietary Modifications
Understanding the nutritional aspects of your homemade cheese and how to modify the recipe for various dietary needs allows you to create versions that align with specific health goals or restrictions.
Standard Nutritional Profile
Homemade smooth melting cheese is rich in protein and calcium due to its real cheese content. It also contains fat, primarily saturated fat from dairy, along with vitamins A and B12. The sodium content can be controlled by adjusting the amount of salt you add. Compared to commercial processed cheese products, homemade versions typically contain more protein, fewer additives, and no artificial colors or preservatives.
Lower-Fat Variations
To reduce the fat content, use reduced-fat versions of cheddar, mozzarella, and cream cheese, along with low-fat or skim milk. You may need to add slightly more cornstarch to compensate for the reduced fat content, which contributes to texture. While the mouthfeel will be less rich, the result is still satisfying and significantly lower in calories and fat than full-fat versions.
Lactose-Reduced Options
For those with lactose sensitivity, use lactose-free cheese and milk products, which are now widely available in many markets worldwide. These products have had the lactose enzymatically removed but retain the same nutritional profile and melting properties as regular dairy, making them an excellent option for those who want to enjoy cheese while managing digestive concerns.
Protein-Enhanced Versions
To boost the protein content, add a few tablespoons of unflavored protein powder or nutritional yeast to the mixture. Nutritional yeast also enhances the cheesy flavor while adding B vitamins. Greek yogurt can replace some of the milk for added protein and a slight tangy note. These modifications are particularly useful for those following fitness-oriented diets or looking to increase protein intake.
Sodium Reduction
If you’re monitoring sodium intake, use low-sodium or unsalted cheese varieties and control the amount of added salt. Since cheese naturally contains sodium, you can often omit added salt entirely or use a salt substitute. Enhancing flavor with herbs, spices, garlic, or onion powder helps compensate for reduced salt without compromising taste.
Storage Tips and Make-Ahead Strategies
Proper storage ensures your homemade cheese maintains optimal quality and food safety. Understanding the best practices for storage and preparation timing helps you incorporate this project seamlessly into your routine.
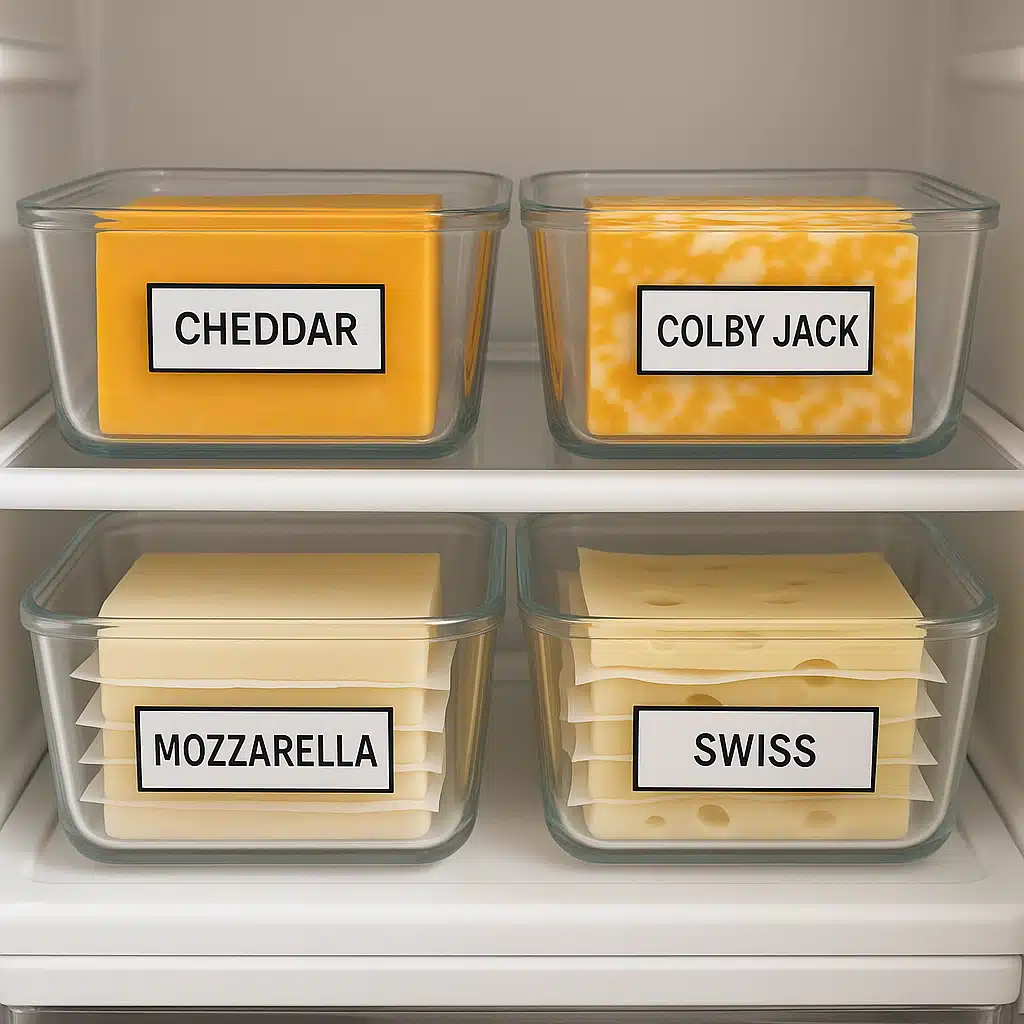
Refrigerator Storage
Store your cheese in an airtight container or wrap it tightly in plastic wrap to prevent it from absorbing odors from other foods in the refrigerator. Glass containers with tight-fitting lids work particularly well. Place parchment paper between slices if you’ve pre-sliced the cheese to prevent them from sticking together. Always store in the coldest part of your refrigerator, typically the back of a lower shelf.
Freezer Storage
For longer storage, freezing is an excellent option. Cut the cheese into portion-sized pieces before freezing for convenience. Wrap each portion individually in plastic wrap, then place all portions in a freezer-safe bag, removing as much air as possible. Label with the date and contents. Frozen cheese will maintain quality for up to three months. Remember to thaw slowly in the refrigerator rather than at room temperature to maintain the best texture.
Batch Preparation
This recipe scales easily, making it practical to prepare larger batches. Double or triple the recipe and store multiple blocks or pour into several smaller containers. This approach is particularly efficient if you use this cheese frequently, as the active preparation time doesn’t increase proportionally with quantity. Having multiple blocks on hand means you’ll always have homemade cheese available for spontaneous meals or entertaining.
Pre-Portioning for Convenience
Consider portioning the cheese into recipe-sized amounts before refrigeration. Pour the mixture into muffin tins or small containers that hold just enough for a single use. Once set, pop them out and store in bags. This strategy makes it incredibly convenient to grab exactly what you need for a quick meal without having to cut and measure.
Cost Comparison and Value Analysis
Understanding the financial aspects of making your own smooth melting cheese helps you appreciate the value proposition beyond just health and quality considerations.
While the initial cost of purchasing the individual ingredients may seem comparable to buying commercial processed cheese, the value becomes apparent when you consider several factors. First, the yield from homemade preparation is typically more generous than equivalently priced commercial products. A single batch using standard ingredient amounts produces a substantial block that lasts longer and goes further in recipes.
Second, the quality differential is significant. You’re essentially creating a premium product using real, aged cheeses that would cost considerably more if purchased as a specialty item. The flavor and nutritional profile more closely resemble artisanal cheese products that command higher prices in specialty stores.
Third, the versatility of the homemade version means you can use it in more applications than you might use commercial alternatives, from sophisticated entertaining to everyday family meals. This flexibility increases the overall value by eliminating the need to purchase multiple types of cheese products for different purposes.
Finally, when you factor in the elimination of additives, preservatives, and artificial ingredients, the health value—while difficult to quantify monetarily—represents real savings in terms of nutrition and wellness. For families prioritizing whole food ingredients, this intangible benefit may be the most valuable aspect of all.
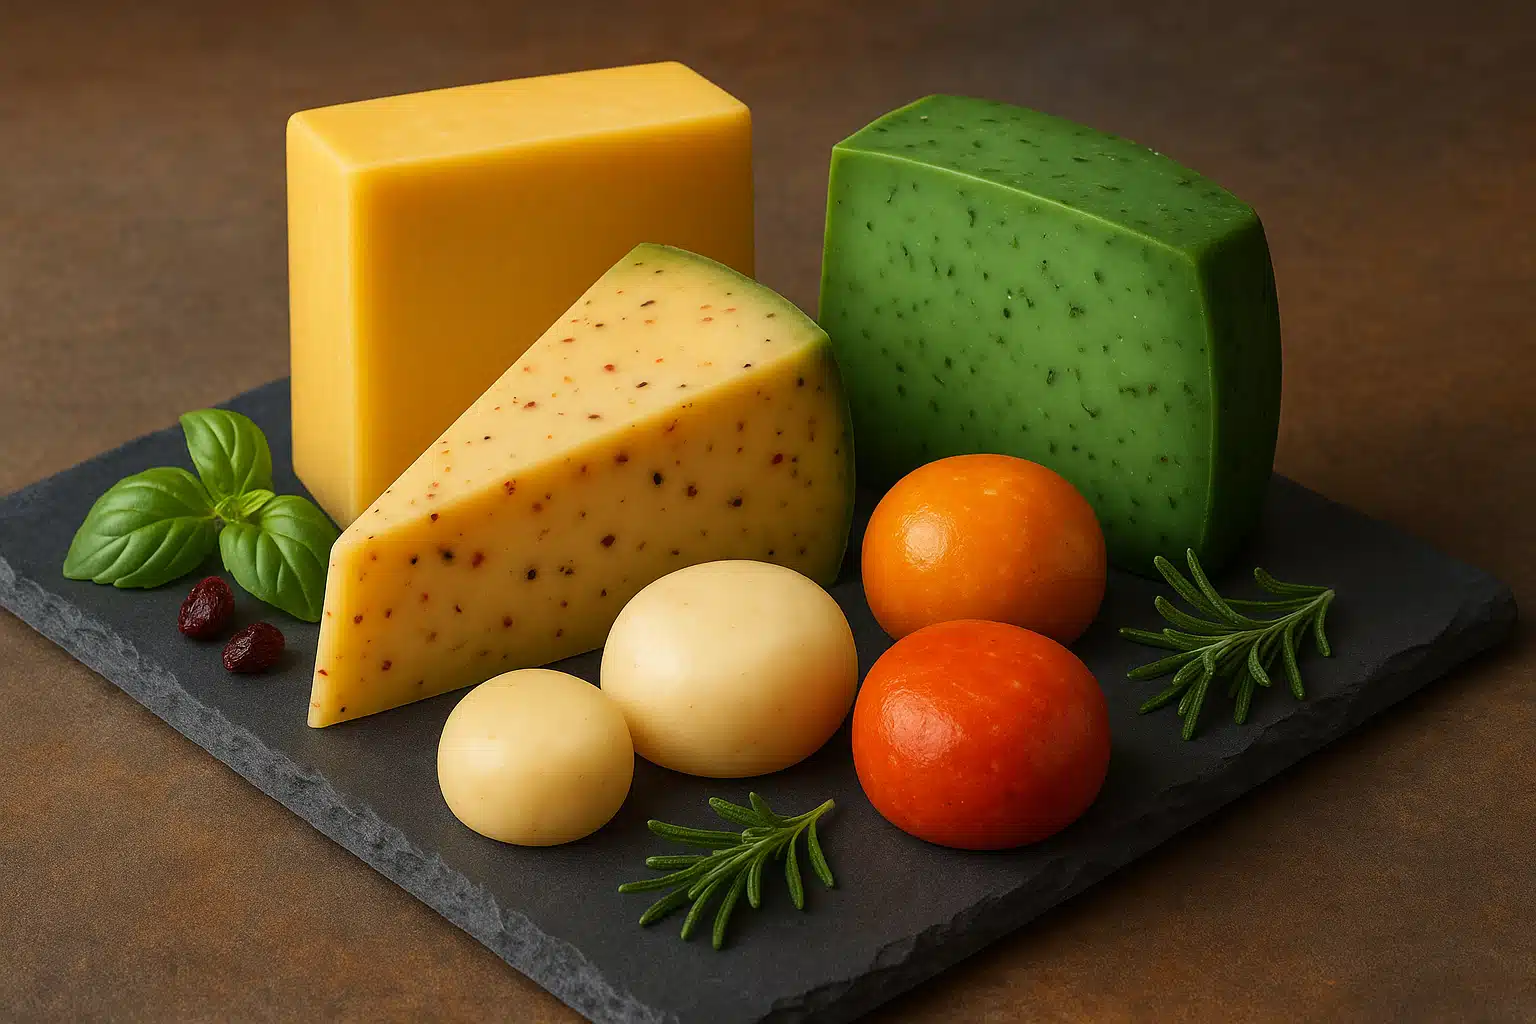
Advanced Techniques and Variations
Once you’ve mastered the basic recipe, these advanced techniques and creative variations will help you expand your cheese-making repertoire and create specialized versions for specific purposes.
Smoked Cheese Version
Incorporate smoked cheese varieties such as smoked cheddar or smoked Gouda into your cheese blend to create a version with deep, complex flavors perfect for gourmet applications. The smoky notes pair beautifully with grilled vegetables, barbecue dishes, or simply enjoyed on crackers. Use smoked paprika to enhance the smoky profile further.
Spicy Pepper Jack Style
Create a zesty variation by replacing some of the mozzarella with Monterey Jack cheese and folding in finely diced jalapeños, green chiles, or roasted red peppers. Add cayenne pepper or hot sauce to taste. This version is excellent for nachos, spicy dips, or adding excitement to tacos and quesadillas.
Herb-Infused Variation
Mix in fresh or dried herbs like rosemary, thyme, basil, or chives to create an aromatic version that elevates simple dishes. This variation works beautifully in elegant entertaining contexts or when you want to add sophistication to everyday meals. Fresh herbs provide brighter flavor, while dried herbs offer more concentrated taste and longer shelf life.
Beer Cheese Adaptation
Replace a portion of the milk with beer (light lagers work well, though darker beers create more robust flavor) and add a touch of Worcestershire sauce and a pinch of garlic powder. This pub-inspired variation is perfect for soft pretzels, burgers, or as a distinctive appetizer dip.
Individual Portion Molds
Pour the mixture into silicone molds in fun shapes for children’s lunches or portion-controlled servings. Individual portions make it easy to grab a single serving for school lunches, portion control, or creating visually appealing presentations for parties.
Food Safety and Best Practices
Maintaining proper food safety standards ensures your homemade cheese remains safe to consume and retains optimal quality throughout its storage life.
Always start with fresh, high-quality ingredients that have been stored properly and are well within their expiration dates. Use clean utensils, containers, and work surfaces to prevent contamination. Wash your hands thoroughly before beginning preparation.
During preparation, avoid letting the mixture sit at room temperature for extended periods. Once cooked, allow it to cool at room temperature for no more than one hour before refrigerating. The cheese should be refrigerated within two hours of cooking to prevent bacterial growth.
When storing, ensure your containers are clean and completely dry before use. Moisture can promote mold growth. If you notice any off odors, discoloration, or mold development on your cheese, discard it immediately. While surface mold on hard aged cheese can sometimes be trimmed away, soft prepared cheese like this should be discarded entirely if any contamination appears.
When reheating, ensure the cheese is heated thoroughly to steaming hot, especially if it’s been stored for several days. If you’ve thawed frozen cheese, use it within three days and never refreeze previously frozen cheese that has been thawed.
Always label your containers with the preparation date so you can track freshness accurately. Use the oldest batches first if you have multiple containers in storage. Following these guidelines ensures your homemade cheese remains safe, delicious, and of the highest quality.
Environmental and Sustainability Considerations
Making your own cheese at home offers several environmental benefits that align with sustainable living practices and reduced environmental impact.
First, preparing cheese from bulk ingredients significantly reduces packaging waste compared to purchasing individually wrapped commercial products. You eliminate the plastic packaging, cardboard boxes, and other materials that typically accompany processed cheese products.
Second, you have the opportunity to select ingredients based on sustainability criteria. Choose organic dairy products, support local cheese producers by purchasing locally-made cheese for your base ingredients, or select brands that prioritize animal welfare and environmental stewardship. This level of control allows you to align your food choices with your values.
Third, homemade preparation reduces the carbon footprint associated with industrial food processing, packaging, distribution, and retail display. While the ingredients still require production and transport, eliminating the additional processing and packaging stages represents meaningful environmental savings.
Fourth, making food at home generally results in less food waste. You can prepare exactly the amount you need, customize portions, and use every bit of the cheese you make. Commercial products often come in sizes that don’t match actual usage patterns, leading to waste.
By choosing reusable glass storage containers over disposable packaging, using silicone molds that last for years, and purchasing ingredients in bulk when possible, you further minimize your environmental impact while enjoying delicious, homemade food.
Conclusion and Final Thoughts
Creating your own smooth, meltable cheese at home represents much more than simply replicating a commercial product. It’s an opportunity to take control of your food quality, understand exactly what you’re consuming, and develop valuable culinary skills that enhance your overall cooking confidence.
The process itself is straightforward and requires no specialized equipment beyond basic kitchen tools you likely already own. The ingredients are accessible in grocery stores worldwide, and the technique, once mastered, becomes second nature. The modest time investment yields substantial returns in terms of quality, flavor, and versatility.
Whether you’re motivated by health considerations, desire for better flavor, cost savings, environmental concerns, or simply the satisfaction of creating something delicious from scratch, homemade smooth melting cheese delivers on all these fronts. It transforms everyday dishes into something special while providing peace of mind about ingredient quality.
As you become comfortable with the basic recipe, don’t hesitate to experiment with different cheese combinations, add your favorite flavors, or adapt the recipe to meet specific dietary needs. The flexibility of this preparation method means it can evolve with your tastes and requirements.
Start with a single batch to familiarize yourself with the process, then scale up and experiment as your confidence grows. Share your homemade cheese with friends and family—they’ll be impressed by your culinary accomplishment, and you’ll enjoy introducing others to the superior quality and flavor of homemade cheese products.
The journey of making your own cheese is rewarding, educational, and delicious. Give it a try, and you may find that commercial alternatives no longer satisfy once you’ve experienced the quality and satisfaction of homemade smooth melting cheese.