Introduction to Homemade Ricotta
Fresh ricotta cheese is one of the kitchen’s best-kept secrets—a creamy, versatile ingredient that elevates countless dishes from breakfast to dessert. While many assume that cheese-making requires specialized equipment, technical expertise, or hours of work, homemade ricotta breaks all these assumptions. In just 30 minutes, with three basic ingredients found in any kitchen, you can create soft, flavorful ricotta that rivals or surpasses anything available commercially.
This comprehensive guide will walk you through everything you need to know about making ricotta at home, from selecting the right ingredients to mastering the technique, avoiding common pitfalls, and exploring creative ways to use your finished product. Whether you’re a cooking novice taking your first steps into cheese-making or an experienced home cook looking to add a new skill, this method is accessible, forgiving, and deeply satisfying.
Why Make Ricotta at Home?
The decision to make ricotta from scratch offers numerous advantages that extend beyond simply having fresh cheese available. Understanding these benefits helps appreciate why this simple kitchen project is worth your time.
Superior Flavor and Texture
Commercially produced ricotta, while convenient, often contains stabilizers, gums, and preservatives that affect both taste and texture. Homemade ricotta offers a clean, milky sweetness with a delicate, creamy consistency that simply cannot be replicated by mass-produced versions. The difference becomes immediately apparent when you taste your first batch—it’s lighter, more flavorful, and has a pleasant, subtle tang that enhances rather than overpowers other ingredients.
Complete Ingredient Control
When you make ricotta yourself, you know exactly what goes into it. This is particularly valuable for those with dietary sensitivities, preferences for organic ingredients, or anyone who simply wants to avoid unnecessary additives. You can adjust the salt level, experiment with different types of milk, or even create variations with herbs and spices incorporated during the process.
Cost-Effectiveness
In many markets, fresh ricotta commands premium prices, especially when purchased from artisanal producers or specialty stores. Making it at home typically costs significantly less than buying equivalent quantities, and the yield from a basic batch provides enough for multiple uses throughout the week.
Satisfaction and Kitchen Skills
There’s genuine satisfaction in creating something from basic ingredients through a simple transformation process. Making ricotta serves as an excellent introduction to cheese-making principles, building confidence and understanding that can lead to exploring other culinary projects. It’s also an impressive skill to demonstrate when entertaining guests or teaching family members about cooking.
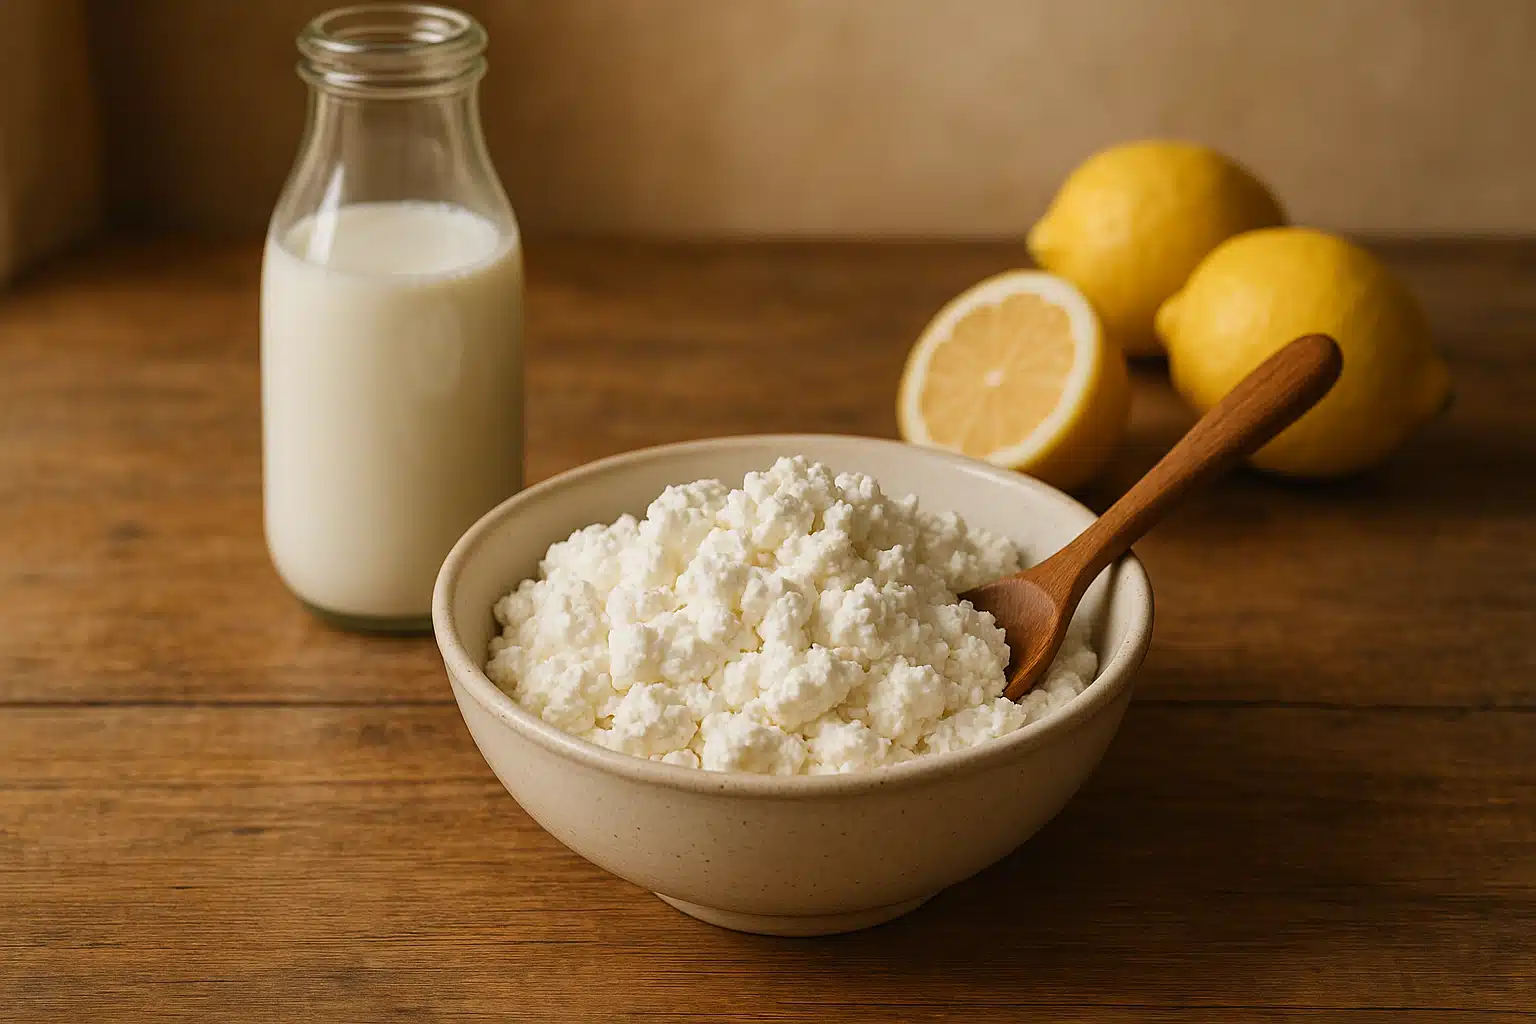
Essential Ingredients and Equipment
Success in making ricotta begins with understanding your ingredients and having the right basic equipment. Fortunately, the requirements are minimal and straightforward.
Choosing Your Milk
The quality and type of milk you select fundamentally impacts your results. Whole milk produces the richest, creamiest ricotta with the best yield. The fat content contributes to flavor and texture, making the finished cheese more satisfying. While you can use lower-fat milk, expect a thinner consistency and less pronounced flavor.
The most critical consideration is avoiding ultra-pasteurized or UHT (ultra-high temperature) milk. These products have been heated to such high temperatures that the protein structure has been altered, preventing proper curd formation. Look for milk labeled as “pasteurized” without the “ultra” designation. Fresh milk from local dairies often works exceptionally well, as it has been minimally processed.
For those interested in experimentation, combining milk with cream (using a 3:1 or 4:1 ratio of milk to cream) creates an extraordinarily rich ricotta suitable for special applications.
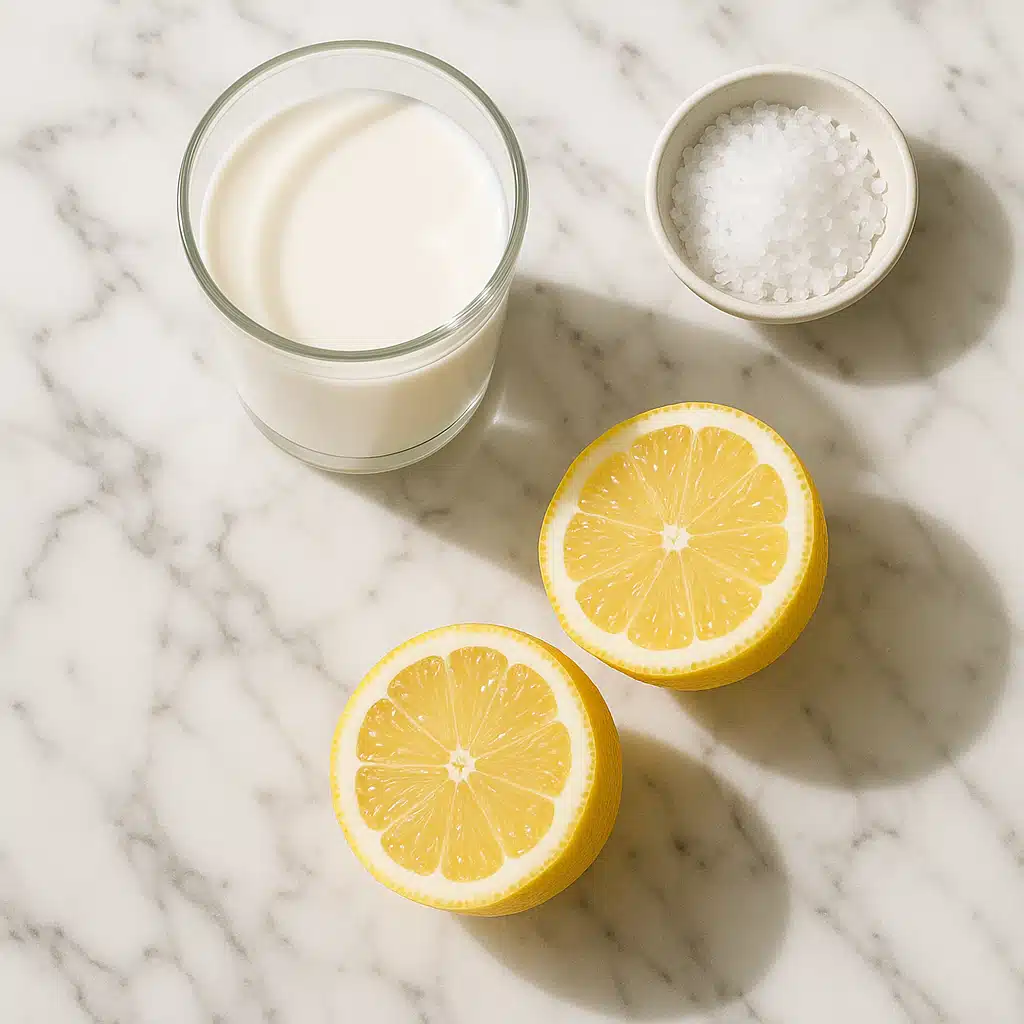
Selecting Your Acid
The acidifying agent causes the milk proteins to coagulate and separate from the liquid whey. You have two primary options, each with subtle characteristics:
Lemon juice provides a bright, fresh flavor with a pleasant citrus note that complements the milk’s natural sweetness. Fresh lemon juice works best, though bottled can be used in a pinch. White vinegar offers a more neutral flavor profile, allowing the pure taste of the milk to dominate. Distilled white vinegar is the standard choice, though some cheese-makers prefer apple cider vinegar for its slightly mellower character.
Both options work equally well from a technical standpoint—the choice comes down to personal preference and intended use.
Salt and Additional Seasonings
A small amount of salt enhances the ricotta’s flavor without making it taste salty. Fine sea salt or kosher salt works well, as both dissolve easily and distribute evenly. You can also experiment with adding fresh herbs, cracked black pepper, or other seasonings once the basic ricotta is made, customizing it for specific dishes.
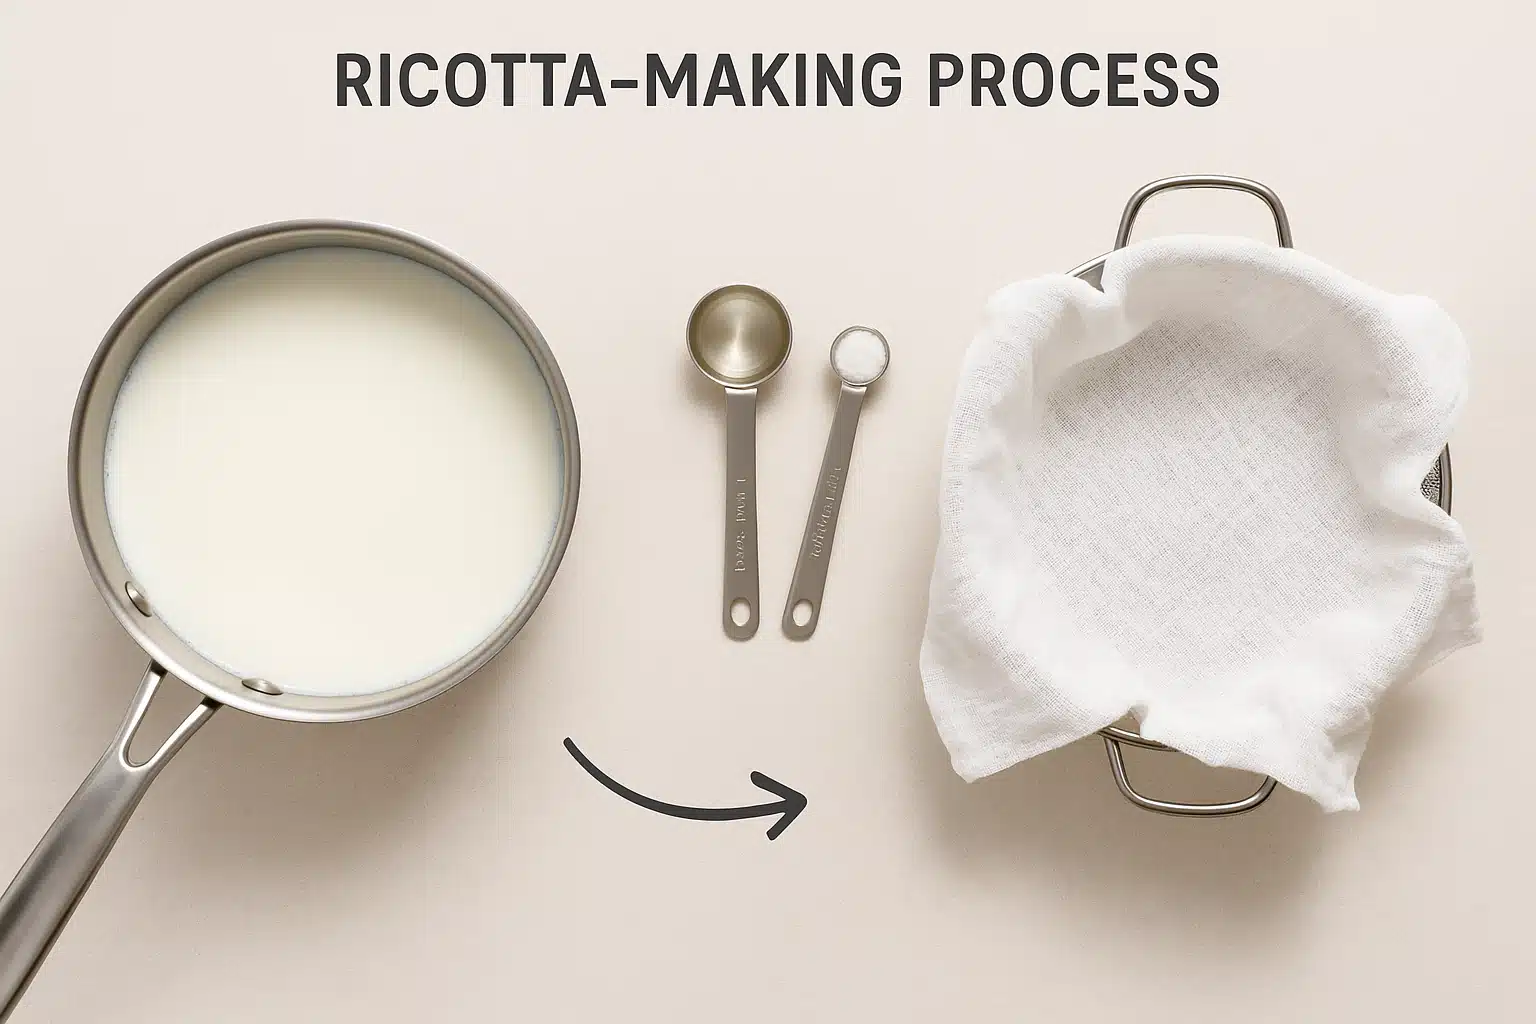
Equipment Needed
The equipment requirements are refreshingly simple and likely already in your kitchen:
- A heavy-bottomed saucepan (medium to large size) to heat the milk evenly without scorching
- A wooden spoon or heat-resistant spatula for stirring
- A colander or fine-mesh strainer for draining the curds
- Cheesecloth, butter muslin, or a clean, thin kitchen towel for lining the strainer
- A large bowl to catch the whey
- A cooking thermometer (optional but helpful for consistency)
Step-by-Step Ricotta Making Process
Now that you understand the ingredients and have your equipment ready, let’s walk through the actual process. This method is straightforward but benefits from attention to detail at each stage.
Step 1: Prepare Your Workspace
Before you begin heating milk, set up your straining station. Place your colander over a large bowl, ensuring it sits securely and won’t tip. Line the colander with cheesecloth, using enough that the fabric drapes over the sides—you’ll use these edges to gather and squeeze the curds later. Having this ready means you can work quickly once the curds form, which helps maintain the best texture.
Step 2: Heat the Milk Gently
Pour your milk into the saucepan and place it over medium heat. The goal is to bring the milk to approximately 185-195°F (85-91°C)—just below boiling. At this temperature, the milk will be steaming actively, with small bubbles forming around the edges, but not rolling into a full boil.
Stir occasionally as the milk heats to prevent a skin from forming on the surface and to ensure even heating throughout. This typically takes 10-15 minutes depending on your heat source and the quantity of milk. If you have a thermometer, monitor the temperature as it approaches the target range. Without a thermometer, watch for steam and those small bubbles at the edges as your visual cue.
Patience during this step prevents scorching, which would give your ricotta an unpleasant burnt taste. If you notice the bottom beginning to stick, reduce the heat slightly.
Step 3: Add the Acid
Once the milk reaches the proper temperature, remove the saucepan from the heat source immediately. Add your chosen acid—start with 2 tablespoons of lemon juice or vinegar—and stir gently with a few slow, deliberate movements. You don’t want to agitate vigorously; just incorporate the acid throughout the milk.
Now comes the most important part: leave it alone. Cover the pot with a lid or clean kitchen towel and let it rest undisturbed for 5-10 minutes. During this time, the acid causes the milk proteins to coagulate, forming soft curds that separate from the yellowish liquid whey.
After 5 minutes, check the progress. You should see distinct white curds floating in clear, yellowish whey. If the whey still looks milky and cloudy, the curds haven’t fully formed. Add another tablespoon of acid, stir gently once, and let it sit for another 5 minutes. The separation should be obvious when ready—clear distinction between solid curds and liquid whey.
Step 4: Drain the Curds
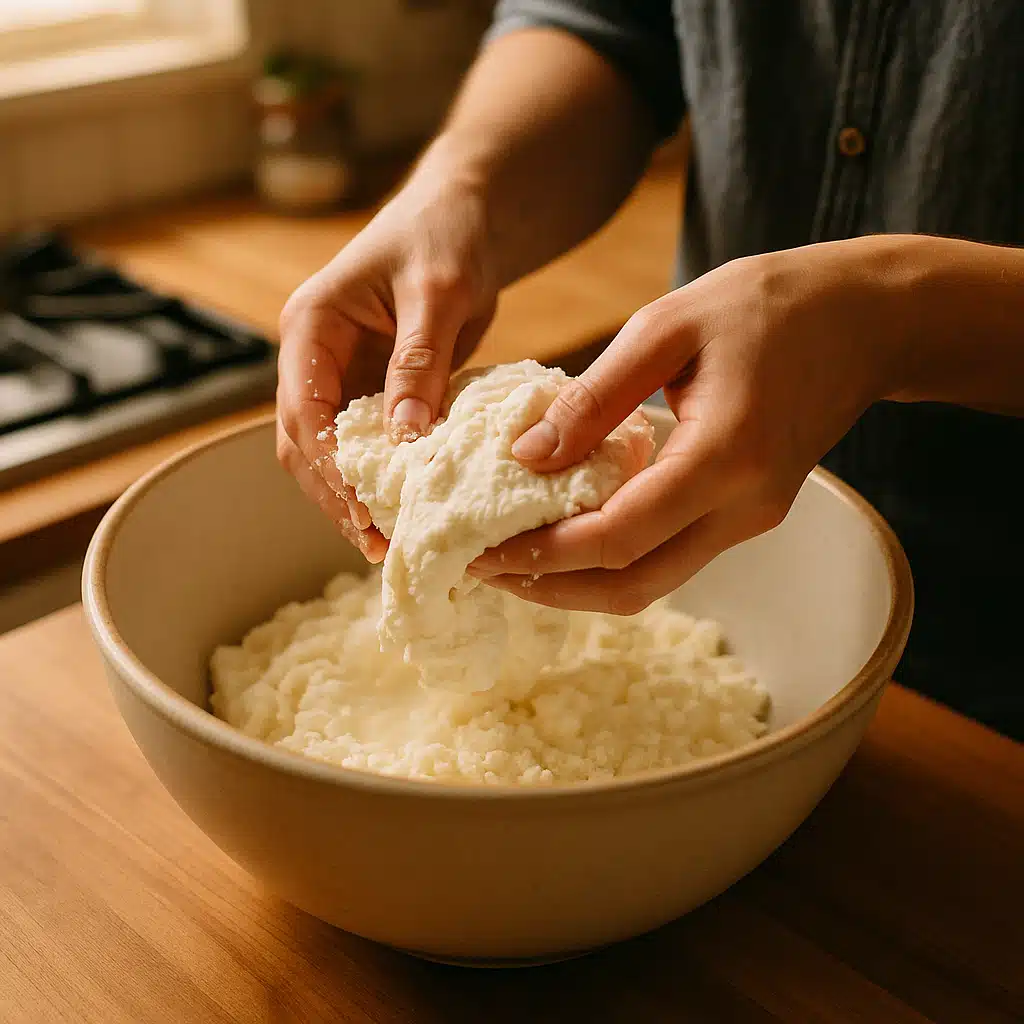
Using a slotted spoon or small ladle, gently transfer the curds to your prepared cheesecloth-lined colander. Alternatively, you can pour the entire contents of the pot through the cloth, though the gentle transfer method gives you more control and produces slightly more delicate curds.
Allow the ricotta to drain for 5-20 minutes, depending on your texture preference. A shorter draining time (5-10 minutes) produces moister, spreadable ricotta perfect for toast or dips. Longer draining (15-20 minutes) creates firmer ricotta better suited for baking or stuffing pasta.
For even firmer ricotta, you can gather the cheesecloth edges and gently squeeze to press out additional whey, or even hang the bundle from a wooden spoon suspended over a bowl and let gravity do the work for 30-60 minutes.
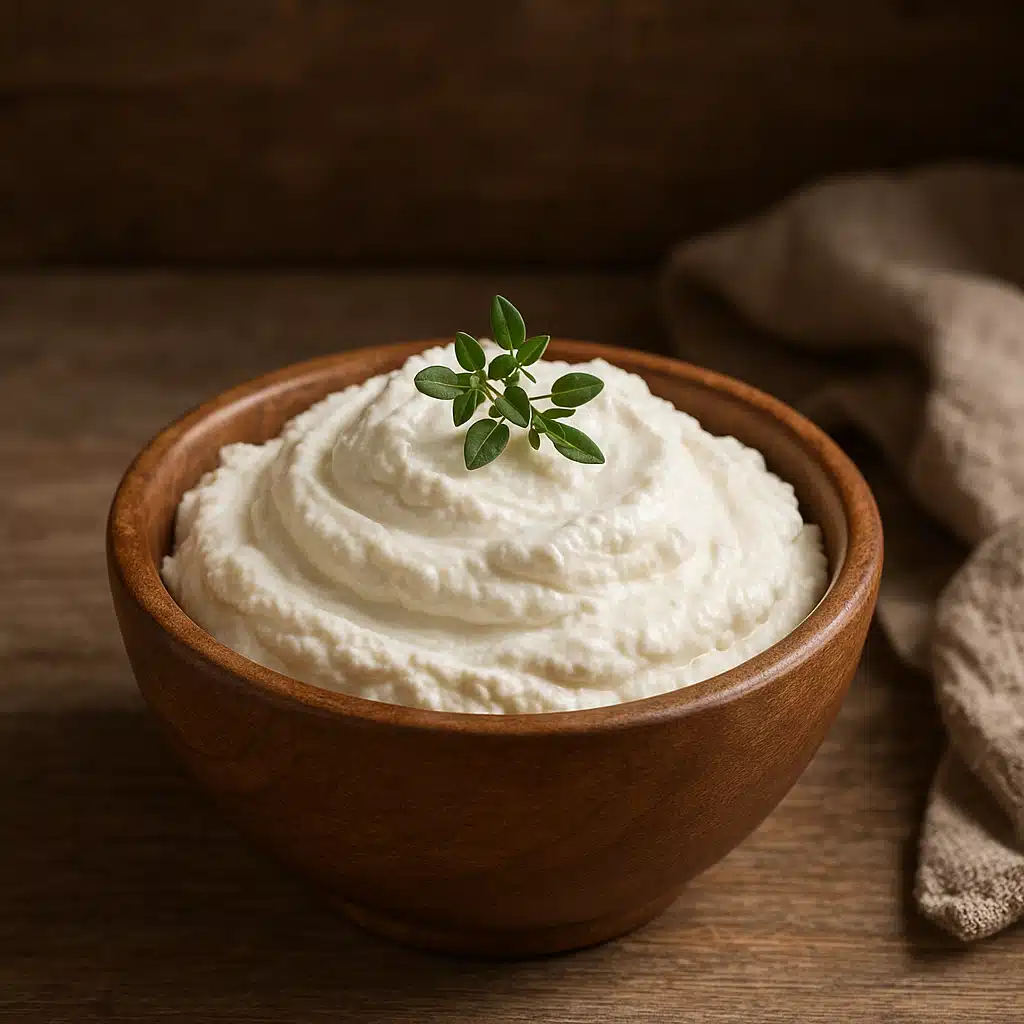
Step 5: Season and Store
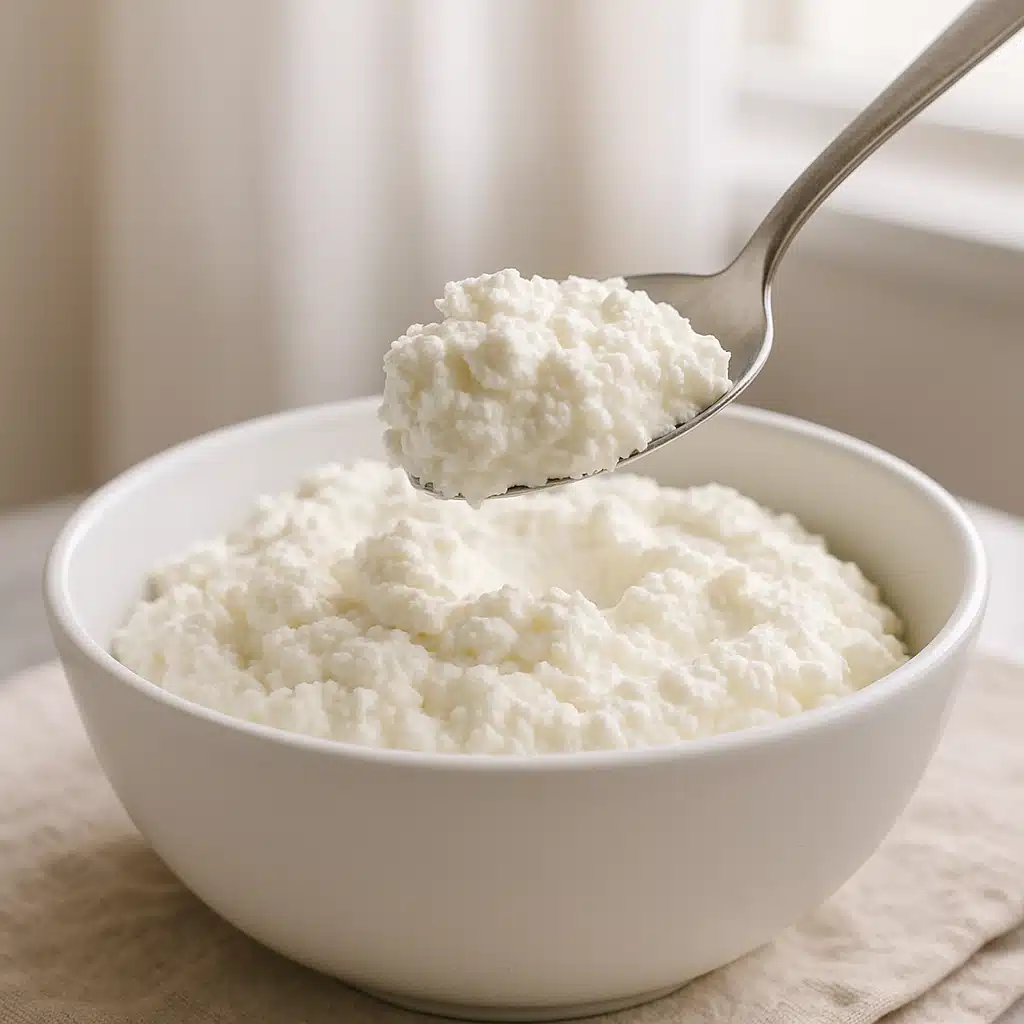
Transfer your drained ricotta to a bowl. Add salt to taste—start with about 1/4 to 1/2 teaspoon and adjust according to preference. Fold the salt in gently with a spoon or spatula. If adding herbs, pepper, or other seasonings, incorporate them now.
Your ricotta is ready to use immediately, and in fact, it’s at its absolute peak of freshness right now. If not using right away, transfer to an airtight container and refrigerate. Homemade ricotta will keep for 5-7 days when properly stored, though the flavor is best within the first 3-4 days.
Understanding Common Issues and Solutions
Even with a straightforward process, certain issues can arise. Understanding these potential problems and their solutions helps ensure consistent success.
Milk Won’t Curdle
If you’ve added acid and waited but the milk remains relatively uniform without clear curd formation, several factors might be responsible. Most commonly, the milk wasn’t hot enough when the acid was added. Return the pot to heat and warm it further, then try adding a bit more acid. Alternatively, you might be using ultra-pasteurized milk, which simply won’t work—there’s no fix for this except starting over with proper pasteurized milk.
Curds Are Too Small or Grainy
Excessively small, grainy curds usually result from overheating the milk (bringing it to a full boil) or stirring too vigorously after adding the acid. Both actions break up the protein structure into tiny fragments rather than allowing soft, delicate curds to form. The ricotta will still be usable but won’t have that ideal creamy texture. To prevent this, maintain gentle heat and minimal stirring after acidification.
Ricotta Tastes Too Sour
Overly tart ricotta comes from adding too much acid. This is easily prevented by starting with the minimum amount (2 tablespoons) and only adding more if the curds don’t form after 10 minutes. If your finished ricotta is too sour, you can balance it somewhat by incorporating a small amount of cream or by using it in applications where the tartness will be offset by other ingredients.
Low Yield
If you’re getting much less ricotta than expected, the most likely cause is using low-fat milk. Whole milk simply produces more curds because of the higher protein and fat content. Using ultra-pasteurized milk can also result in poor yields. Additionally, draining for too long or squeezing too aggressively removes not just whey but also some of the soft curd, reducing your final quantity.
Creative Ways to Use Your Homemade Ricotta
Once you’ve mastered the basic technique, the culinary possibilities expand dramatically. Fresh ricotta enhances dishes across all meal categories.
Breakfast Applications
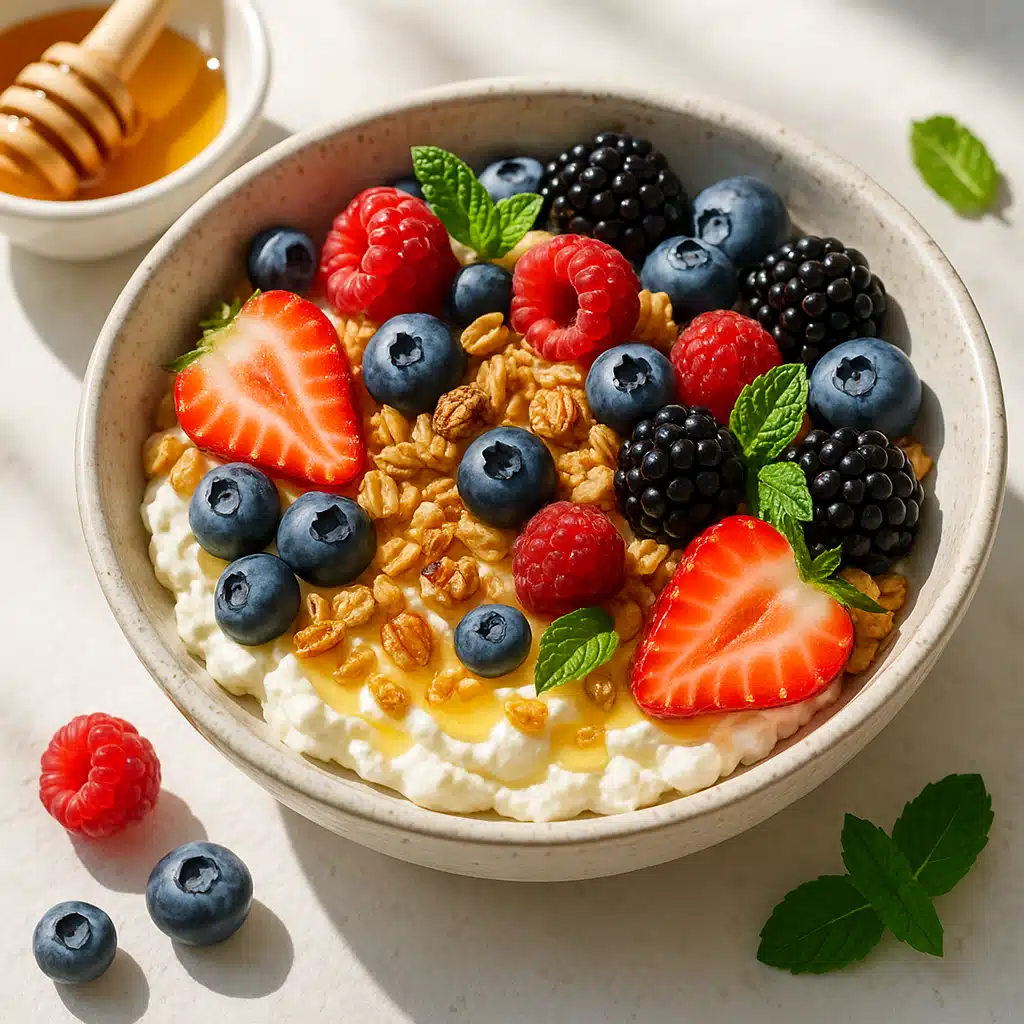
Start your day by spreading ricotta on toasted bread, topped with honey, fresh berries, and a sprinkle of cinnamon. Mix it into pancake or waffle batter for extra moisture and protein. Fold it into scrambled eggs just before they finish cooking for a luxuriously creamy texture. Create a breakfast bowl with ricotta as the base, topped with granola, sliced fruit, nuts, and a drizzle of maple syrup.
Savory Dishes
Ricotta shines in countless savory applications. Use it as a filling for stuffed pasta like ravioli, tortellini, or cannelloni. Spread it as a creamy layer in lasagna. Dollop it onto pizza before or after baking for pockets of creamy richness. Mix it with sautéed spinach and garlic as a side dish or filling. Incorporate it into meatballs or meatloaf for tenderness. Spread it on flatbreads or crostini with roasted vegetables as an appetizer.
Baking and Desserts
Ricotta’s mild flavor and creamy texture make it valuable in baking. Use it in cheesecakes for a lighter alternative to cream cheese. Fold it into cake batters for moisture. Make traditional Italian desserts like ricotta cookies or cassata. Create a simple dessert by sweetening ricotta with honey or sugar and serving with fresh fruit. Mix it with chocolate chips and use as a cannoli filling.
Simple Snacks and Dips
Blend ricotta with herbs, garlic, and olive oil for a vegetable dip. Mix it with pesto for a creamy spread. Combine with roasted red peppers and spices for a flavorful dip. Simply season with salt, pepper, and good olive oil and serve with crackers or bread.
Don’t Waste the Whey
After making ricotta, you’ll have a substantial amount of leftover whey—the yellowish liquid that drained from the curds. This byproduct is far too valuable to discard. Whey contains protein, vitamins, and minerals, and can be used in numerous ways.
Use whey as the liquid in bread or pizza dough recipes, where it adds subtle flavor and tenderness. Substitute it for water when cooking grains like rice, quinoa, or oatmeal for added nutrition. Add it to smoothies for a protein boost. Use it to soak beans or legumes. Water plants with diluted whey (mix 1 part whey to 3 parts water) as a fertilizer. Feed it to pets or add to compost bins. Some people even use whey as a facial toner due to its lactic acid content.
Refrigerated whey keeps for about a week, or you can freeze it in portions for later use.
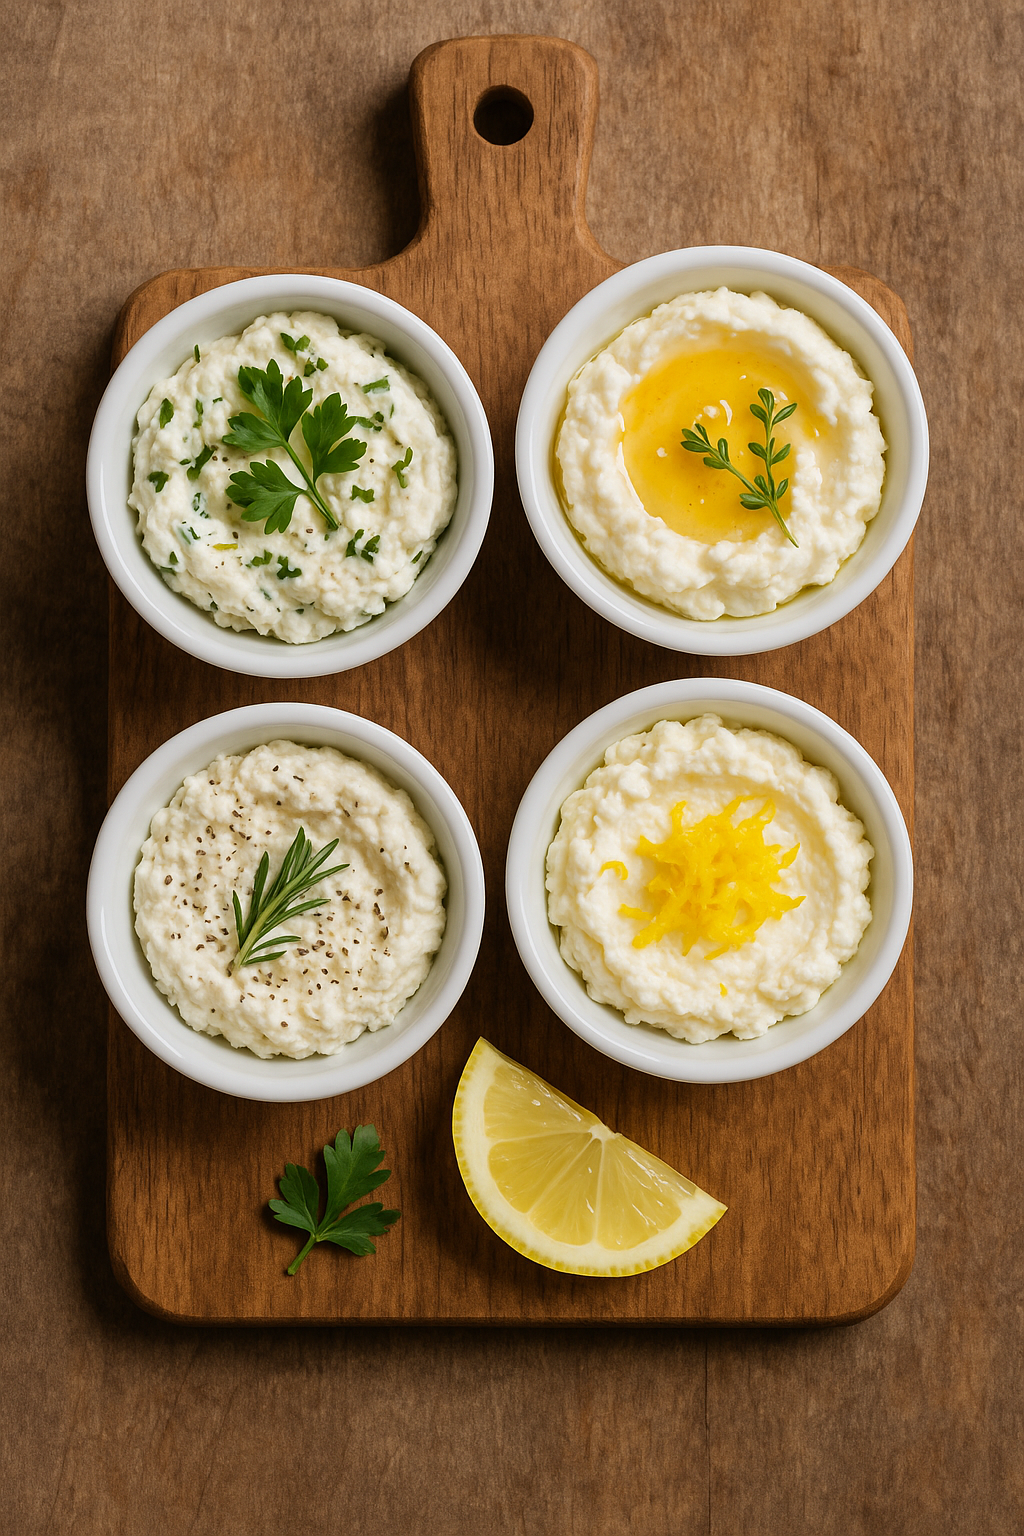
Variations and Flavor Enhancements
Once comfortable with the basic process, experiment with variations that customize your ricotta for specific purposes.
Herb-Infused Ricotta
Add fresh herbs like basil, thyme, oregano, or parsley to the finished ricotta. Finely chop the herbs and fold them in along with the salt. This creates ricotta perfect for savory applications.
Sweet Ricotta
Instead of salt, add a sweetener like honey, maple syrup, or sugar, along with vanilla extract or other flavorings. This version works beautifully in desserts or as a spread for breakfast.
Lemon-Pepper Ricotta
Add fresh lemon zest and cracked black pepper to create a bright, peppery ricotta that pairs wonderfully with pasta or grilled vegetables.
Whipped Ricotta
For an ultra-smooth, spreadable consistency, transfer your finished ricotta to a food processor and blend for 30-60 seconds until silky and airy. This technique creates ricotta perfect for dips, spreads, or elegant presentations.
Scaling the Recipe
The basic recipe can easily be scaled up or down depending on your needs. The standard ratio is roughly 4 cups of milk to 2-3 tablespoons of acid, producing approximately 1 to 1.5 cups of ricotta (yield varies based on milk fat content and draining time).
To make a larger batch, simply multiply all ingredients proportionally. Keep in mind that larger quantities will take longer to heat and may require a bigger pot. The acidification and draining times remain essentially the same regardless of batch size.
For a smaller test batch, you can halve the recipe, using 2 cups of milk and 1 tablespoon of acid. This is perfect for your first attempt or when you need just a small amount for a specific dish.
Frequently Asked Questions
Can I use non-dairy milk?
Traditional ricotta relies on animal milk proteins to form curds. Plant-based milks have different protein structures that don’t respond the same way to acid. While some specialized recipes exist for vegan ricotta alternatives using nuts or tofu, they involve completely different processes and ingredients.
How long does homemade ricotta last?
When stored in an airtight container in the refrigerator, homemade ricotta maintains good quality for 5-7 days. For best flavor and texture, use it within the first 3-4 days. If you notice any off-smells, discoloration, or mold, discard it immediately.
Can I freeze ricotta?
While you can technically freeze ricotta, the texture changes upon thawing—it becomes grainier and loses some of its creamy quality. Frozen and thawed ricotta works better in cooked applications like lasagna or baked dishes rather than fresh uses like spreads or dips. If you do freeze it, store it in an airtight container for up to 2 months, thaw in the refrigerator, and stir well before using.
Why is my ricotta different from what I buy at the store?
Commercial ricotta often contains stabilizers, gums, and additional ingredients that affect texture and shelf life. Some mass-produced versions are also made from whey as a byproduct of other cheese production rather than from whole milk, resulting in different characteristics. Your homemade version will be fresher, lighter, and have a cleaner milk flavor without these additives.
Building Confidence Through Practice
Like any kitchen skill, making ricotta improves with repetition. Your first batch might not be perfect, but the process is forgiving enough that even imperfect ricotta is usually delicious and completely usable. Pay attention to what happens at each stage, make mental notes about timing and temperatures, and adjust variables slightly from one batch to the next.
Many home cooks find that by the third or fourth attempt, they’ve developed an intuitive feel for the process and no longer need to measure or time as precisely. The visual and sensory cues become second nature—you’ll recognize when the milk is hot enough, when the curds have properly formed, and when the draining has reached your preferred consistency.
This confidence extends beyond just making ricotta. Understanding the basic principles of acid coagulation and curd formation provides a foundation for exploring other fresh cheeses and dairy projects, opening up new culinary possibilities.
Conclusion: Fresh Cheese, Endless Possibilities
Making ricotta at home represents one of those rare cooking projects that delivers maximum reward for minimal effort. In just 30 minutes, with three basic ingredients and simple equipment, you can produce fresh, creamy cheese that enhances countless dishes from breakfast through dessert.
Beyond the practical benefits of cost savings, ingredient control, and superior flavor, there’s something deeply satisfying about transforming liquid milk into soft, delicious curds through a simple chemical reaction. This small act of creation connects you to traditional food practices that have existed for centuries while giving you a valuable skill that impresses guests and elevates your everyday cooking.
Whether you spread it on morning toast, layer it in lasagna, dollop it on pizza, or whip it into a dessert, homemade ricotta brings freshness and quality that simply cannot be matched by commercial alternatives. The process is accessible enough for complete beginners yet offers room for experimentation and refinement as your skills develop.
Start with a basic batch following these guidelines, experience the simple joy of making your own cheese, and discover how this versatile ingredient can enhance your cooking. Once you’ve tasted the difference, you’ll find it difficult to return to store-bought versions, and you’ll likely be making ricotta regularly as a staple component of your kitchen repertoire.