Crystal collecting has become a cherished hobby for enthusiasts around the world, combining the beauty of natural minerals with the joy of curation and display. Whether you’ve been collecting for years or have just started your journey into the world of minerals and gemstones, learning how to properly mount and display your specimens can transform a simple collection into a stunning showcase worthy of any personal museum or living space.
In this comprehensive guide, we’ll explore the art and science of mounting crystals using mineral tack and acrylic display bases. You’ll discover why proper mounting techniques matter, what materials work best, and how to create professional-looking displays that protect your specimens while allowing their natural beauty to shine. Let’s begin this journey into the world of crystal presentation!
The Importance of Proper Crystal Mounting
Mounting your crystals and mineral specimens isn’t merely about aesthetics—though that’s certainly an important consideration. Proper mounting serves multiple essential functions that every collector should understand and appreciate.
Protection and Preservation
Crystals, despite their hardness, can be surprisingly fragile. Many specimens have delicate terminations, thin blades, or intricate formations that can chip, break, or become damaged when stored improperly. A secure mounting system prevents specimens from rolling, falling, or coming into contact with other hard surfaces that could cause damage. This is particularly crucial for rare or valuable pieces that may be irreplaceable.
Enhanced Visual Presentation
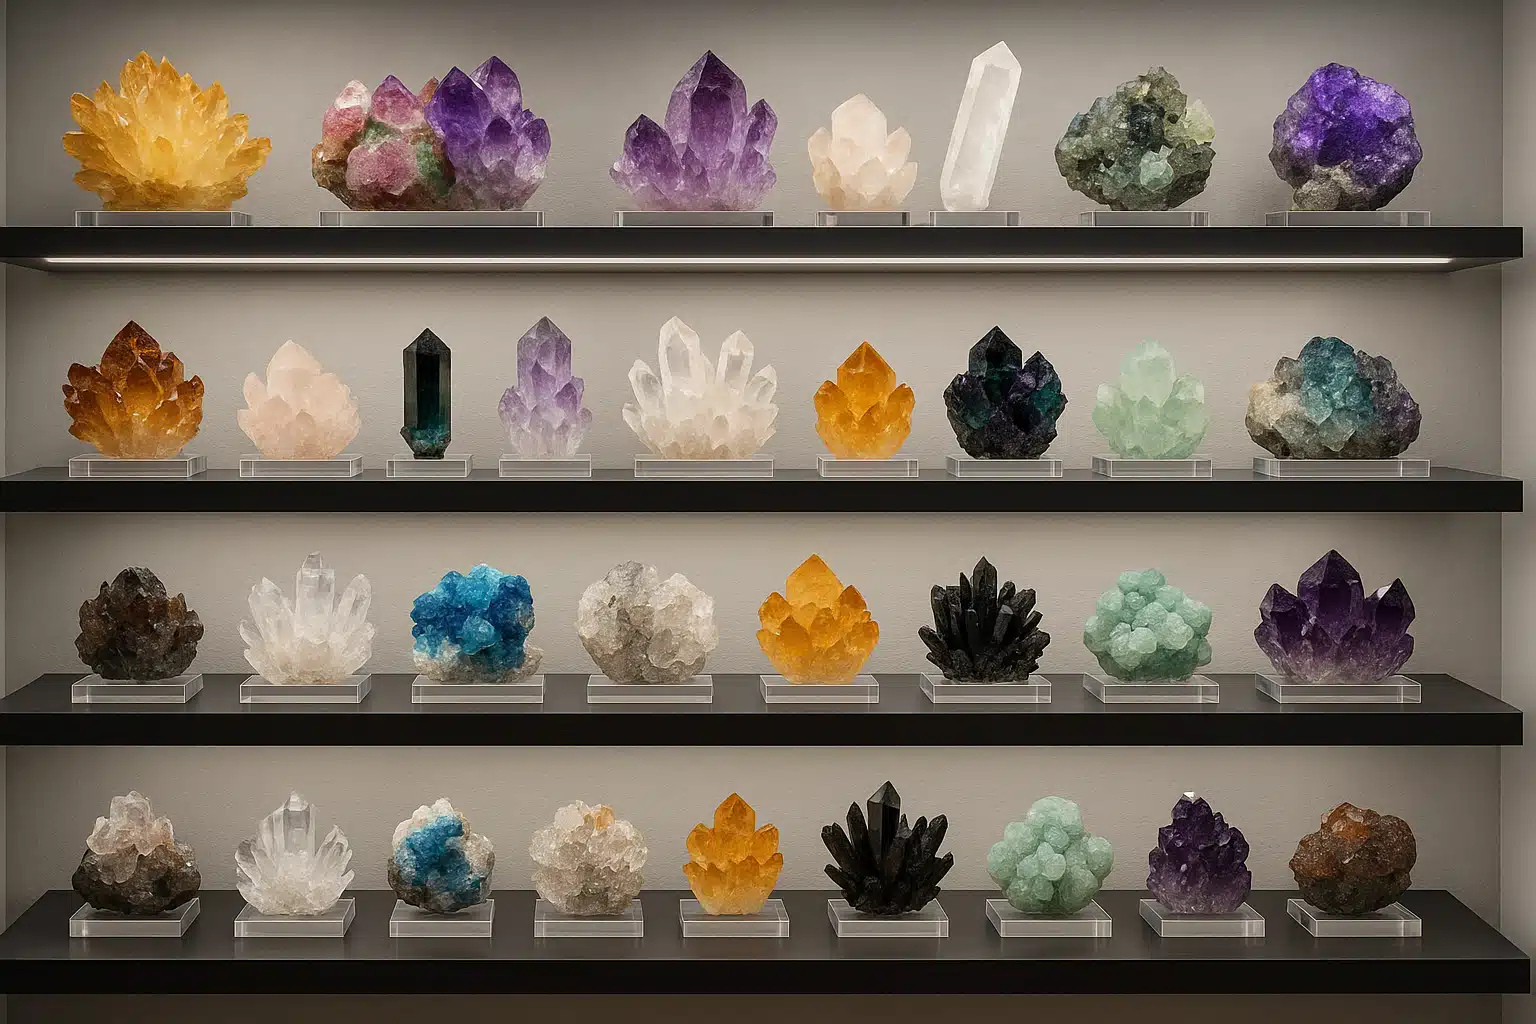
A well-mounted crystal allows viewers to appreciate the specimen from optimal angles. By elevating crystals on appropriate bases, you can highlight their best features—whether that’s the clarity of a quartz point, the vibrant color of an amethyst cluster, or the geometric perfection of a pyrite cube. The right display method turns each piece into a focal point rather than just another item in a crowded collection.
Organization and Space Management
For collectors with numerous specimens, proper mounting creates order and maximizes display space. Uniform bases allow for consistent presentation across your collection, making it easier to arrange, rearrange, and catalog your pieces. This organizational approach also makes it simpler to rotate displays seasonally or based on themes.
Educational Value
When crystals are properly mounted and displayed, they become more than decorative objects—they become teaching tools. Whether you’re sharing your passion with family, friends, or fellow collectors, a well-presented specimen invites closer examination and deeper appreciation of mineralogy, geology, and the natural processes that create these remarkable formations.
Essential Materials for Crystal Mounting
Before you begin mounting your crystals, it’s important to gather the right materials. Using quality supplies ensures your specimens remain secure while avoiding potential damage from inferior products.
Mineral Tack: Your Primary Mounting Medium
Mineral tack is a specialized, reusable adhesive putty designed specifically for mounting mineral and crystal specimens. Unlike regular adhesives, mineral tack is non-permanent, non-staining, and won’t damage your crystals. It remains pliable over time, allowing you to reposition specimens as needed without leaving residue. This putty-like material can support moderate weight while providing enough flexibility to absorb minor impacts that might otherwise damage delicate specimens.
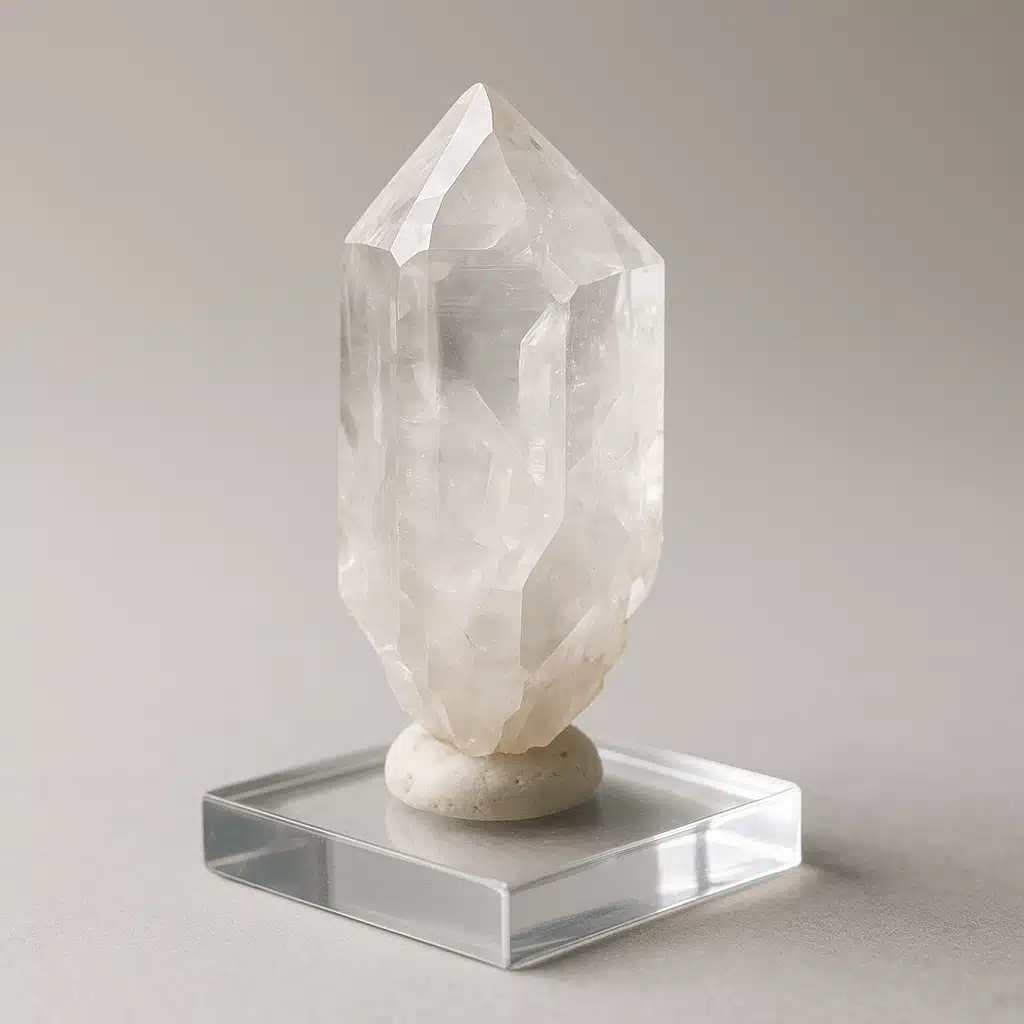
Acrylic Display Bases
Acrylic bases provide the perfect platform for crystal display. These clear, transparent stands come in various shapes and sizes, from simple flat squares to multi-tiered platforms and custom-cut forms. The transparency of acrylic ensures the focus remains on your crystal rather than the mounting system. Quality acrylic is durable, scratch-resistant, and won’t yellow over time when kept away from direct sunlight.
Additional Tools and Supplies
Beyond the basic mounting materials, several additional items can make the mounting process easier and more precise:
- Precision Tweezers: Essential for handling smaller specimens and positioning crystals with accuracy
- Microfiber Cloths: For cleaning acrylic bases and crystals without scratching
- Isopropyl Alcohol: For removing fingerprints and oils from acrylic surfaces
- Soft Brush: For dusting crystals before mounting
- LED Light Source: Helps you see the best mounting angle and position
- Measuring Tools: Small ruler or caliper for centering specimens on bases

Step-by-Step Crystal Mounting Process
Now that you understand the importance of mounting and have gathered your materials, let’s walk through the detailed process of mounting a crystal specimen professionally and securely.
Step 1: Prepare Your Workspace
Begin by creating a clean, well-lit workspace. Cover your work surface with a soft cloth or foam pad to protect both your crystals and the surface from scratches. Ensure adequate lighting—natural daylight or a good LED lamp works best—so you can clearly see what you’re doing and properly evaluate the crystal’s best angles.
Step 2: Clean the Acrylic Base
Before mounting, thoroughly clean your acrylic base. Use a microfiber cloth slightly dampened with water or isopropyl alcohol to remove dust, fingerprints, and any manufacturing residue. Dry completely with a clean section of the cloth. Clean acrylic not only looks more professional but also provides better adhesion for the mineral tack.
Step 3: Examine and Clean Your Crystal
Carefully inspect your crystal specimen to identify any fragile areas and determine the optimal display orientation. Consider which angle best showcases the crystal’s features—this might be showing the clearest face, the most impressive termination, or the most vibrant color. Use a soft brush to gently remove any dust or debris from the specimen, paying special attention to the surface that will contact the mineral tack.
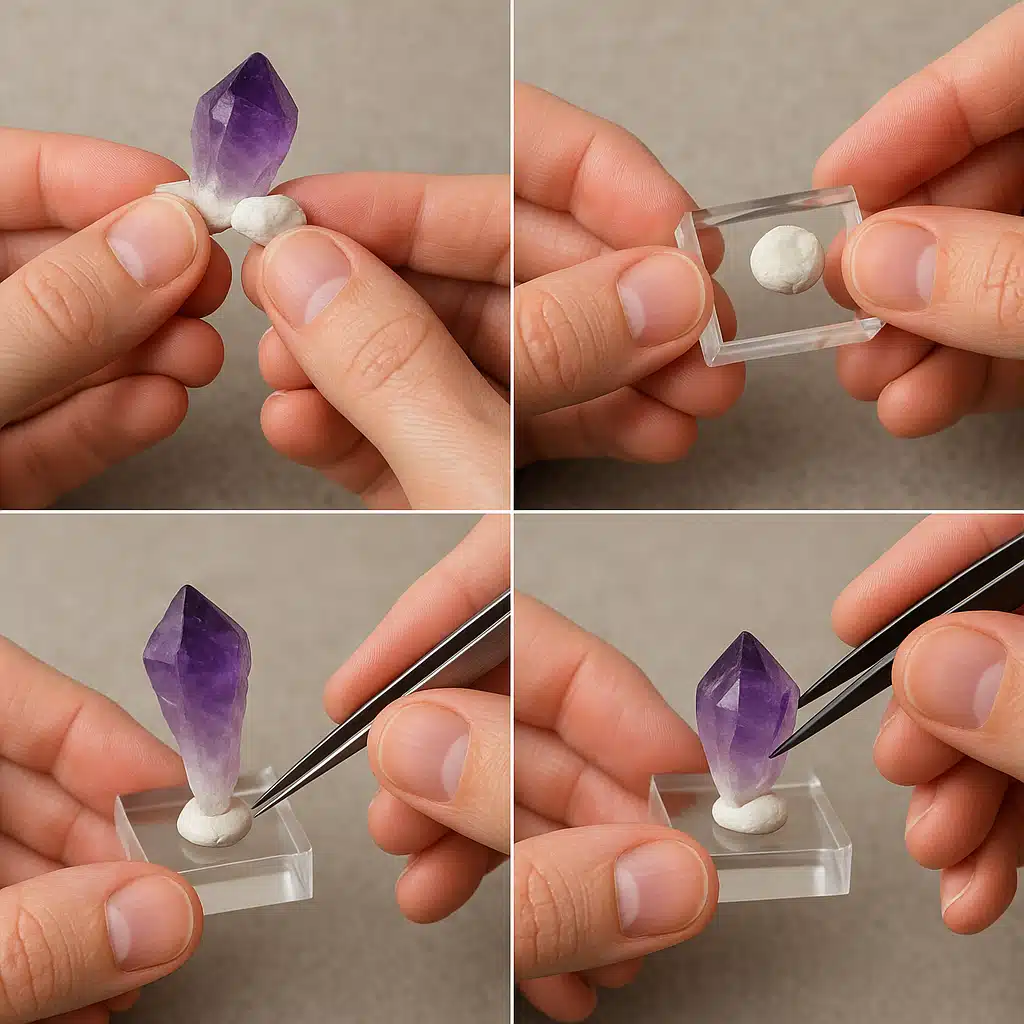
Step 4: Prepare the Mineral Tack
Take a portion of mineral tack from your container—the amount depends on the size and weight of your crystal. For most small to medium specimens, a piece roughly the size of a pea is sufficient. Roll the tack between your fingers to warm and soften it, forming it into a smooth ball or cylinder. Working the tack makes it more pliable and improves its adhesive properties.
Step 5: Apply Tack to the Base
Press the prepared mineral tack onto the acrylic base at the desired location. For aesthetic balance, this is typically the center of the base, though you might choose an off-center position for asymmetrical specimens or artistic effect. Press firmly to ensure good contact between the tack and the acrylic surface, then slightly flatten the top of the tack to create a broader surface area for the crystal to rest upon.
Step 6: Position the Crystal
This is the most critical step. Using your fingers or precision tweezers (for smaller specimens), carefully place the crystal onto the mineral tack. Position it at your predetermined angle, then apply gentle, even pressure to seat the crystal into the tack. Avoid excessive force, which could damage delicate specimens or push the tack too flat. The goal is to create enough contact for security without over-compressing the tack.
Step 7: Fine-Tune the Positioning
Step back and view your mounted crystal from multiple angles. Check that it’s centered on the base (unless you intentionally chose an offset position), that it’s oriented to show its best features, and that it appears stable. If adjustments are needed, gently lift the crystal and reposition it. The mineral tack remains workable, allowing for multiple adjustments until you achieve the perfect placement.
Step 8: Verify Stability
Once you’re satisfied with the position, perform a stability test. Gently tilt the base at various angles to ensure the crystal remains securely attached. If the specimen feels loose or wobbles, remove it and add slightly more mineral tack, or redistribute the existing tack for better support. For larger or heavier specimens, you may need to use additional tack points or larger amounts of adhesive.
Step 9: Final Cleaning
After mounting, inspect both the crystal and base for any tack residue or fingerprints. Use a soft, dry microfiber cloth to gently remove any marks from the acrylic. Avoid touching the crystal faces if possible, as oils from your skin can leave marks on some mineral surfaces.
Advanced Mounting Techniques and Considerations
As you become more experienced with crystal mounting, you may encounter specimens that require special techniques or present unique challenges. Here are some advanced considerations to enhance your mounting skills.
Mounting Heavy Specimens
Larger, heavier crystals may require additional support beyond standard mineral tack. Consider using multiple tack points distributed across the specimen’s contact area for better weight distribution. Some collectors use small metal pins or wires embedded in the tack for extra support, though this requires drilling into the acrylic base—a permanent modification that should be carefully considered.
Displaying Delicate or Unusual Shapes
Specimens with unusual shapes, such as thin tabular crystals, long needle-like formations, or asymmetrical clusters, may be challenging to balance. For these pieces, custom-shaped acrylic bases or bases with carved recesses can provide better support. Alternatively, you can create a small “nest” of mineral tack shaped to cradle the specimen while keeping it visible from multiple angles.
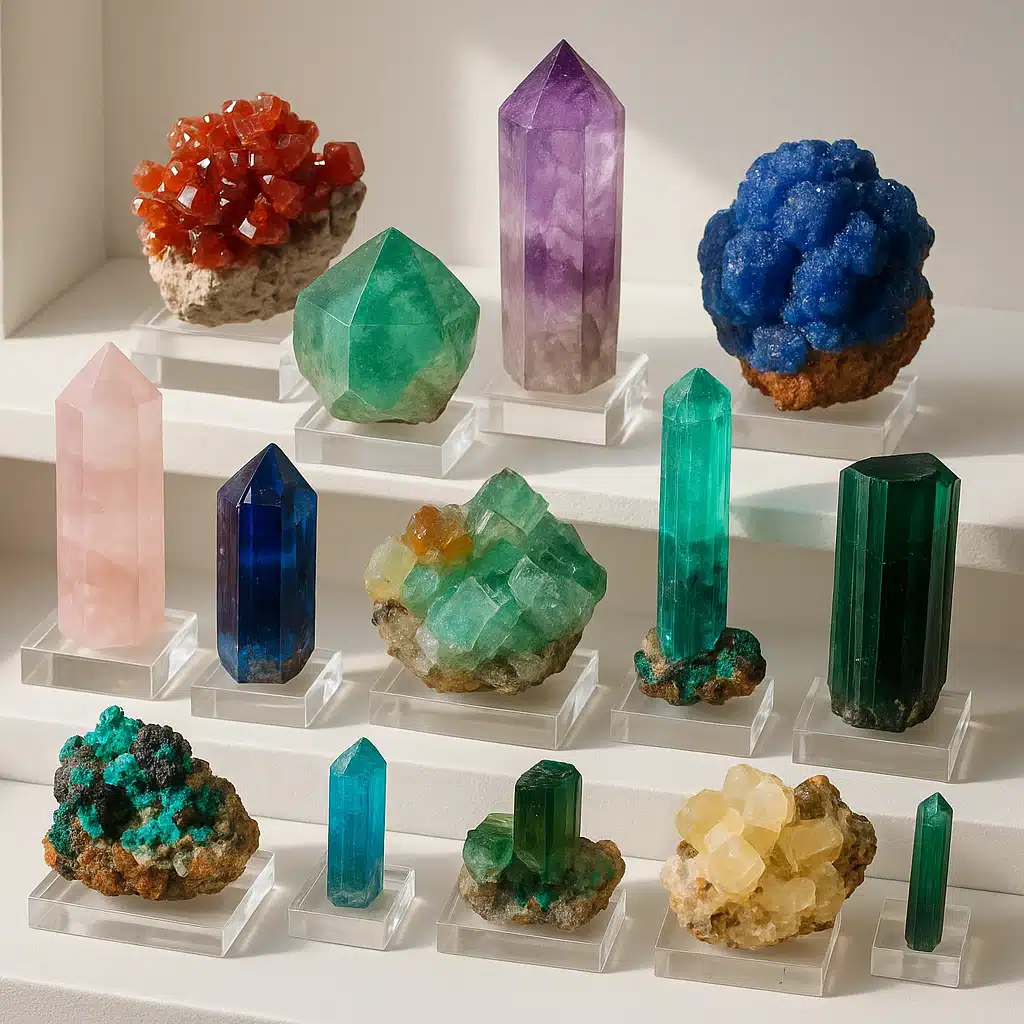
Creating Multi-Level Displays
For dramatic visual impact, consider using tiered or stepped acrylic bases that allow you to display multiple specimens at different heights. This approach works particularly well for showing a collection of related crystals or demonstrating size comparisons. Ensure each tier has adequate space and that specimens won’t touch if the display is moved.
Rotating Displays
Some collectors use motorized rotating bases to showcase crystals from all angles. If you plan to use rotating displays, ensure your mineral tack application is particularly secure and test the rotation at various speeds before placing the display in its final location.

Showcasing Your Mounted Collection
Once your crystals are properly mounted, the next consideration is how to display them effectively in your space. The right display approach can transform your collection from a personal hobby into a striking design element that enhances your environment.
Choosing the Right Location
Select display locations that protect your crystals while allowing them to be appreciated. Avoid areas with direct sunlight, which can fade colors in some minerals and cause acrylic bases to yellow over time. Similarly, keep specimens away from heat sources, high humidity areas, and locations where they might be easily bumped or knocked over. Sturdy shelving, dedicated display cabinets, or curio cases work well for most collections.
Lighting Considerations
Proper lighting dramatically enhances crystal displays. LED lights are ideal because they produce minimal heat and won’t damage specimens. Consider using spotlights to highlight particularly impressive pieces, or install LED strip lighting along shelves for even illumination. Some crystals, particularly translucent specimens like quartz or selenite, look spectacular when backlit.
Creating Visual Harmony
Arrange your mounted crystals with attention to visual balance. You might group specimens by color, size, mineral type, or geographic origin. Alternatively, create contrast by mixing sizes, shapes, and colors for a more eclectic look. Leave adequate space between specimens—crowding diminishes the impact of individual pieces and increases the risk of damage if one is removed or repositioned.
Adding Labels and Information
Consider adding small labels to your displays with information about each specimen—mineral name, location found, chemical composition, or interesting facts. This educational element enhances appreciation and serves as a conversation starter when sharing your collection with others. Small acrylic label holders or printed cards on matching acrylic bases maintain the professional aesthetic.

Common Questions and Troubleshooting
Even with careful attention to technique, you may encounter challenges when mounting crystals. Here are answers to frequently asked questions and solutions to common problems.
Can mineral tack support all crystal types and weights?
Mineral tack works excellently for small to medium-sized specimens, typically up to several hundred grams depending on the tack quality and amount used. For very heavy specimens (over 500 grams), you may need to supplement mineral tack with additional support methods, use specially formulated heavy-duty museum tack, or consider alternative mounting systems involving metal armatures or custom stands.
How do I properly clean acrylic bases?
Clean acrylic bases with a soft microfiber cloth and either plain water or a mixture of water with a small amount of mild dish soap. For stubborn marks or residue, use isopropyl alcohol. Never use abrasive cleaners, rough cloths, or paper towels, which can scratch the acrylic surface. Always wipe in straight motions rather than circular patterns to minimize visible scratching.
Can I reuse mineral tack?
Yes, mineral tack can be reused multiple times. However, it will gradually collect dust and debris, losing some of its adhesive properties over time. If your tack becomes dirty or no longer holds securely, it’s best to replace it with fresh material. Generally, tack should be replaced every few months to a year depending on how frequently you rearrange your collection.
What if my crystal keeps falling off the base?
If a crystal won’t stay mounted, first ensure you’re using enough mineral tack—don’t be too conservative. Work the tack thoroughly between your fingers to soften it before application. Check that both the crystal and base are completely clean and free of oils or dust. For specimens with very smooth surfaces or unusual weight distribution, try increasing the contact area by using more tack spread over a larger surface, or choose a base with a textured rather than smooth surface.
Will mineral tack damage or stain my crystals?
Quality mineral tack specifically designed for specimen mounting is formulated to be non-staining and non-damaging. However, avoid using generic adhesive putties or mounting products not intended for minerals, as these may contain oils or chemicals that could stain porous specimens. When in doubt, test on an inconspicuous area of a less valuable specimen first.
How do I remove mineral tack from a crystal?
To remove a crystal from its base, gently lift and twist the specimen while supporting the base. The mineral tack should release cleanly. If any tack remains on the crystal, roll it off with your finger or use a fresh piece of tack pressed against the residue—it will often stick to the fresh tack and pull away. Never use sharp tools to scrape tack off, as this may damage the crystal’s surface.
Can I use this mounting method outdoors?
Mineral tack and acrylic bases are designed for indoor use. Temperature fluctuations, humidity, UV exposure, and weather conditions can affect the tack’s adhesive properties and potentially damage both the acrylic and certain crystal types. If you wish to display crystals outdoors temporarily, monitor conditions closely and bring them indoors if weather changes.

Maintenance and Long-Term Care
Properly mounted crystals still require regular maintenance to keep them looking their best. Establishing a routine care schedule ensures your collection remains beautiful and well-preserved for years to come.
Regular Dusting
Dust your mounted crystals regularly using a soft brush, microfiber cloth, or compressed air. For delicate specimens with intricate formations, a soft artist’s brush or photographer’s lens brush works well to reach crevices without causing damage. Establish a dusting schedule—weekly for frequently handled areas, monthly for enclosed cabinets.
Periodic Remounting
Every few months, inspect your mounted specimens to ensure they remain secure. Check for any loosening of the mineral tack, particularly for heavier pieces or those in frequently moved displays. Replace tack as needed, and take this opportunity to reposition specimens for fresh presentation or to show different angles.
Environmental Monitoring
Monitor the environment where your crystals are displayed. Excessive humidity can affect some minerals and may impact the acrylic over time. Similarly, temperature fluctuations can cause expansion and contraction that might loosen mounted specimens. Maintain consistent conditions for optimal preservation.
Refreshing Your Display
Periodically refresh your display by rotating which crystals are prominently featured. This prevents overexposure to light for any single specimen, gives you the opportunity to rediscover pieces that may have been stored, and keeps your display interesting if you view it daily. Consider seasonal rotations or thematic arrangements to maintain visual interest.
Building Your Collection: Beyond the Basics
As your mounting skills develop and your collection grows, you may wish to explore more sophisticated display options and expand your knowledge of mineralogy and collecting practices.
Investing in Quality Specimens
While mounting techniques work for crystals at any price point, investing in quality specimens enhances your collection’s overall impact. Look for crystals with good clarity, vibrant colors, well-formed shapes, and minimal damage. Research reputable dealers and learn to identify quality markers in different mineral types.
Documentation and Cataloging
Serious collectors benefit from maintaining detailed records of their specimens, including acquisition information, mineral identification, locality data, and photographs. Digital cataloging systems or specialized collection software can help you track your collection’s growth and value over time.
Joining the Collector Community
Connect with other crystal and mineral enthusiasts through online forums, social media groups, or local gem and mineral clubs. These communities offer opportunities to learn, trade specimens, share display techniques, and deepen your appreciation of the hobby. Many experienced collectors are generous with advice and happy to help newcomers develop their skills.
Continuing Education
Expand your knowledge through books, online resources, museum visits, and educational programs focused on mineralogy and geology. Understanding the science behind crystal formation, learning to identify different mineral species, and discovering the geological processes that create these specimens adds depth and meaning to your collection.
Conclusion: Transforming Your Collection
Mounting crystals using mineral tack and acrylic bases is a skill that combines practical conservation with aesthetic presentation. This accessible technique allows collectors at any level to transform their specimens from loose stones into professionally displayed treasures worthy of admiration.
The process requires minimal investment in materials but offers maximum impact on your collection’s appearance and preservation. By following the techniques outlined in this guide—from selecting the right materials and mastering the mounting process to creating harmonious displays and maintaining your collection—you can showcase your crystals in a manner that highlights their natural beauty while protecting them for years to come.
Remember that mounting and displaying crystals is both an art and a science. Don’t be afraid to experiment with different arrangements, try new techniques, and develop your own style. Each crystal is unique, and the perfect mounting and display method may vary from specimen to specimen.
Whether you’re displaying a single spectacular piece as a focal point in your home, organizing an extensive collection for study and appreciation, or creating an eye-catching arrangement to share with guests, proper mounting techniques form the foundation of successful crystal display. Start with these basics, practice regularly, and watch as your collection transforms into a stunning showcase that reflects both the natural wonder of these geological formations and your dedication as a thoughtful collector.
Begin your mounting journey today, and discover how these simple techniques can elevate your entire crystal collecting experience. Your specimens deserve to be displayed at their best—and with mineral tack and acrylic bases, achieving professional-quality presentation is well within reach!