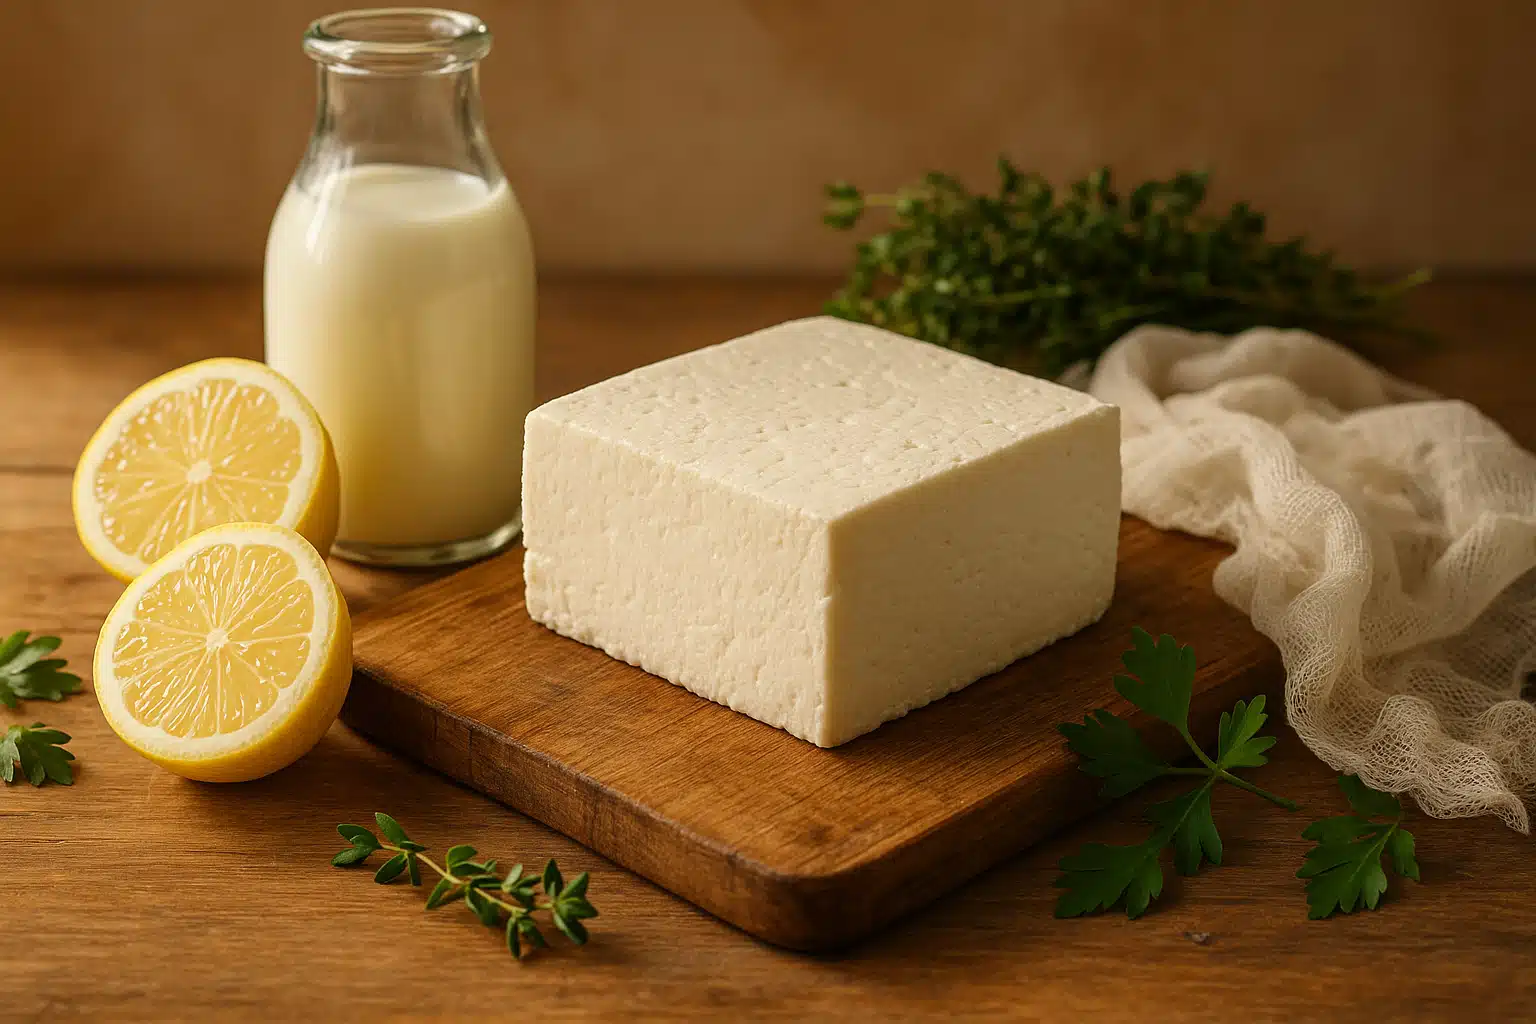
What is Paneer?
Paneer is a fresh, non-aged cheese widely celebrated in South Asian cuisines and increasingly popular worldwide. Unlike most traditional cheeses, paneer is characterized by its soft yet firm texture, mild milky flavor, and unique property of not melting when heated. This makes it exceptionally versatile for cooking methods ranging from grilling and frying to simmering in rich sauces.
What sets paneer apart from many other cheeses is that it doesn’t require rennet—an enzyme commonly derived from animal sources used in traditional cheese-making. Instead, paneer is made using simple acid coagulation, typically with lemon juice, vinegar, or other food-grade acids. This makes it naturally vegetarian-friendly and accessible to home cooks around the world, regardless of their access to specialized cheese-making ingredients.
The beauty of paneer lies in its simplicity and adaptability. Its mild flavor profile acts as a blank canvas, readily absorbing the spices, herbs, and seasonings it’s cooked with. This quality has made it a beloved ingredient not only in traditional curries and grilled dishes but also in modern fusion recipes, salads, sandwiches, wraps, and even desserts.
Why Make Paneer at Home?
Making paneer in your own kitchen offers numerous advantages that go beyond simply having fresh cheese on hand. Here’s why homemade paneer is worth considering:
Maximum Freshness
Homemade paneer delivers unparalleled freshness. When you make it yourself, you control exactly when it’s prepared and consumed, ensuring optimal texture and flavor. Store-bought versions may have been sitting on shelves for days or weeks, gradually losing their delicate taste and creamy consistency.
Complete Control Over Ingredients
When you make paneer at home, you decide exactly what goes into it. You can choose organic milk, control the salt content, avoid preservatives and stabilizers commonly found in commercial products, and ensure the quality meets your personal standards. This is particularly valuable for those with dietary restrictions or preferences.
Cost-Effectiveness
In many markets worldwide, fresh paneer can be expensive or difficult to find. Making it at home using simple, affordable ingredients like milk and lemon juice typically costs significantly less than purchasing equivalent amounts from specialty stores or international markets.
Customization Possibilities
Homemade paneer opens up creative possibilities. You can adjust the firmness by varying pressing time, infuse flavors by adding herbs, spices, or seasonings during preparation, or even experiment with different types of milk to create unique variations suited to specific recipes.
Simplicity and Satisfaction
The process of making paneer is remarkably straightforward, requiring minimal equipment and no specialized skills. The satisfaction of creating your own fresh cheese from scratch is rewarding and can inspire confidence to explore other homemade dairy products.

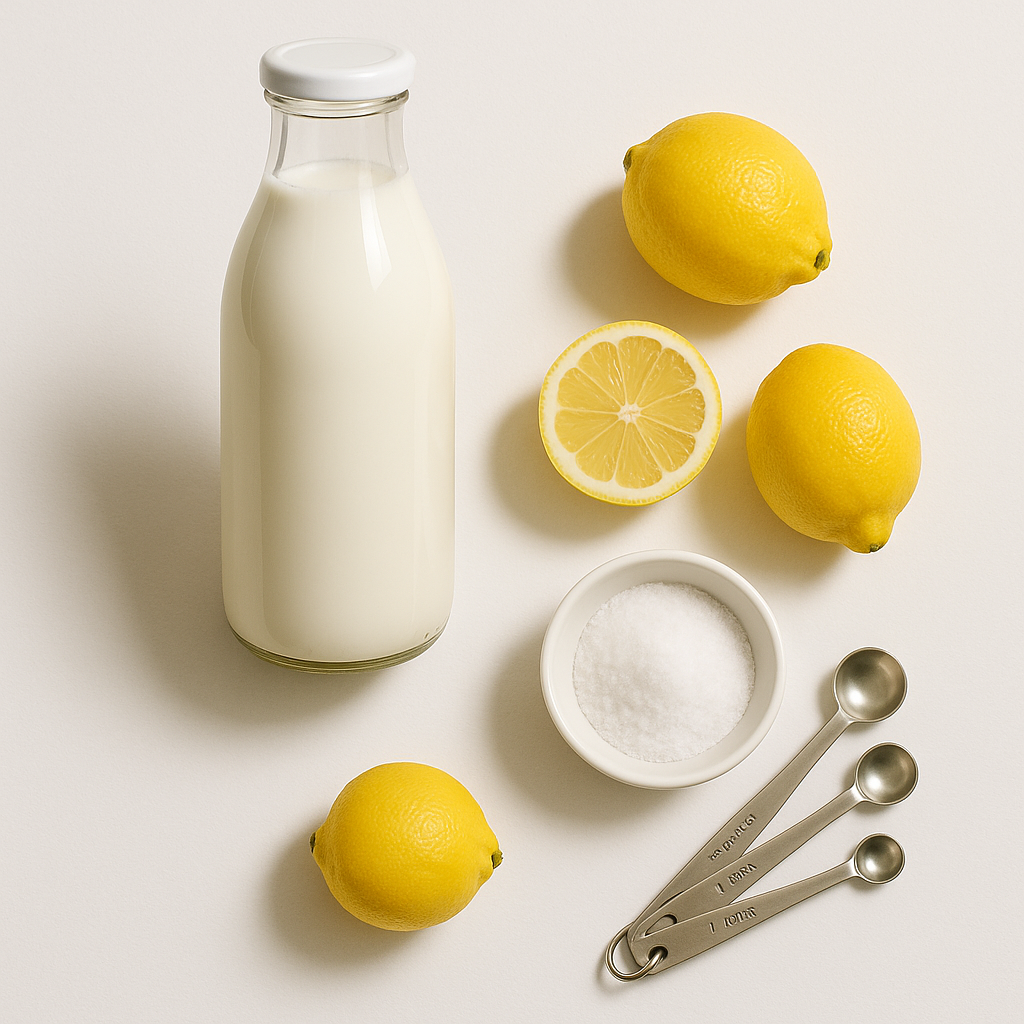
Ingredients You’ll Need
The beauty of paneer-making lies in its simplicity. You’ll need just a few basic ingredients that are readily available in grocery stores worldwide:
- Whole Milk (1 liter/approximately 4 cups): Full-fat milk produces the creamiest, most flavorful paneer. While you can use low-fat milk, the yield will be lower and the texture less rich. Avoid ultra-pasteurized milk when possible, as it may not curdle as effectively.
- Acid (2-3 tablespoons): Fresh lemon juice, white vinegar, or citric acid solution all work well. Lemon juice imparts a subtle citrus note, while vinegar offers a more neutral flavor. The acid causes the milk proteins to separate from the liquid whey.
- Salt (optional, to taste): A small pinch can enhance flavor, though many prefer to leave the paneer unsalted and season it during cooking.
- Cold Water: For rinsing the curds and removing any residual acidic taste.
That’s it! With these simple ingredients, you’re ready to create fresh, homemade cheese in your kitchen.
Equipment You’ll Need
Making paneer requires minimal specialized equipment. Most items are standard kitchen tools you likely already own:
- Heavy-Bottomed Pot: A thick-bottomed pot distributes heat evenly and prevents the milk from scorching on the bottom. A 2-3 liter capacity works well for standard batches.
- Wooden Spoon or Heat-Resistant Spatula: For stirring the milk and curds gently without scratching your pot.
- Colander or Strainer: A medium to large colander is essential for draining the whey from the curds.
- Cheesecloth or Muslin Fabric: These fine-weave fabrics allow liquid to drain while retaining the solid curds. Alternatively, a clean, thin kitchen towel can work in a pinch.
- Large Bowl: To catch the whey during straining (which can be saved for other culinary uses).
- Weight or Heavy Object: A small pot, plate, or can placed on top of the wrapped curds helps press out excess moisture and create firm paneer.
- Thermometer (optional): While not essential, a kitchen thermometer helps monitor milk temperature for consistent results.
Step-by-Step Guide to Making Paneer
Follow these detailed steps to create perfect homemade paneer every time:
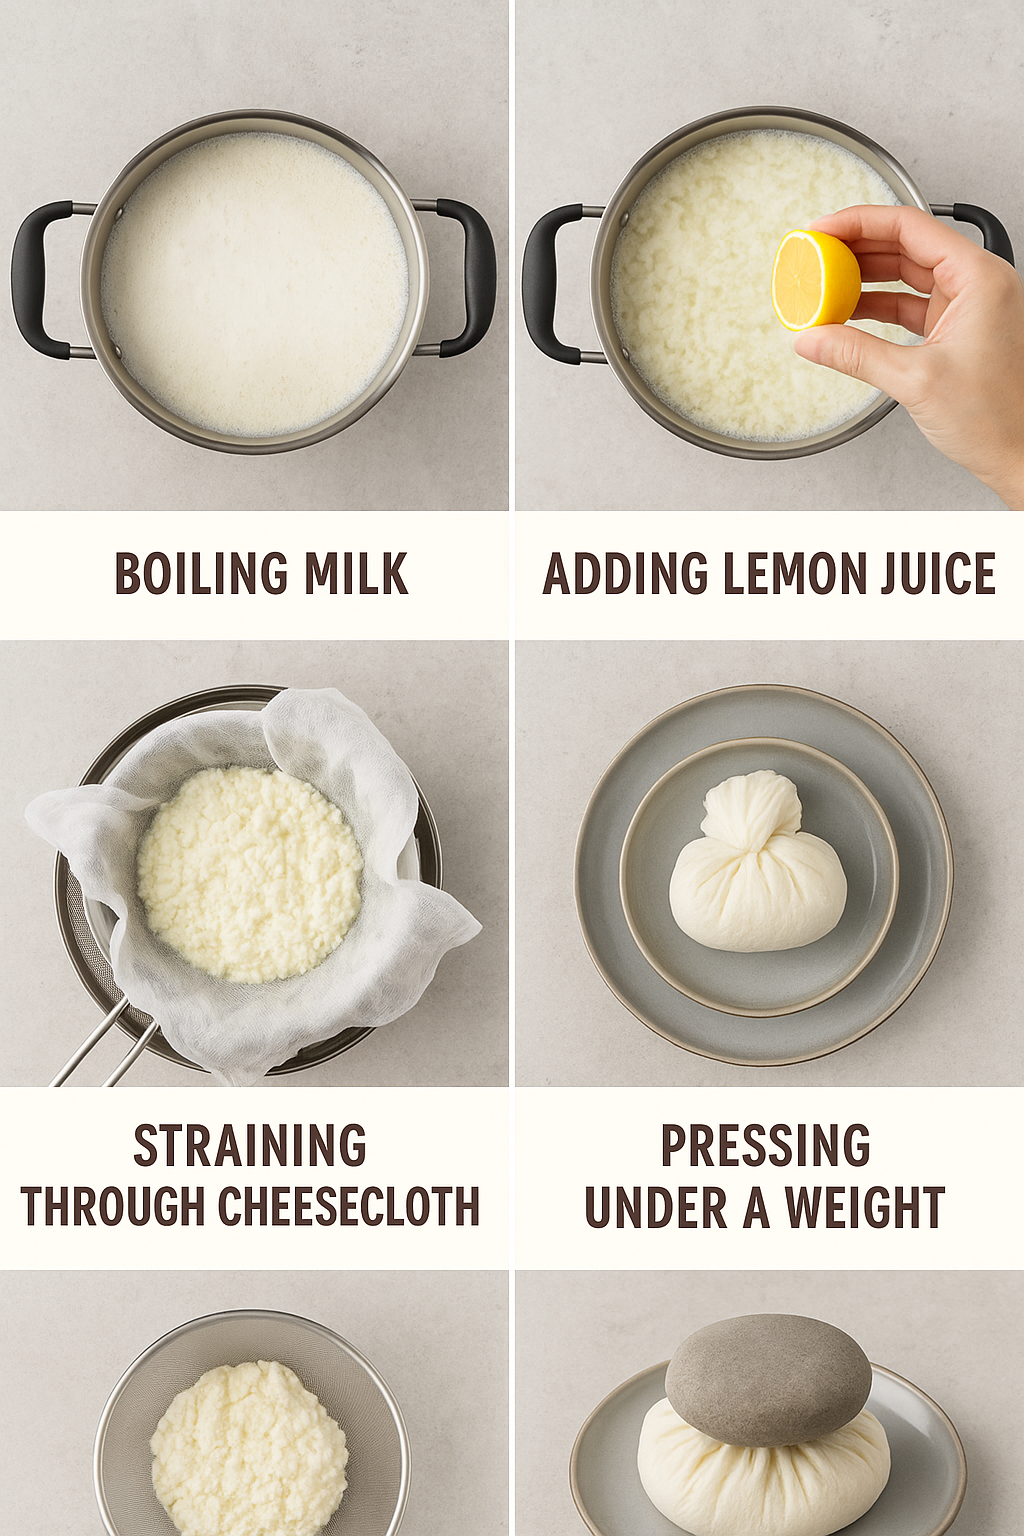
Step 1: Heat the Milk
Pour your milk into the heavy-bottomed pot and place it over medium heat. Stir occasionally to prevent a skin from forming on the surface and to ensure the milk doesn’t scorch on the bottom. You want to bring the milk to a gentle, rolling boil—this typically takes 8-12 minutes depending on your stove and the amount of milk. Watch carefully as milk can boil over quickly once it reaches temperature.
The ideal temperature for curdling is around 85-90°C (185-195°F). If you have a thermometer, this is a helpful guide, but visual cues work just as well—look for steady bubbling and steam rising from the surface.
Step 2: Add the Acid and Curdle the Milk
Once the milk reaches a boil, reduce the heat to low. Slowly drizzle in your lemon juice or vinegar while gently stirring the milk. You should see an almost immediate reaction—the milk will begin to separate into solid white curds and translucent yellowish whey. Continue stirring gently for another 30-60 seconds to ensure complete separation.
If the milk doesn’t fully separate (you’ll still see milky-white whey), add another tablespoon of acid and stir again. The whey should become relatively clear when curdling is complete. Be careful not to add too much acid, as this can make the paneer taste sour and affect the texture.
Step 3: Strain the Curds
Line your colander with several layers of cheesecloth or muslin and place it over a large bowl to catch the whey. Carefully pour the curdled milk mixture into the lined colander. The liquid whey will drain through while the solid curds remain in the cloth.
Let it sit for 2-3 minutes to allow most of the whey to drain naturally. Then, rinse the curds under cold running water for 15-20 seconds. This crucial step removes any residual acidic taste and stops the cooking process, helping to preserve the paneer’s mild, fresh flavor.
Step 4: Press and Shape the Paneer
Gather the edges of the cheesecloth and twist gently to squeeze out excess whey. Don’t squeeze too hard at this stage—you want to remove liquid but keep the curds moist enough to bind together.
Place the wrapped curds on a flat surface (a plate or cutting board works well). Flatten the bundle into a disc shape, about 2-3 cm (1 inch) thick. Place a flat, heavy object on top—a small pot filled with water, a heavy plate, or a few cans work perfectly.
The pressing time determines your paneer’s firmness:
- 15-20 minutes: Soft, crumbly paneer ideal for desserts or dishes where you want it to break apart
- 30-45 minutes: Medium-firm paneer suitable for most cooking applications
- 1-2 hours: Firm paneer perfect for grilling, frying, or cubing without crumbling
Step 5: Unwrap and Use
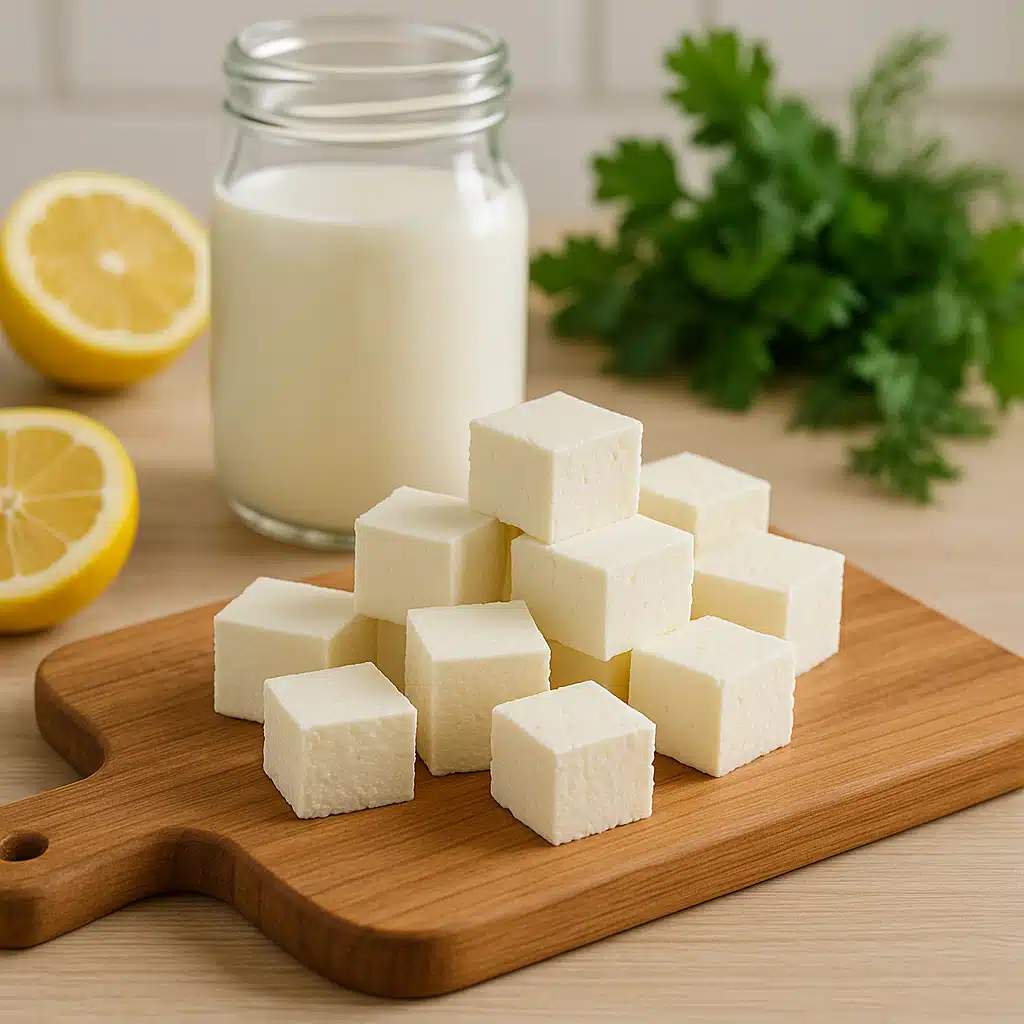
After pressing, carefully unwrap the paneer. You should have a smooth, cohesive block of fresh cheese. Cut it into cubes, slices, or crumble it according to your recipe needs.
Fresh paneer can be used immediately or stored in the refrigerator. For storage, place it in an airtight container, optionally submerged in cold water (changed daily), for up to 3-4 days. For longer storage, you can freeze paneer for up to 3 months, though the texture may become slightly more crumbly after thawing.
Common Challenges and Solutions
Even though making paneer is straightforward, beginners may encounter a few common issues. Here’s how to troubleshoot them:
Milk Not Curdling Properly
Problem: The milk doesn’t separate into clear curds and whey, remaining cloudy or milky.
Solution: Add another tablespoon of acid (lemon juice or vinegar) and stir gently. Ensure the milk was hot enough—it should be at a full boil before adding acid. Ultra-pasteurized milk sometimes resists curdling; try a different brand or look for milk labeled simply “pasteurized.”
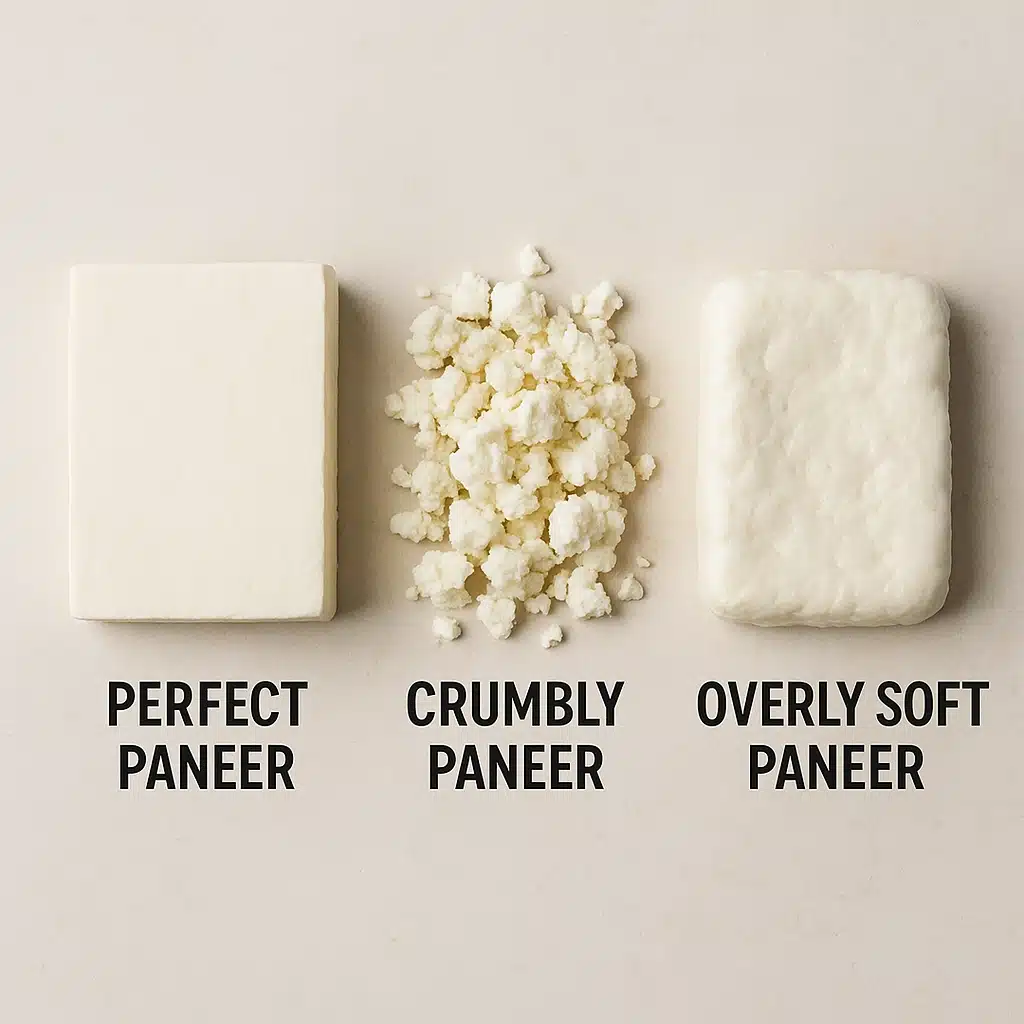
Paneer Too Crumbly or Dry
Problem: The finished paneer falls apart easily or has a dry, grainy texture.
Solution: You may have added too much acid, over-cooked the curds, or pressed too hard/long. Next time, use slightly less acid, remove from heat immediately after curdling, and reduce pressing time. Rinsing with cold water promptly also helps maintain moisture.
Paneer Too Soft or Doesn’t Hold Shape
Problem: The paneer is too soft and won’t hold its shape when cut or cooked.
Solution: Press the paneer longer with more weight. Ensure you’re using whole milk rather than low-fat varieties, as fat content affects firmness. You can also let it drain longer before pressing to remove more whey.
Sour or Acidic Taste
Problem: The finished paneer has an unpleasant sour or acidic flavor.
Solution: This usually means too much acid was used or the curds weren’t rinsed thoroughly. Always rinse the curds well under cold water after straining, and use only the minimum acid needed to achieve separation. Start with 2 tablespoons and add more only if necessary.
Low Yield
Problem: You get much less paneer than expected from your milk.
Solution: Always use whole, full-fat milk for maximum yield. Low-fat or skim milk produces significantly less paneer. Also, ensure complete curdling—the whey should be translucent, not cloudy with milk proteins.
Tips for Perfect Paneer Every Time
- Use Fresh, Quality Milk: The fresher your milk, the better your paneer will taste. Full-fat milk gives the richest results.
- Don’t Skip the Rinsing Step: Rinsing removes acidic flavors and gives your paneer a clean, mild taste.
- Control Pressing Time: Adjust firmness based on your intended use—less time for soft, more for firm.
- Save the Whey: Don’t discard the liquid whey! It’s nutritious and can be used in bread-making, smoothies, cooking grains, or even as a plant fertilizer.
- Experiment with Flavors: Try adding crushed garlic, herbs like cilantro or mint, or spices like cumin to the curds before pressing for flavored paneer.
- Room Temperature is Fine: You don’t need to refrigerate paneer immediately if you’re using it within a few hours—it can sit at room temperature while you prepare your dish.
Creative Ways to Use Your Homemade Paneer
Once you’ve mastered making paneer, the culinary possibilities are virtually endless. Here are some popular and creative ways to use your fresh cheese:
Traditional Dishes
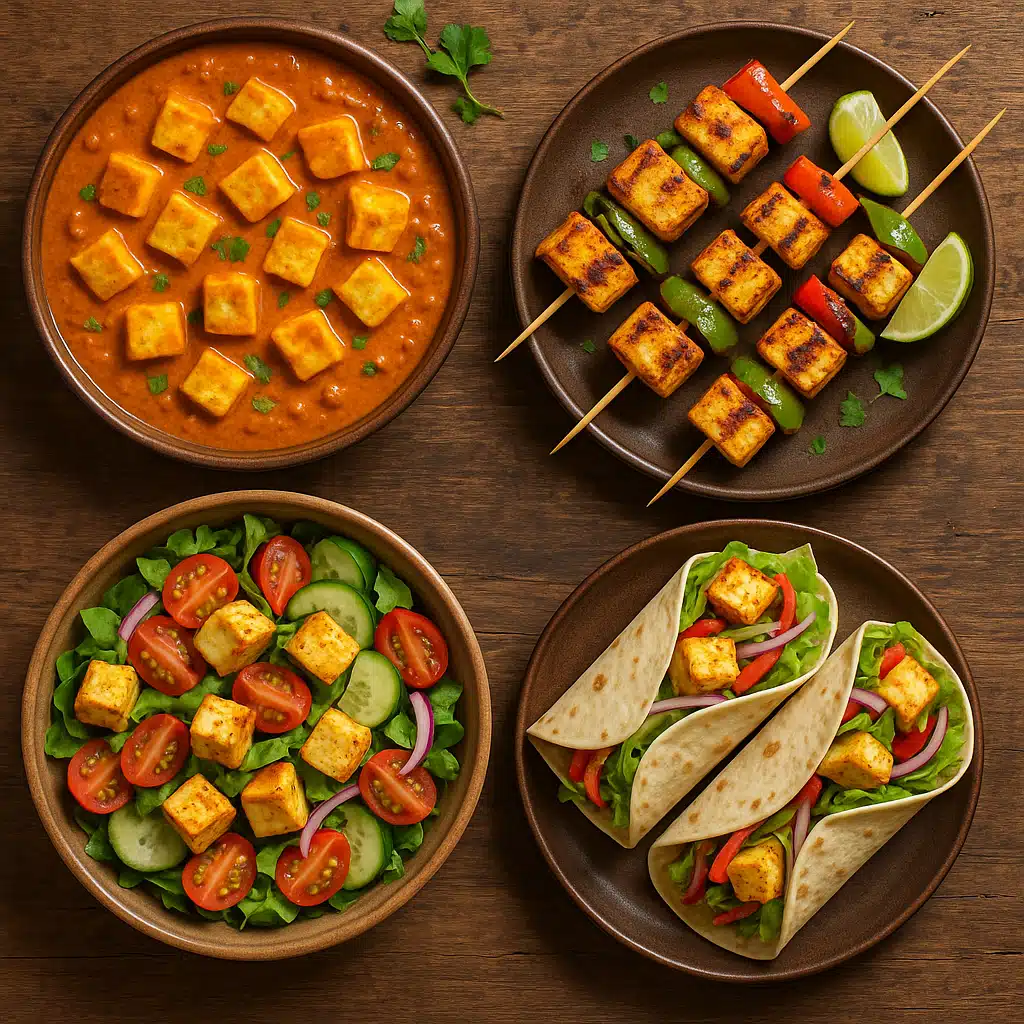
- Curries and Gravies: Paneer cubes simmer beautifully in rich, spiced sauces without melting or losing shape.
- Grilled or Tandoori Style: Marinate paneer in spiced yogurt and grill or bake for smoky, flavorful results.
- Stir-Fries: Toss paneer cubes with vegetables and sauces for quick, protein-rich meals.
Modern Fusion Applications
- Salads: Grilled or fried paneer adds protein and substance to fresh green salads.
- Wraps and Sandwiches: Layer paneer with vegetables in wraps, pitas, or sandwiches for satisfying vegetarian meals.
- Pizza Topping: Cubed or crumbled paneer makes an excellent pizza topping that won’t melt away.
- Scrambles: Crumble paneer and cook with vegetables as a high-protein breakfast alternative.
- Desserts: Soft paneer works wonderfully in sweet dishes, from cheesecake-style desserts to traditional milk-based sweets.
Nutritional Benefits of Paneer
Beyond its culinary versatility, paneer offers several nutritional advantages:
- High-Quality Protein: Paneer is an excellent source of complete protein, making it valuable for vegetarians and anyone looking to increase protein intake.
- Rich in Calcium: As a dairy product, paneer provides significant calcium for bone health.
- Contains Beneficial Fats: When made from whole milk, paneer contains healthy fats that promote satiety and nutrient absorption.
- B Vitamins: Paneer provides B-complex vitamins essential for energy metabolism.
- Low Carbohydrate: Naturally low in carbs, paneer fits well into various dietary approaches including low-carb and ketogenic diets.
As with all foods, moderation is key, especially since paneer is relatively high in calories and saturated fat when made from full-fat milk.
Storing and Preserving Homemade Paneer
Proper storage ensures your homemade paneer stays fresh and maintains its texture:
Short-Term Storage (3-4 Days)
Place paneer in an airtight container in the refrigerator. For best results, submerge it in cold water, changing the water daily. This keeps it moist and fresh. Alternatively, wrap it tightly in plastic wrap or parchment paper.
Freezing (Up to 3 Months)
Cut paneer into portion-sized pieces, wrap individually in plastic wrap, then place in a freezer-safe bag or container. Thaw in the refrigerator before use. Note that frozen paneer may become slightly more crumbly but remains perfectly usable for cooking.
Signs of Spoilage
Discard paneer if it develops an off smell, slimy texture, visible mold, or sour taste beyond its natural mild tanginess. Fresh paneer should smell clean and milky.
Frequently Asked Questions
Can I use low-fat or skim milk?
Yes, but the yield will be lower and the texture less creamy. Whole milk produces the best-quality paneer with optimal taste and texture.
What can I use instead of lemon juice?
White vinegar, apple cider vinegar, citric acid dissolved in water, or even yogurt can work as curdling agents. Each imparts a slightly different flavor profile.
Why is my paneer rubbery?
Over-pressing or using too much acid can create a rubbery texture. Reduce pressing time and weight, and use the minimum acid needed for curdling.
How much paneer does 1 liter of milk make?
Typically, 1 liter of whole milk yields approximately 150-200 grams (5-7 ounces) of paneer, depending on the milk’s fat content and how much moisture is pressed out.
Is paneer suitable for lactose-intolerant individuals?
Paneer contains less lactose than milk since much of it drains away with the whey, but it’s not lactose-free. Those with severe intolerance should exercise caution or avoid it.
Conclusion: Embrace the Art of Homemade Cheese-Making
Making paneer at home is a rewarding culinary skill that combines simplicity with versatility. With just milk, acid, and basic kitchen equipment, you can create fresh, preservative-free cheese tailored to your exact preferences. Whether you’re exploring traditional recipes, creating modern fusion dishes, or simply seeking a healthier, more economical alternative to store-bought options, homemade paneer delivers on all fronts.
The process is forgiving enough for beginners yet offers room for experimentation as you develop your technique. From controlling firmness to infusing custom flavors, each batch is an opportunity to refine your craft. Beyond the practical benefits of cost savings and ingredient control, there’s genuine satisfaction in transforming simple milk into delicious, versatile cheese in your own kitchen.
Start with the basic recipe outlined above, and don’t be discouraged by minor imperfections in your first attempts. Like any cooking skill, paneer-making improves with practice. Soon you’ll be confidently producing restaurant-quality fresh cheese whenever the craving strikes, opening up a world of culinary possibilities limited only by your imagination.
Gather your ingredients, set aside 30 minutes, and discover why countless home cooks around the world have embraced this ancient yet wonderfully simple cheese-making tradition.