Understanding Cheese Presses: An Essential Tool for Home Cheesemaking
Cheesemaking at home has become an increasingly popular craft worldwide, offering enthusiasts the opportunity to create artisanal cheese varieties in their own kitchens. From soft, creamy varieties to aged hard cheeses, the possibilities are endless. However, achieving professional-quality results requires the right equipment, and a cheese press is one of the most critical tools in any home cheesemaker’s arsenal. Whether you’re just beginning your cheesemaking journey or looking to enhance your existing setup, understanding cheese presses and selecting the right one will significantly impact the quality and consistency of your final product.
The Importance of Using a Dedicated Cheese Press
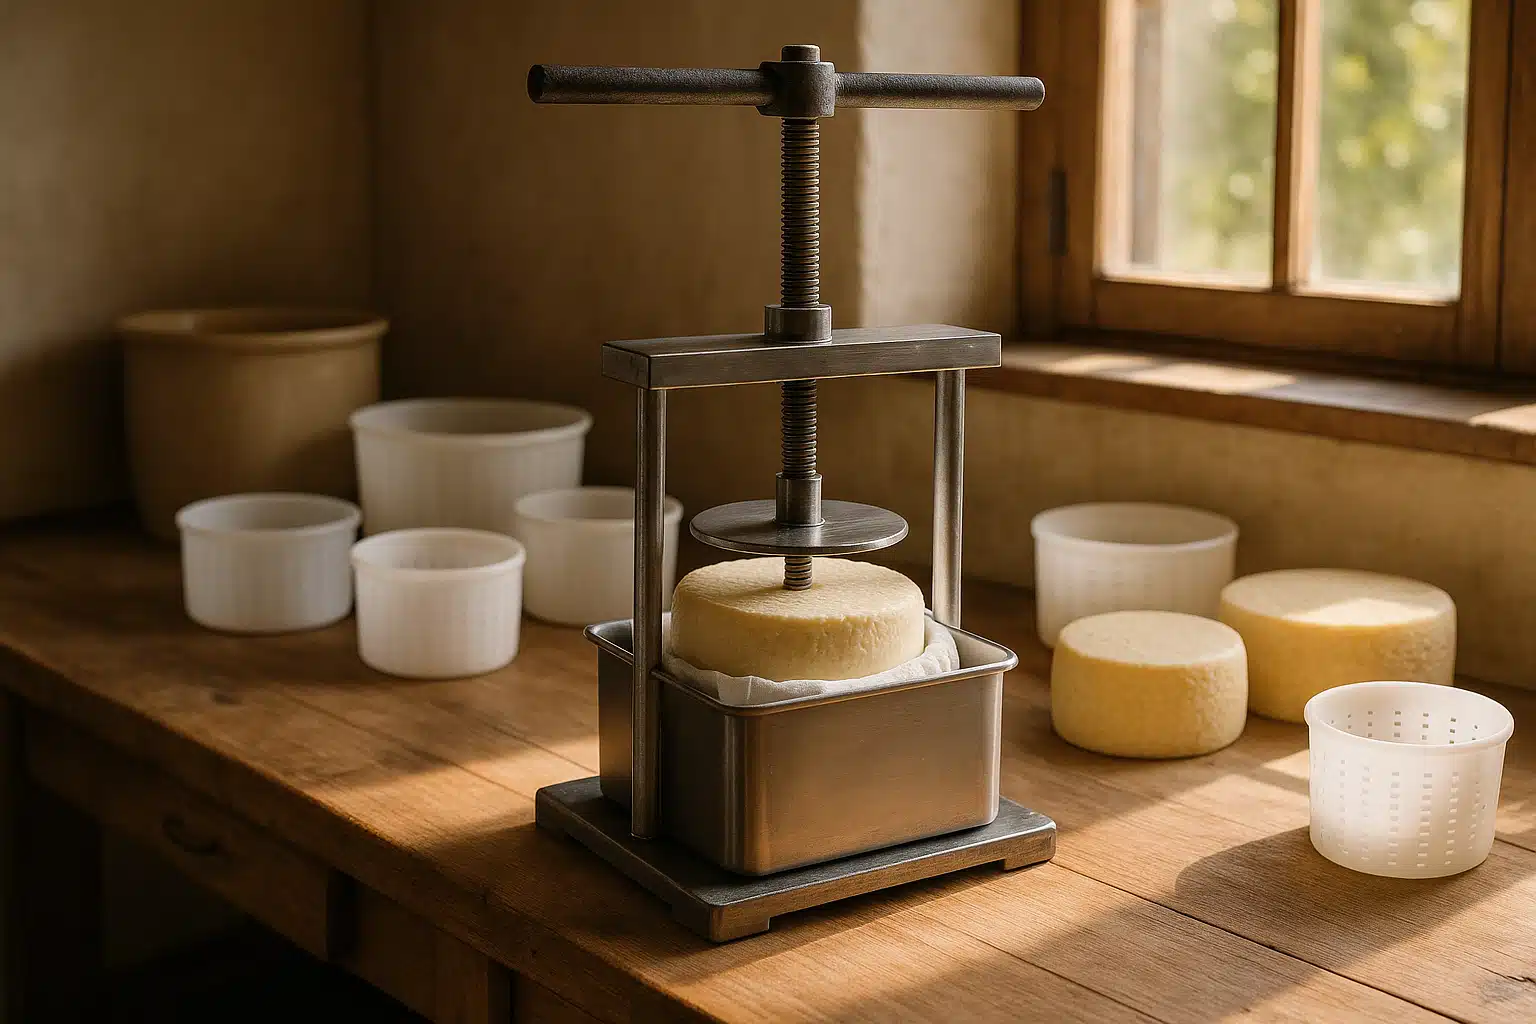
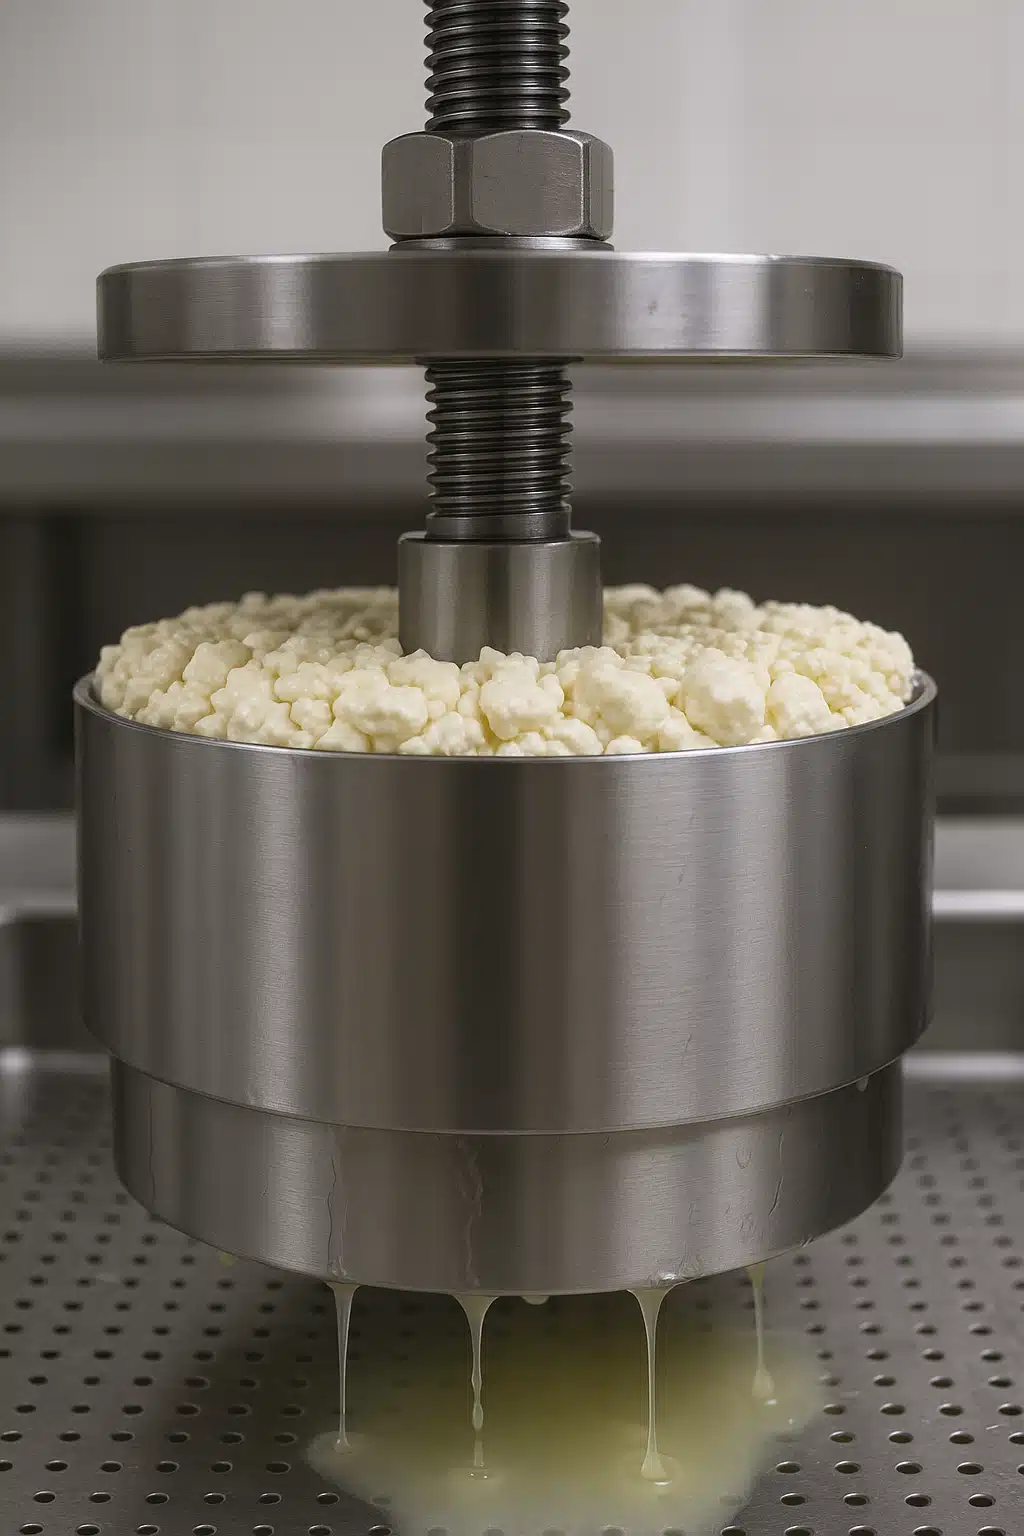
Many beginners in cheesemaking wonder whether a specialized cheese press is truly necessary. While improvised methods using household items like heavy pots, books, or weights might seem like viable alternatives, they rarely deliver the consistent results that a purpose-built cheese press provides. The fundamental purpose of a cheese press is to apply controlled, even pressure to cheese curds, expelling excess whey while shaping the cheese into its final form. This process is crucial for achieving the proper texture, moisture content, and structural integrity that define quality cheese.
A dedicated cheese press offers several distinct advantages over makeshift solutions. First, it distributes pressure uniformly across the entire surface of the cheese, preventing uneven moisture removal that can create pockets, cracks, or inconsistent texture. Second, adjustable pressure settings allow you to fine-tune the compression based on the specific cheese variety you’re creating—soft cheeses require gentle pressure, while hard aged cheeses need substantial force. Third, proper cheese presses are designed with food safety in mind, using materials that won’t contaminate your cheese or harbor bacteria. Finally, the convenience and repeatability of a quality press eliminate guesswork, helping you achieve consistent results batch after batch.
Essential Features to Consider When Choosing a Cheese Press
Selecting the right cheese press requires careful consideration of several key features that will affect both your cheesemaking experience and the quality of your final product. Understanding these characteristics will help you make an informed decision that matches your specific needs and goals.
Construction Materials and Durability
The materials used in a cheese press directly impact its longevity, safety, and ease of maintenance. Stainless steel is widely considered the gold standard for cheese press construction due to its exceptional durability, resistance to corrosion, and ease of cleaning. Stainless steel doesn’t absorb odors or flavors and can withstand repeated sanitization without degrading. High-quality food-grade plastics offer a lighter, more affordable alternative, though they may not provide the same longevity. Wooden presses, while traditional and aesthetically pleasing, require more careful maintenance to prevent bacterial growth and moisture damage. Avoid presses with materials that contain BPA or other potentially harmful chemicals that could leach into your cheese.
Pressure Adjustment Capabilities
Different cheese varieties require different pressing pressures and durations. Soft cheeses like feta or chevre need minimal pressure, typically ranging from 2 to 5 kilograms, while semi-hard cheeses like gouda require moderate pressure between 10 to 20 kilograms. Hard cheeses such as cheddar or parmesan demand substantial pressure, sometimes exceeding 25 kilograms or more. A versatile cheese press should offer easy adjustment mechanisms—whether through spring-loaded systems, weight additions, or screw-type compression—allowing you to precisely control the pressure applied throughout the pressing process. Some advanced models include pressure gauges or indicators that help you monitor the exact force being applied.
Capacity and Size Considerations
Cheese presses come in various sizes, designed to accommodate different batch volumes. Consider how much cheese you plan to make regularly. Smaller presses typically handle cheese molds up to 1-2 kilograms, perfect for beginners or those making cheese for personal consumption. Medium-sized presses can accommodate 2-4 kilogram batches, suitable for regular home production or small-scale gifting. Larger presses, designed for 5 kilograms or more, are ideal for serious enthusiasts or those producing cheese for small markets or events. Keep in mind that a larger press takes up more storage space and may be unnecessarily complex if you’re only making occasional small batches.
Cleaning and Maintenance Requirements
Hygiene is paramount in cheesemaking, as contamination can ruin entire batches and potentially pose health risks. The ideal cheese press should disassemble easily for thorough cleaning and sanitization after each use. Look for designs with minimal crevices where moisture and bacteria might accumulate. Smooth surfaces are easier to sanitize than textured or porous materials. Consider whether components are dishwasher-safe or require hand washing. Some presses include removable parts that can be soaked or boiled for deep cleaning, which is particularly valuable when switching between different cheese types to prevent cross-contamination of cultures and flavors.
Included Accessories and Compatibility
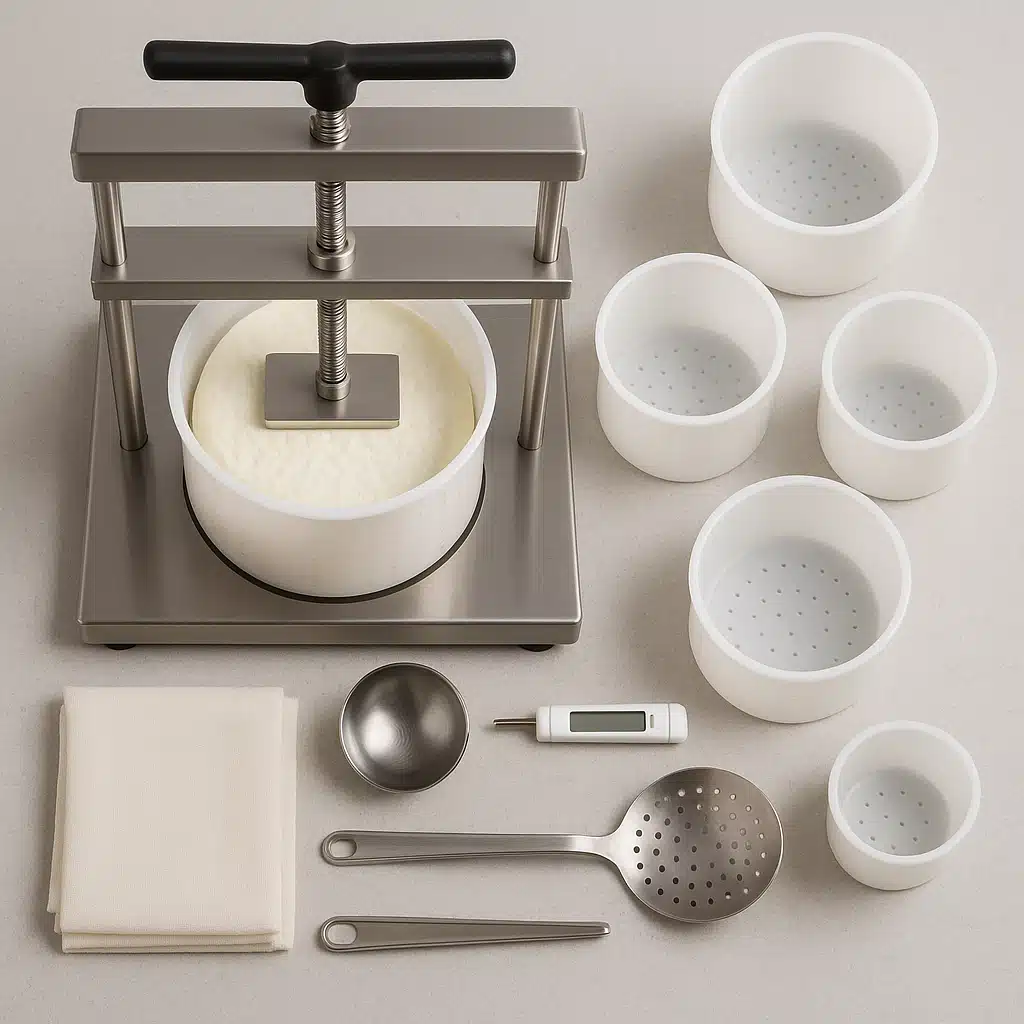
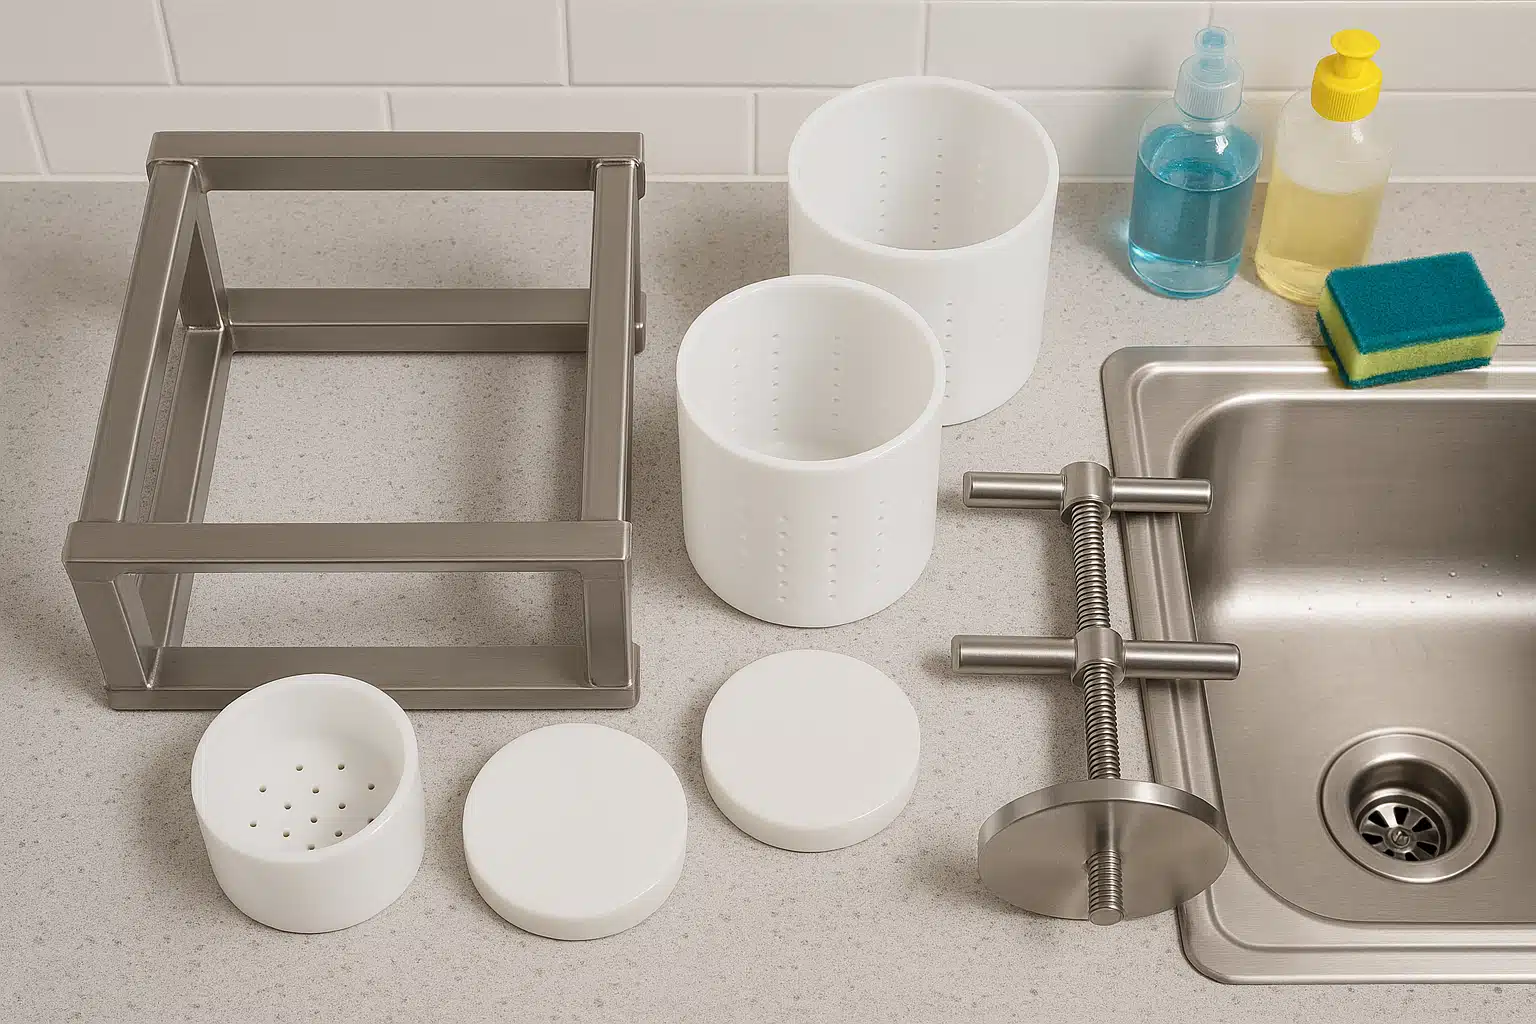
Some cheese presses are sold as complete kits including cheese molds, followers (the disc that sits atop the curds during pressing), cheesecloth, and sometimes even cultures or rennet to get you started immediately. Others are sold as standalone units, requiring you to purchase compatible molds separately. Check the dimensions and specifications to ensure the molds you already own or plan to purchase will fit the press. Universal designs that accommodate various mold sizes offer greater flexibility as your cheesemaking skills expand. Additional features like drip trays to catch expelled whey, stabilizing bases to prevent tipping, and ergonomic handles for easy operation can significantly enhance your cheesemaking experience.
Types of Cheese Presses Available for Home Cheesemakers
Cheese presses come in several distinct designs, each with unique advantages and ideal use cases. Understanding the different types will help you select the model that best fits your cheesemaking style and requirements.
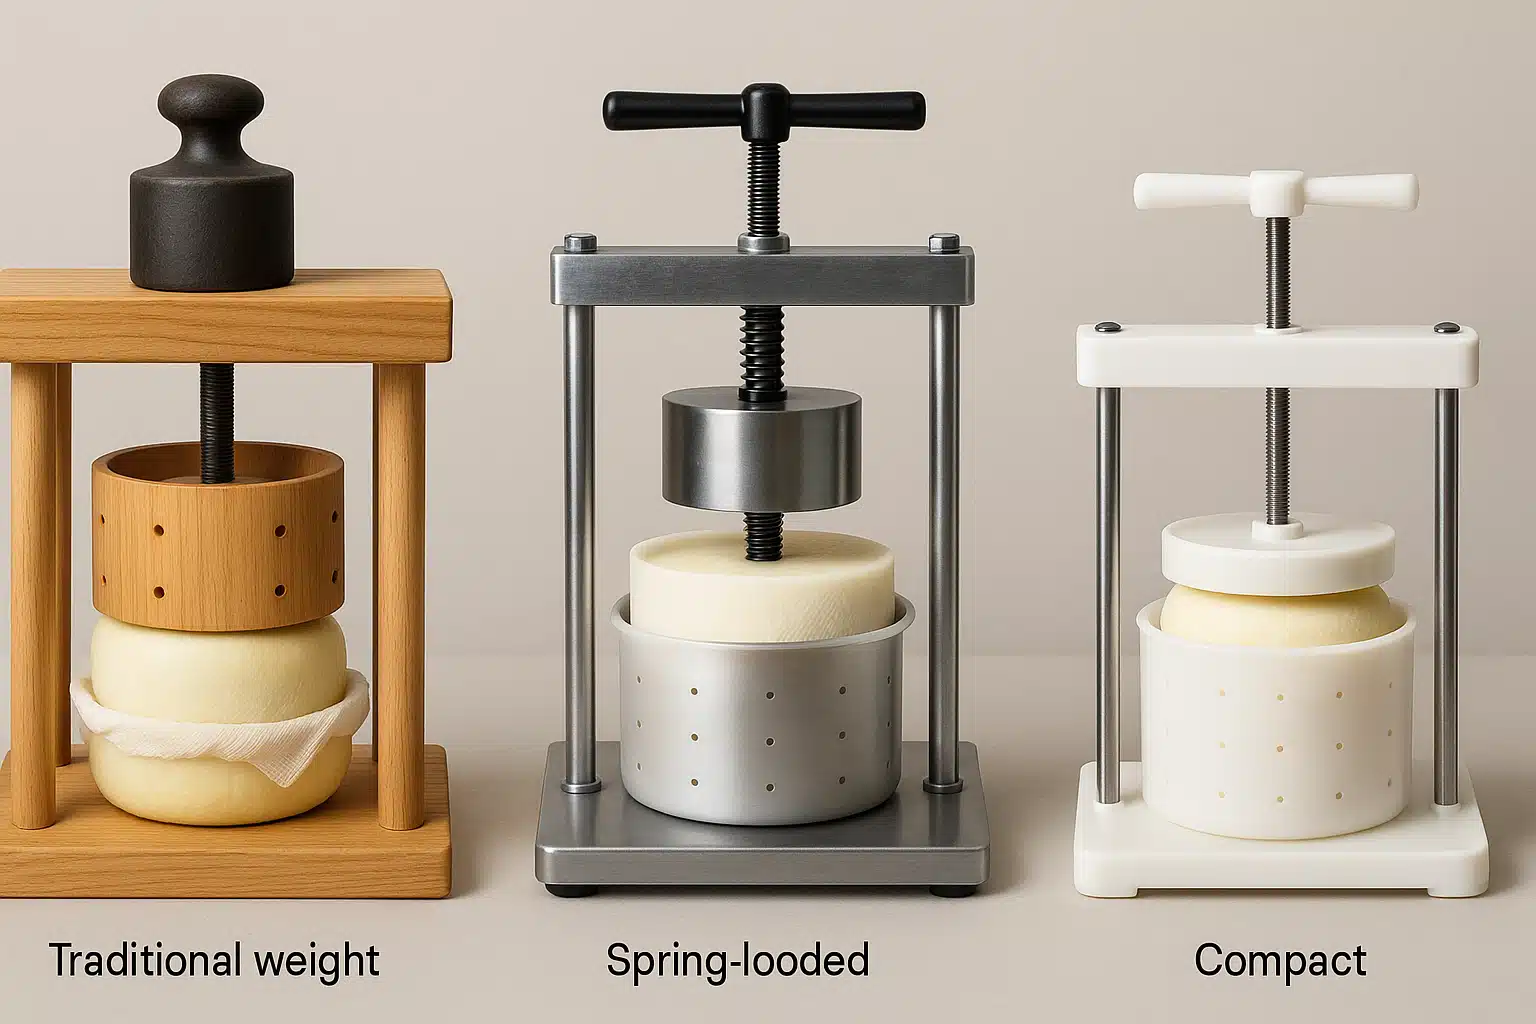
Traditional Weight-Based Presses
Weight-based cheese presses operate on a simple yet effective principle: gravity and added weights provide the pressing force. These presses typically feature a platform or basket to hold the cheese mold, with a lever arm or direct weight system that applies pressure. Users add calibrated weights or common household items to achieve the desired pressure level. The advantages of weight-based systems include their simplicity, reliability with no mechanical parts to break, and precise control when using calibrated weights. However, they can be bulky, require storage space for multiple weights, and demand more manual adjustment when changing pressure levels during the pressing process.
Spring-Loaded and Screw-Type Presses
Spring-loaded presses use mechanical springs or threaded screws to generate compression force. By turning a handle or adjusting a screw, you can increase or decrease the pressure applied to the cheese. These designs are generally more compact than weight-based systems and allow for quick pressure adjustments without adding or removing physical weights. Spring-loaded models often include pressure indicators showing approximate force levels. The main considerations with these presses are the quality of the spring or screw mechanism—cheaper versions may lose tension over time or provide inconsistent pressure. High-quality models, however, offer excellent convenience and repeatability.
Dutch-Style Presses
Dutch-style cheese presses feature a distinctive design with a wide, stable base and a lever arm that provides mechanical advantage. These traditional presses have been used for generations in European cheesemaking and remain popular due to their elegant simplicity and effectiveness. The lever system allows for substantial pressure with minimal weight, and the wide base ensures stability during pressing. Dutch-style presses are particularly well-suited for making traditional cheese varieties and often have a charming aesthetic that makes them attractive kitchen displays. They typically require more counter or storage space than compact modern designs.
Compact and Portable Designs
For those with limited space or who want to make cheese while traveling or in temporary locations, compact cheese presses offer a practical solution. These smaller units often use screw-type compression in a vertical design that minimizes footprint. While they may not provide the same pressing capacity as larger models, they’re ideal for beginners, small batches, or as secondary presses for making multiple cheese varieties simultaneously. The portability and easy storage make them particularly appealing for apartment dwellers or those who make cheese occasionally rather than as a regular practice.
Selecting the Right Cheese Press for Your Skill Level
Your experience level in cheesemaking should significantly influence your choice of cheese press. Different skill stages benefit from different features and capabilities.
Best Options for Beginners
If you’re new to cheesemaking, prioritize simplicity, affordability, and ease of use. A compact screw-type or spring-loaded press is often ideal for beginners. Look for complete starter kits that include the press, molds, cheesecloth, and basic instructions. These all-in-one packages remove the guesswork from equipment compatibility and get you making cheese immediately. Focus on presses designed for smaller batches—1 to 2 kilograms—which allow you to experiment without significant investment of time or ingredients. User-friendly designs with clear pressure indicators help you follow recipes accurately without requiring advanced knowledge of cheesemaking physics.
Intermediate Cheesemaker Considerations
Once you’ve mastered basic techniques and are ready to expand your repertoire, consider upgrading to a more versatile press that can handle various cheese types and larger batches. At this stage, adjustability becomes crucial—you’ll be making different varieties that require different pressing profiles. A quality stainless steel press with precise pressure control and the ability to accommodate multiple mold sizes will serve you well. Consider models that allow for simultaneous pressing of multiple cheeses, letting you experiment with different recipes or maintain a regular production schedule. Durability becomes more important as you’ll be using the press frequently, justifying investment in higher-quality construction.
Advanced and Commercial-Scale Requirements
Experienced cheesemakers or those producing for small commercial operations need professional-grade equipment that can withstand heavy, continuous use. Look for heavy-duty construction, typically in stainless steel, with robust pressure mechanisms rated for thousands of pressing cycles. Capacity becomes critical—consider presses that handle 5 kilograms or more, or invest in multiple presses to run simultaneous batches. Advanced features like pressure gauges, timer integration, and specialized mold configurations for specific cheese types justify their higher cost through improved efficiency and consistency. At this level, warranty and manufacturer support become important factors, as equipment downtime can affect production schedules.

Understanding Cheese Pressing Techniques and Best Practices
Owning a quality cheese press is only part of the equation—understanding proper pressing techniques ensures optimal results. The pressing process involves several stages, each critical to developing the desired characteristics in your cheese.
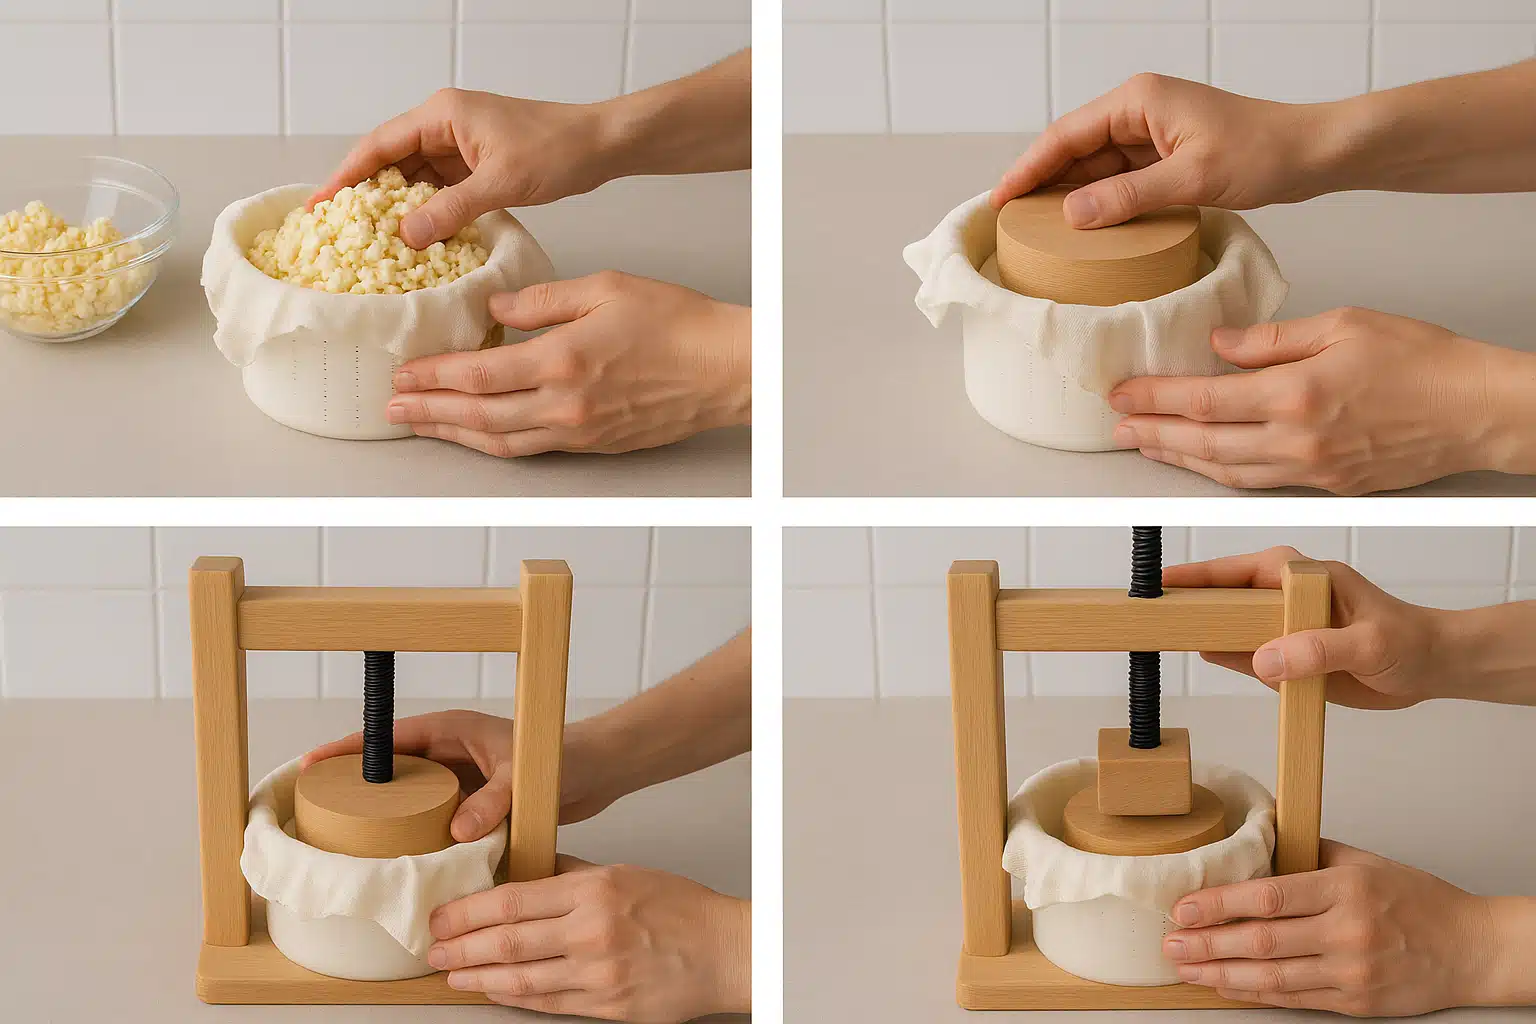
Before pressing begins, prepare your molds by lining them with clean cheesecloth, ensuring no wrinkles that might imprint on the cheese surface. Drain the curds thoroughly before transferring them to the mold, as excessive moisture can lead to uneven pressing and poor texture development. Begin with light pressure to allow the curds to knit together without creating stress fractures. Many recipes call for progressive pressing—starting with low pressure and gradually increasing over several hours or days, with periodic cloth changes to remove expelled whey.
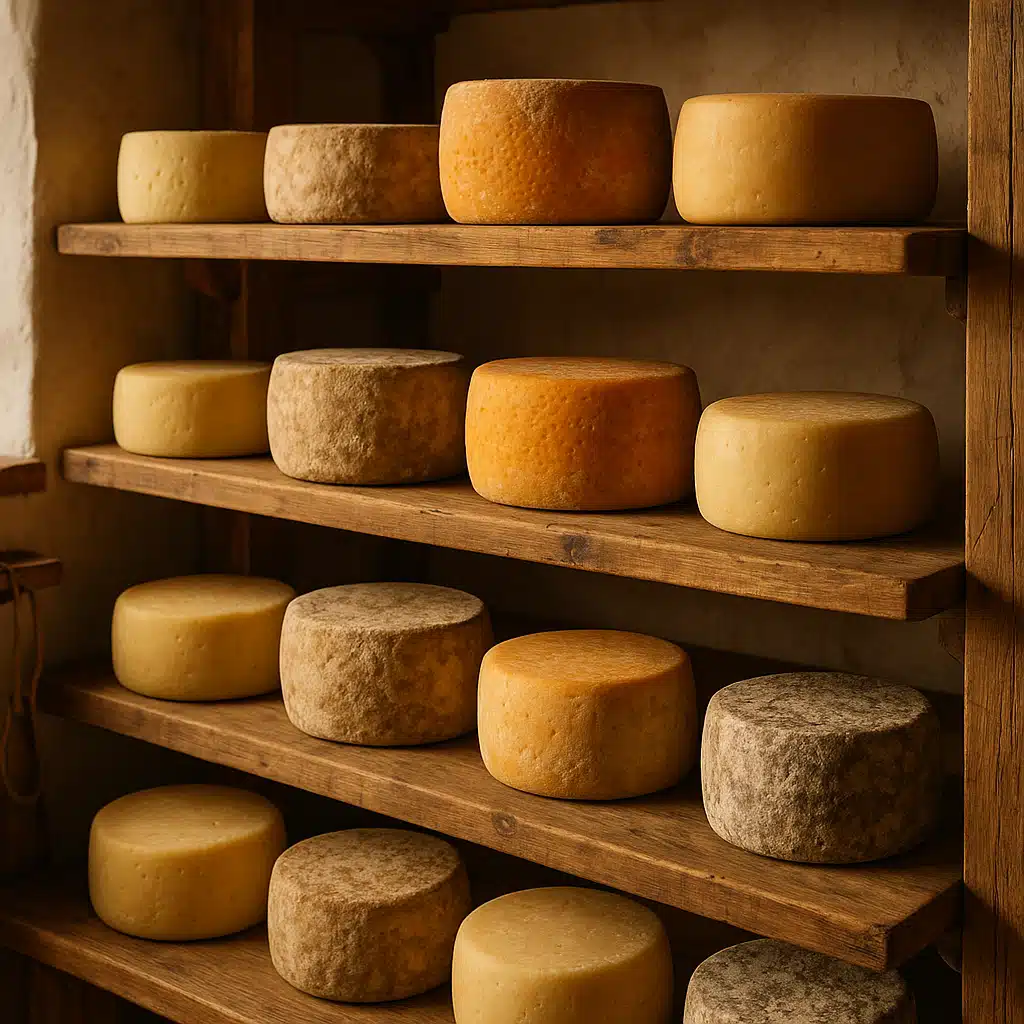
Temperature during pressing significantly affects the final product. Most cheeses press best at room temperature, though some varieties benefit from slightly warmer or cooler conditions. Monitor the pressing environment, especially in extreme climates, as temperature fluctuations can affect moisture removal rates and curd fusion. The duration of pressing varies dramatically by cheese type: soft cheeses might press for just a few hours, while hard varieties require 24-48 hours or more under sustained pressure.
Flipping the cheese during pressing is standard practice in many recipes, helping achieve even moisture distribution and a uniform rind. When flipping, remove the cheese from the mold, unwrap it, and inspect for proper curd consolidation. Rewrap in fresh cloth, return to the mold, and resume pressing. Some cheesemakers recommend flipping multiple times in the first few hours of pressing to prevent the curds from settling unevenly.
Troubleshooting Common Cheese Pressing Problems
Even experienced cheesemakers encounter pressing challenges. Recognizing common issues and their solutions helps you achieve consistent results and avoid wasting batches.
Cracking or splitting cheese: This typically results from applying too much pressure too quickly, especially with high-moisture curds. Reduce initial pressure and increase gradually. Ensure your curds are at the proper temperature—cold curds don’t fuse well and are more prone to cracking under pressure.
Excessive moisture retention: If your finished cheese seems too moist or weeps excessively, you may need to increase pressing pressure, extend pressing time, or ensure proper drainage during pressing. Check that your mold allows adequate whey escape and that cloth wrapping isn’t too tight, which can restrict drainage.
Uneven texture or “mechanical openings”: Gaps and holes in pressed cheese usually indicate insufficient pressure or inadequate curd preparation. Ensure curds are cut to uniform size before pressing, and consider starting with slightly higher initial pressure to encourage proper fusion. Some cheese varieties benefit from brief resting periods at room temperature before pressing to allow slight acidification that promotes better curd knitting.
Surface impressions from cloth: Wrinkle marks on cheese surfaces are primarily aesthetic concerns but can be minimized by carefully smoothing cheesecloth when wrapping and using finer-weave cloth for the final pressing stages. Some cheesemakers press initially with standard cloth, then briefly repress with fine muslin for a smoother surface.
Cheese sticking to mold or cloth: This frustrating problem usually stems from insufficient greasing of the mold or using cloth that’s not adequately prepared. Lightly coating molds with food-grade oil or butter before lining with cloth can prevent sticking. Ensure cheesecloth is dampened before use, which helps it conform to the mold and releases more easily after pressing.
Maintaining and Caring for Your Cheese Press
Proper maintenance of your cheese press ensures longevity, consistent performance, and food safety. Immediately after each use, disassemble all components and rinse thoroughly with warm water to remove cheese residue and whey. Follow with hot, soapy water cleaning, paying special attention to threads, joints, and any crevices where bacteria might accumulate. For stainless steel presses, occasional sanitization with food-safe disinfectant solutions provides an extra layer of protection against contamination.
Inspect mechanical components regularly for signs of wear, corrosion, or degradation. Tighten any loose fasteners, and apply food-grade lubricant to threads and moving parts that might bind or corrode. If you have a wooden press, check for moisture damage, cracks, or signs of mold growth, treating with appropriate food-safe sealants as needed. Store your press in a dry location when not in use, protecting it from humidity that can cause rust or material degradation.
Molds and followers require similar careful maintenance. Inspect them for cracks, chips, or rough spots that might harbor bacteria or damage cheese surfaces. Replace worn components promptly rather than risk compromising your cheese quality. Keep cheesecloth clean and sanitized, washing after each use and replacing when it becomes stained or damaged.
Frequently Asked Questions About Cheese Presses
Can I make cheese without a press?
Yes, many cheese varieties don’t require pressing at all. Soft cheeses like ricotta, cream cheese, and fresh chevre are simply drained under their own weight or with minimal compression. However, any firm or hard cheese—cheddar, gouda, parmesan, and similar varieties—require proper pressing to achieve the characteristic texture and moisture content. While you can improvise with household items, the results will be inconsistent compared to using a dedicated press.
How much pressure is needed for different cheese types?
Pressure requirements vary significantly by cheese variety. Soft-pressed cheeses typically need 2-5 kilograms of pressure, semi-hard varieties require 10-20 kilograms, and hard aged cheeses may need 25 kilograms or more. These are general guidelines—specific recipes provide exact pressure recommendations. Many cheese presses include pressure charts or conversion tables to help you apply the correct force. When following traditional recipes that use pounds, remember that approximately 2.2 pounds equals one kilogram.
How long does cheese need to be pressed?
Pressing duration depends entirely on the cheese type and recipe. Some soft-pressed cheeses require only 2-4 hours of pressing, while firm cheeses typically press for 12-24 hours. Extra-hard varieties like parmesan may remain under pressure for 48 hours or longer. Most recipes specify progressive pressing schedules that alternate between different pressure levels and include cloth changes to remove expelled whey.
What’s the difference between a cheese press and a tincture press?
While both apply pressure to extract liquid, cheese presses are specifically designed for the unique requirements of cheesemaking. They provide adjustable, sustained pressure over extended periods, accommodate cheese-specific molds, and use food-safe materials throughout. Tincture presses typically apply quick, high pressure for herbal extraction and aren’t suited to the gradual, controlled pressing that cheese requires.
Are expensive cheese presses worth the investment?
The value of a premium cheese press depends on your commitment to the craft. If you make cheese regularly and plan to continue long-term, investing in a quality stainless steel press with precise pressure control will pay dividends through consistent results, durability, and ease of use. For occasional cheesemakers or beginners still exploring the hobby, a mid-range press provides excellent functionality without significant financial commitment. The most expensive option isn’t always the best for your specific needs—focus on quality construction and appropriate features rather than simply choosing the highest price point.
Can one cheese press work for all cheese types?
A versatile cheese press with adjustable pressure can indeed handle everything from soft-pressed cheeses to hard aged varieties. The key is selecting a press with sufficient pressure range and compatible mold sizes for your intended cheese styles. Some specialized cheese types may benefit from dedicated presses or molds, but most home cheesemakers find that a single quality adjustable press meets all their needs.
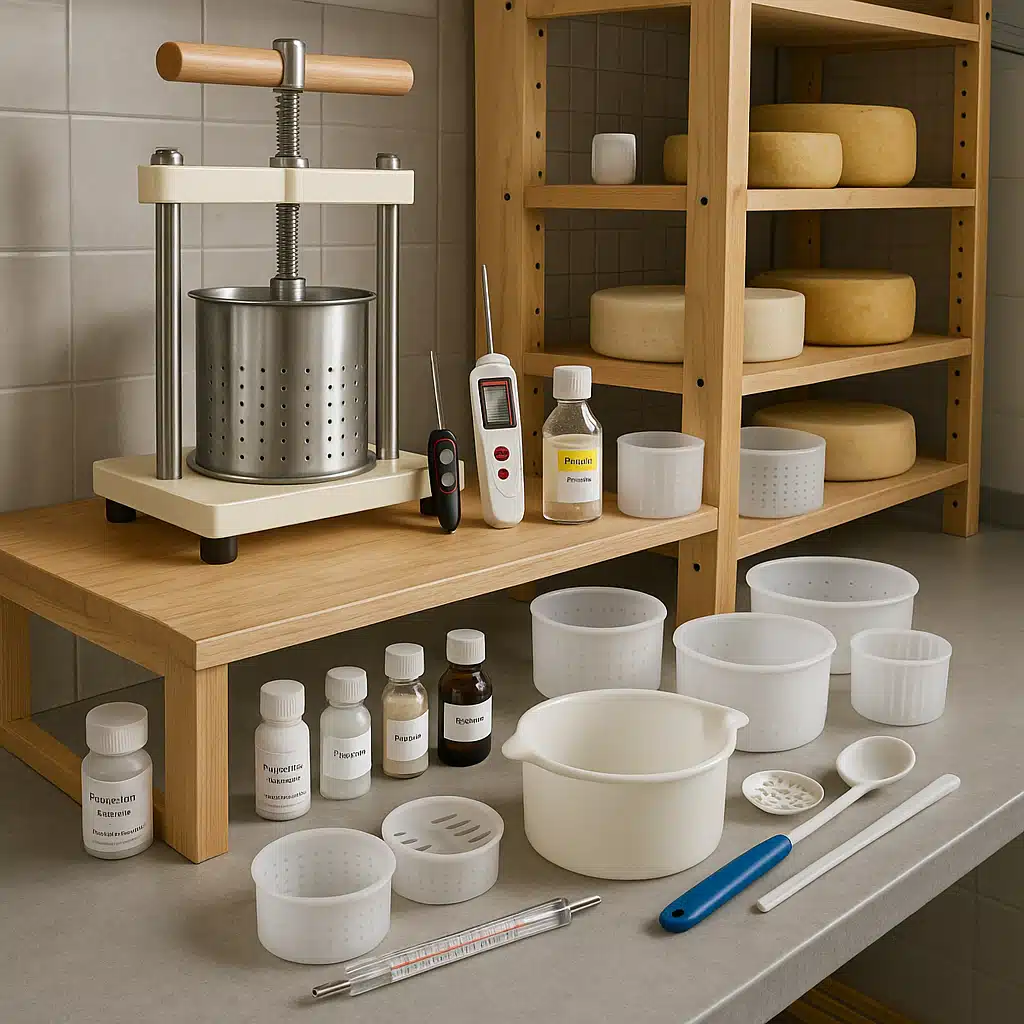
Expanding Your Cheesemaking Beyond the Press
While a cheese press is essential equipment, successful cheesemaking requires additional tools and knowledge. Consider investing in quality thermometers for precise temperature control during culturing and cooking. pH meters or test strips help monitor acidity development, which is crucial for flavor and texture. Cultures, rennet, and other ingredients should be sourced from reputable suppliers to ensure consistency and safety.
Create a dedicated cheese-making space with proper sanitation, temperature control, and storage for aging cheeses. Many varieties require specific aging conditions—temperature, humidity, and air circulation—that differ dramatically from the pressing stage. Cheese wax, vacuum sealing equipment, or aging boxes become necessary as you move beyond fresh cheeses into aged varieties.
Education remains one of the most valuable investments in your cheesemaking journey. Online courses, instructional books, and connections with other cheesemakers through forums and social media groups provide troubleshooting help, recipe variations, and encouragement. Many regions have cheesemaking associations or clubs where enthusiasts share knowledge and sometimes equipment.
Environmental and Sustainability Considerations
As interest in sustainable food production grows, many cheesemakers consider the environmental impact of their hobby. Making cheese at home can be more sustainable than purchasing commercial products, especially when using local milk and minimizing packaging waste. Choose cheese presses built from durable, long-lasting materials that won’t need frequent replacement. Stainless steel, while having higher initial production impact, lasts for decades with proper care, ultimately proving more sustainable than frequently replaced plastic alternatives.
Consider sourcing milk from local, sustainable dairy operations when possible. The whey expelled during pressing is nutrient-rich and shouldn’t be wasted—it can be used in baking, fed to animals if you have them, or composted to enrich garden soil. Some cheesemakers use whey to make ricotta or other whey cheeses, extracting maximum value from their milk investment.
Choose reusable cheesecloth that can be washed and sanitized repeatedly rather than disposable options. When replacement eventually becomes necessary, seek natural fiber cloths that can be composted rather than synthetic materials that contribute to microplastic pollution. These small considerations, multiplied across your cheesemaking practice, contribute to a more sustainable approach to food production.
Conclusion: Selecting Your Ideal Cheese Press
Choosing the right cheese press is a personal decision that should reflect your experience level, production goals, available space, and budget. Beginners benefit from simple, affordable presses that allow skill development without overwhelming complexity or financial commitment. As your expertise grows, investing in more versatile, durable equipment enables you to expand your cheese repertoire and achieve professional-quality results.
Focus on essential features—food-safe materials, appropriate pressure adjustment, compatibility with your intended cheese types, and ease of cleaning. Don’t be swayed by unnecessary features or premium pricing that doesn’t align with your actual needs. Read reviews from other home cheesemakers, seek recommendations from cheesemaking communities, and consider starting with a mid-range option that offers room to grow rather than immediately purchasing the most expensive or basic model.
Remember that the cheese press is one component in your cheesemaking journey. Pair it with quality ingredients, proper technique, patience, and ongoing learning. The satisfaction of producing artisanal cheese at home, with its unique flavors and textures that reflect your personal craft, makes the investment in proper equipment worthwhile. Whether you’re making fresh cheese for weekend enjoyment or developing aged varieties that showcase months of careful preparation, the right cheese press helps transform your cheesemaking aspirations into delicious reality.
Start your cheesemaking adventure with confidence, knowing that you’ve selected equipment suited to your needs. As you develop expertise and discover your favorite cheese varieties, your press will become a trusted tool that enables countless batches of homemade artisanal cheese. The journey from curds to finished cheese, guided by quality equipment and growing knowledge, offers endless opportunities for creativity, experimentation, and the simple pleasure of creating something delicious with your own hands.