Why is My Mozzarella Rubbery? 5 Common Mistakes Solved
Mozzarella cheese is celebrated worldwide for its signature creamy texture, delightful stretchiness, and mild flavor that complements countless dishes. Whether you’re making homemade pizza, preparing a fresh caprese salad, or crafting artisanal cheese at home, achieving the perfect mozzarella texture is essential. However, many home cheese makers and cooking enthusiasts encounter a frustrating problem: rubbery mozzarella that lacks the desired softness and elasticity.
If you’ve experienced this issue, you’re not alone. Rubbery mozzarella is one of the most common challenges in cheese making, but the good news is that it’s entirely preventable once you understand the root causes. In this comprehensive guide, we’ll explore the five most common mistakes that lead to rubbery mozzarella and provide detailed solutions to help you achieve that perfect, creamy stretch every time. Whether you’re a beginner or an experienced home cheese maker, these insights will transform your mozzarella-making experience.
Understanding Mozzarella Texture: What Makes It Perfect?
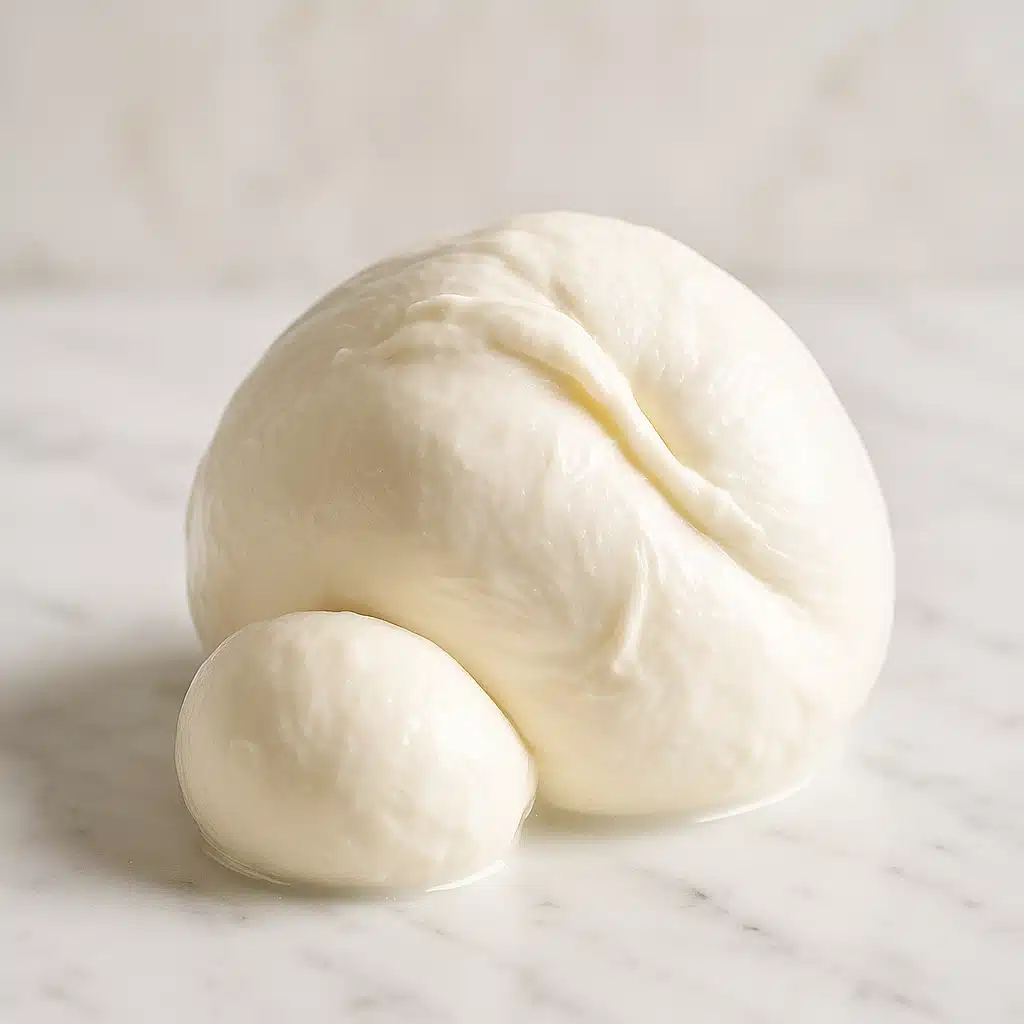
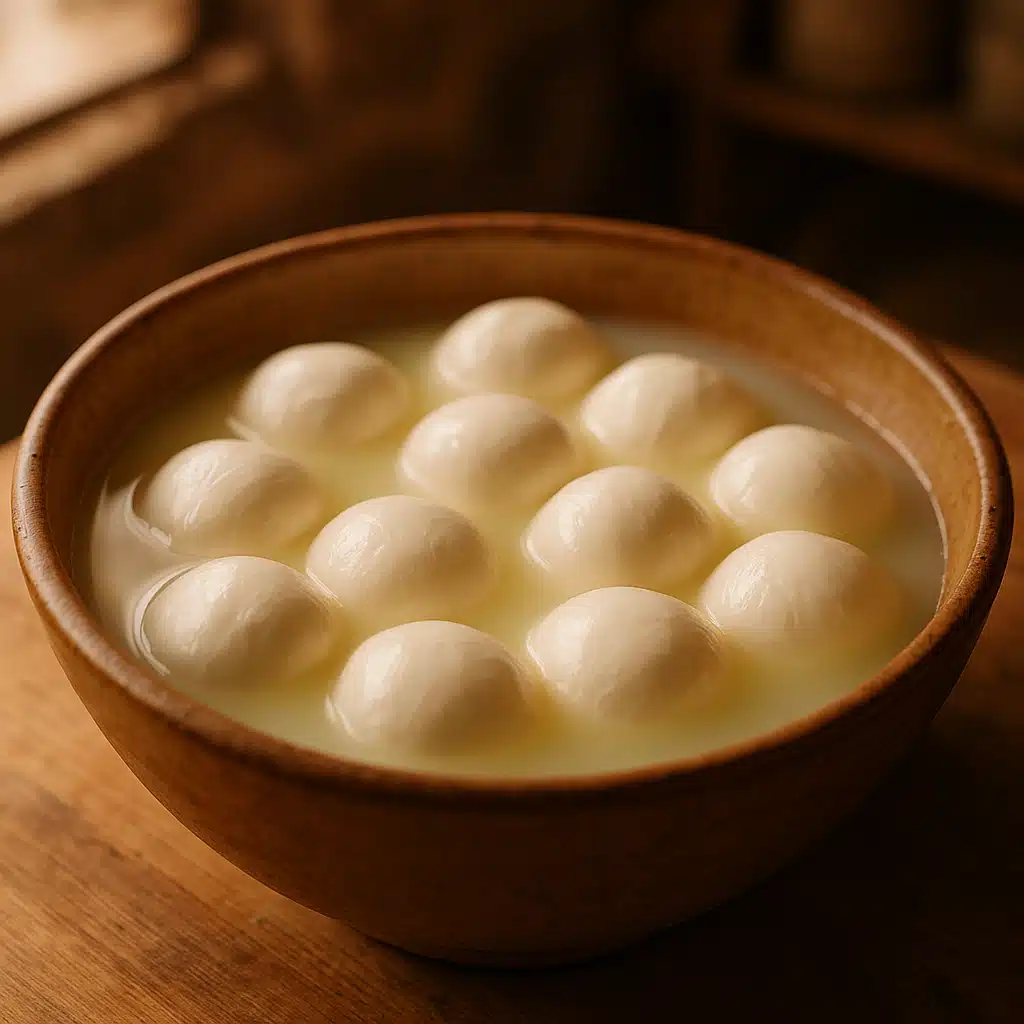
Before diving into the mistakes, it’s important to understand what characterizes ideal mozzarella. Perfect mozzarella should have a smooth, slightly elastic texture that’s tender to the bite. It should stretch easily when pulled, creating those satisfying cheese strings without being tough or resistant. The cheese should feel moist and soft, with a delicate milky flavor that’s neither bland nor overpowering.
The science behind mozzarella’s texture lies in its protein structure. During the cheese-making process, milk proteins form a network that traps moisture and fat. When this network is properly developed through correct temperatures and techniques, you get that signature mozzarella texture. When something goes wrong in the process, the protein network becomes too tight or improperly formed, resulting in the rubbery texture you want to avoid.
Mistake #1: Incorrect Temperature Control
Temperature control is arguably the most critical factor in achieving perfect mozzarella texture. The cheese-making process involves precise temperature ranges at different stages, and deviating from these can directly cause rubbery results.
Curd Temperature Issues
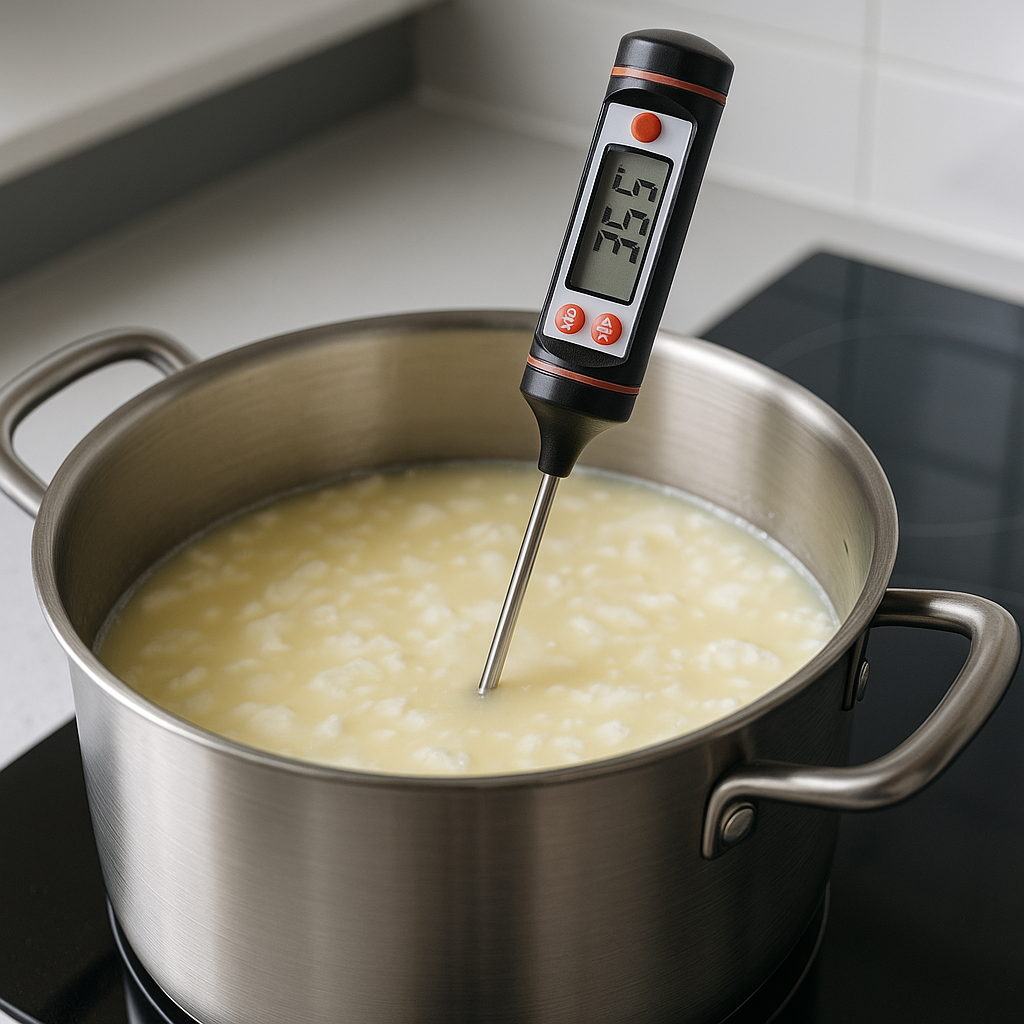
When your cheese curds are too cold, they won’t stretch properly, no matter how much effort you put into the process. The proteins in cold curds are rigid and resistant, making them difficult to work with and resulting in a tough, rubbery final product. The ideal curd temperature for stretching mozzarella is approximately 57-60°C (135-140°F). At this temperature range, the proteins are pliable enough to stretch and fold smoothly while maintaining structural integrity.
If your curds feel stiff or break apart when you try to stretch them, they’re likely too cold. Conversely, if they become soupy or lose their shape completely, they may be too hot. Finding that perfect temperature sweet spot is essential for success.
Water Temperature for Stretching
The hot water bath used for stretching your mozzarella is equally important. This water should be maintained at approximately 77-82°C (170-180°F). Water at this temperature effectively heats the curds to the proper stretching temperature while allowing you to work with them safely. If the water is too cool, your curds won’t reach the necessary temperature for proper stretching. If it’s too hot, you risk overcooking the exterior while the interior remains underheated, creating texture inconsistencies.
Investing in a reliable kitchen thermometer is one of the best decisions you can make for consistent cheese-making results. Digital instant-read thermometers provide accurate readings and take the guesswork out of the process.
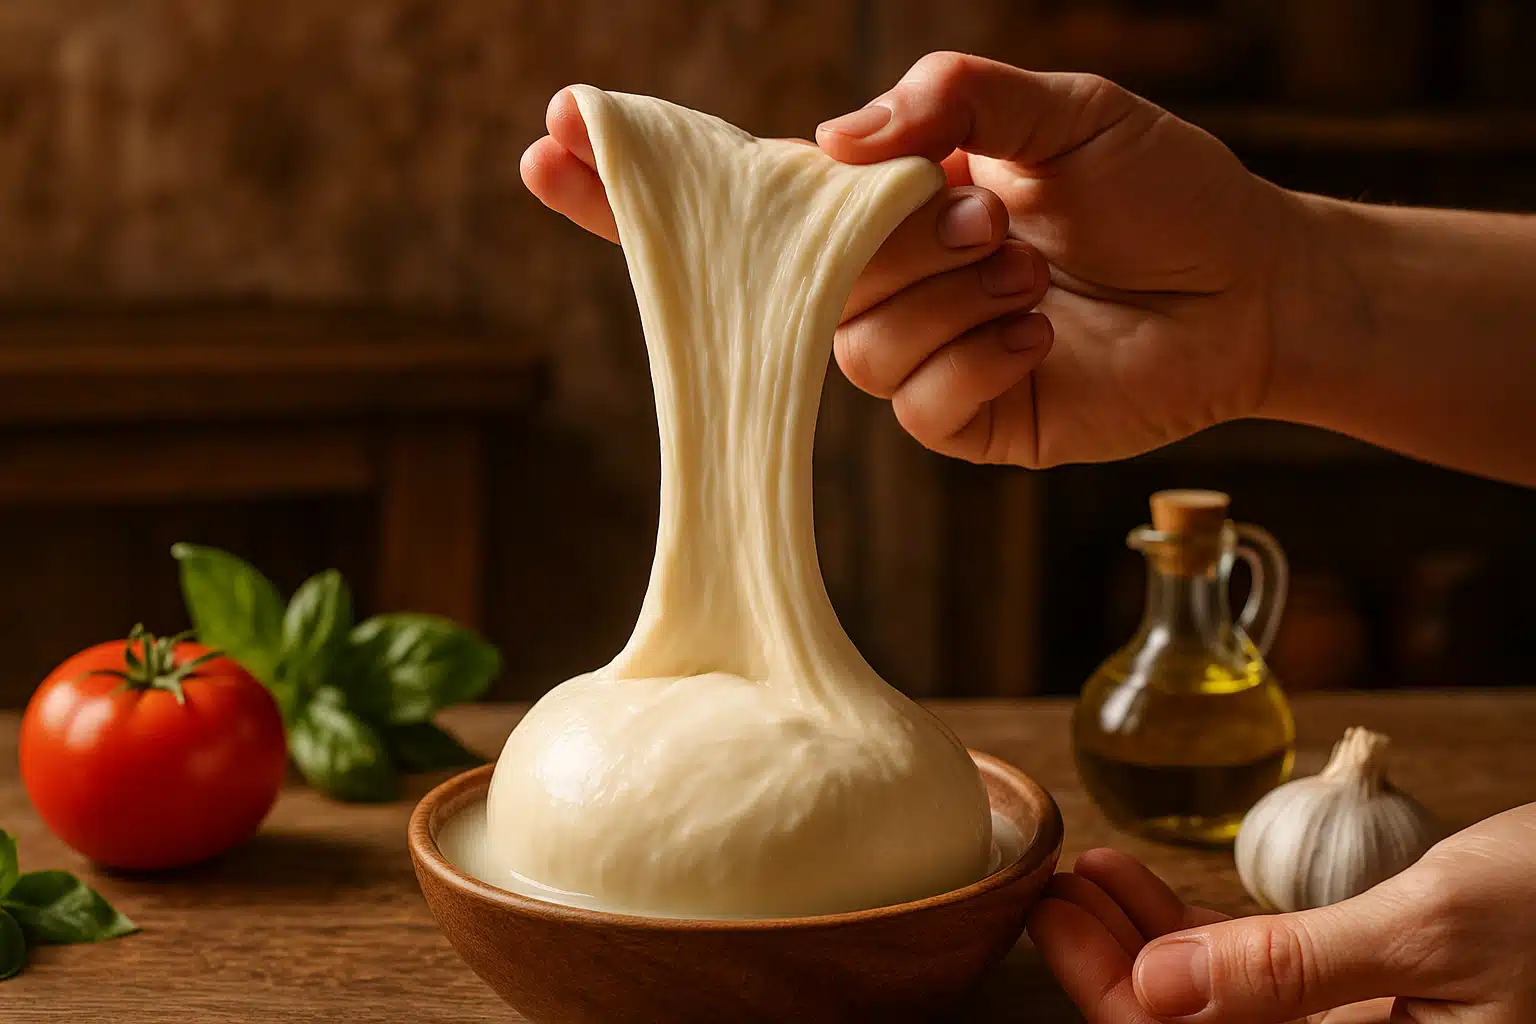
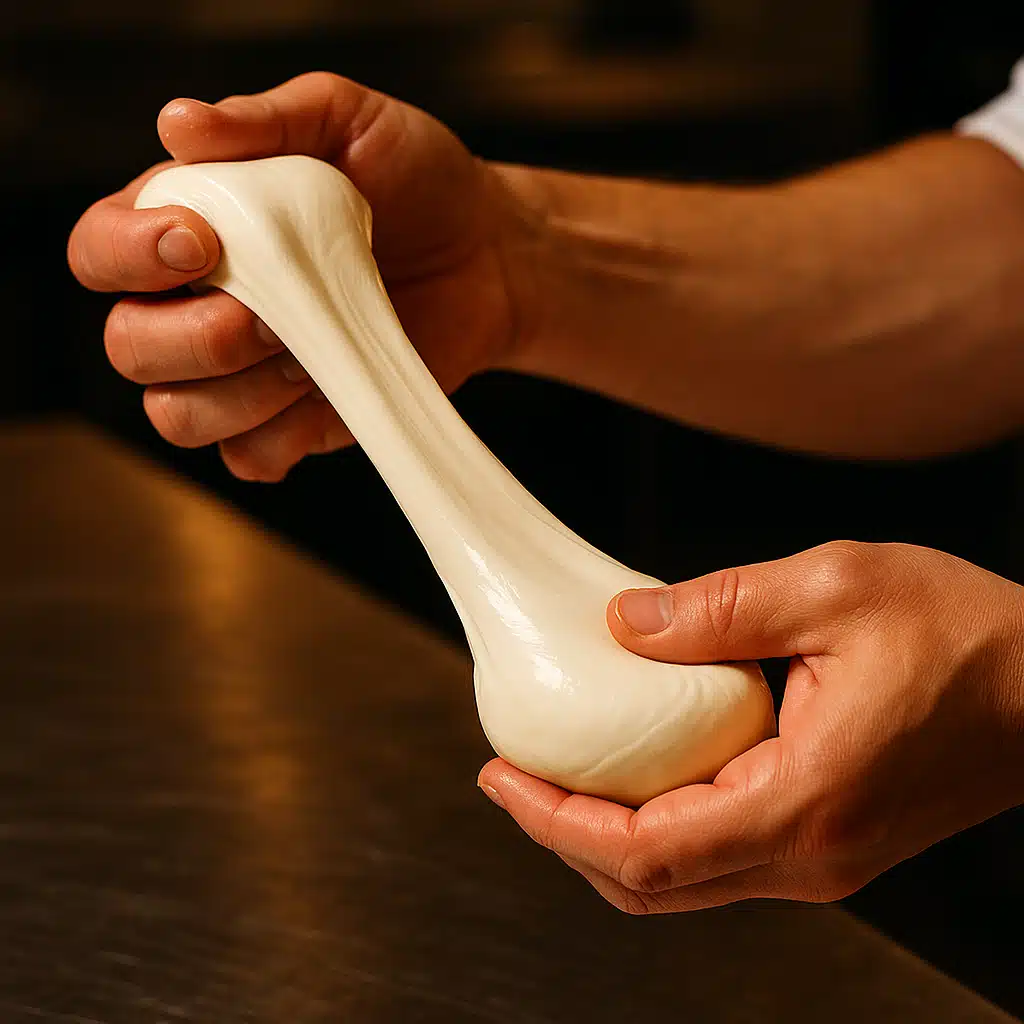
Mistake #2: Improper Stretching Technique
Even with perfect temperatures, using the wrong stretching technique can turn your mozzarella rubbery. The stretching phase is where the magic happens—it’s when the protein strands align to create that characteristic texture. However, this process requires finesse and understanding.
The Art of Kneading and Folding
Proper mozzarella stretching involves a rhythmic process of kneading and folding rather than aggressive pulling. When you work with properly heated curds, you should gently stretch them, fold them over themselves, and repeat this process several times. This technique helps develop the protein structure gradually while incorporating the heat evenly throughout the cheese mass.
Think of it as similar to kneading bread dough—you’re developing structure through gentle, repeated manipulation. Each fold aligns more protein strands and creates a smoother, more cohesive texture. The entire stretching process typically takes 2-5 minutes, depending on the quantity of cheese you’re making.
The Dangers of Over-Stretching
While proper stretching is essential, over-stretching is equally problematic. When you stretch mozzarella excessively, you can over-develop the protein network, making it too tight and resulting in a tough, rubbery texture. Over-stretched mozzarella may also become stringy in an unpleasant way rather than having that desirable tender pull.
The cheese is ready when it becomes smooth, glossy, and pliable. It should stretch easily without tearing, but shouldn’t feel like rubber bands. If you notice the texture becoming resistant or tough, you’ve likely crossed into over-stretching territory. Learning to recognize this point comes with practice, but paying close attention during your first few batches will help you develop an intuitive sense for when the cheese is perfectly stretched.
Mistake #3: Choosing the Wrong Milk
The foundation of any great mozzarella is the milk you start with. Not all milk is created equal when it comes to cheese making, and your milk choice can significantly impact the final texture and quality of your mozzarella.
Whole Milk vs. Reduced-Fat Milk
The fat content in milk plays a crucial role in creating creamy, tender mozzarella. Whole milk, with its higher fat content, produces mozzarella that’s naturally softer, creamier, and more luxurious in texture. The fat molecules help keep the protein network from becoming too tight, resulting in that desirable tender bite.
Reduced-fat or skim milk, on the other hand, contains less fat to cushion the protein structure. This often leads to a tougher, more rubbery texture because the proteins can pack together more tightly without fat separating them. While it’s possible to make mozzarella from lower-fat milk, the results are generally less satisfying, especially for beginners who are still mastering the technique.
For the best results, always choose high-quality whole milk with at least 3.5% fat content. The investment in quality milk pays dividends in the final product’s taste and texture.
Pasteurization Considerations
The pasteurization process can also affect your mozzarella’s texture. Ultra-pasteurized milk, which has been heated to very high temperatures for preservation, can be problematic for cheese making. This intensive heat treatment can damage the protein structure in ways that make it difficult to achieve proper curd formation and stretching.
Standard pasteurized milk works well for mozzarella making and is widely available. If you have access to minimally processed or vat-pasteurized milk, you may find it produces even better results. Some cheese makers prefer raw (unpasteurized) milk for its superior flavor and texture potential, though availability and regulations regarding raw milk vary significantly by country and region.
Regardless of which type you choose, ensure it’s fresh and of the highest quality you can find. Check the label to avoid ultra-pasteurized varieties, and select milk without additives or stabilizers that can interfere with the cheese-making process.

Mistake #4: Incorrect Acid Balance
The acidity level in your cheese-making process is another critical factor that’s often overlooked. Mozzarella requires a specific pH range to develop the proper texture, and deviations from this range can result in rubbery or otherwise unsatisfactory cheese.
When making mozzarella, you typically acidify the milk using either citric acid or a starter culture. This acidification process lowers the pH, which is necessary for proper curd formation and affects how the proteins behave during stretching. If your cheese is too acidic (pH too low), it can become crumbly and difficult to stretch. If it’s not acidic enough (pH too high), it may be rubbery and tough.
The ideal pH for mozzarella stretching is between 5.1 and 5.3. At this level, the calcium bonds between protein molecules are at the optimal state for creating that perfect stretchy texture. Too much acid causes the proteins to expel too much moisture and become brittle. Too little acid means the proteins remain too tightly bound, resulting in toughness.
Using pH test strips or a pH meter can help you monitor and adjust acidity levels accurately. While this might seem technical, it becomes second nature with practice and can be the difference between mediocre and exceptional mozzarella.
Mistake #5: Poor Timing and Patience
Cheese making is as much about patience and timing as it is about ingredients and technique. Rushing through the process or misjudging when to move from one step to the next can easily result in rubbery mozzarella.
Curd Setting Time
After adding rennet to your acidified milk, the curds need adequate time to set properly. Cutting the curds too early, before they’ve formed a clean break, can result in excessive moisture loss and affect the final texture. The curd should be firm enough that when you insert a knife and lift it, the curd breaks cleanly with clear whey in the crack.
This typically takes 30-60 minutes, depending on your specific recipe and conditions. Impatience at this stage can compromise everything that follows, so resist the urge to rush and allow the rennet to work its magic fully.
Resting After Stretching
After you’ve finished stretching your mozzarella and formed it into balls, the cheese needs time to rest and stabilize. Many people make the mistake of immediately refrigerating or using the cheese, which can affect its texture. Allowing the mozzarella to rest at room temperature for 15-30 minutes after shaping helps the proteins relax and the texture to settle into its final form.
After this brief rest, you can place the mozzarella in a brine solution or fresh water and refrigerate it. This gradual cooling process helps maintain the tender texture you’ve worked so hard to achieve, rather than shocking the cheese with sudden temperature changes that can make it tough.
Common Misconceptions About Rubbery Mozzarella
Let’s address some widespread misconceptions that can lead to confusion and frustration in your mozzarella-making journey.
Rubbery Doesn’t Always Mean Inedible
First, it’s important to understand that rubbery mozzarella, while not ideal, isn’t necessarily a complete failure. The cheese may still taste pleasant and be perfectly safe to eat. It can often be used successfully in cooked dishes where it will melt, such as on pizza, in baked pasta, or in grilled cheese sandwiches. The heat from cooking can help soften the texture and restore some of the desired characteristics.
However, for fresh applications like caprese salad or eating on its own, the texture difference will be quite noticeable and less enjoyable. Understanding this distinction helps you salvage batches that don’t turn out perfectly while still striving for improvement.
Temperature Isn’t the Only Factor
While temperature is crucial, focusing exclusively on heat while neglecting other variables is a common mistake. As we’ve explored, milk quality, acid balance, stretching technique, and timing all play significant roles in determining your final texture. A holistic approach that considers all these factors will yield far better results than obsessing over temperature alone.
Store-Bought and Homemade Are Different
Some people expect their homemade mozzarella to have exactly the same texture as commercially produced varieties. However, industrial mozzarella often contains stabilizers, emulsifiers, and other additives that affect texture in ways that home cheese makers can’t replicate without special ingredients. Homemade mozzarella should be judged on its own merits—when done correctly, it has a fresher, more delicate flavor and texture that many people find superior to mass-produced alternatives.
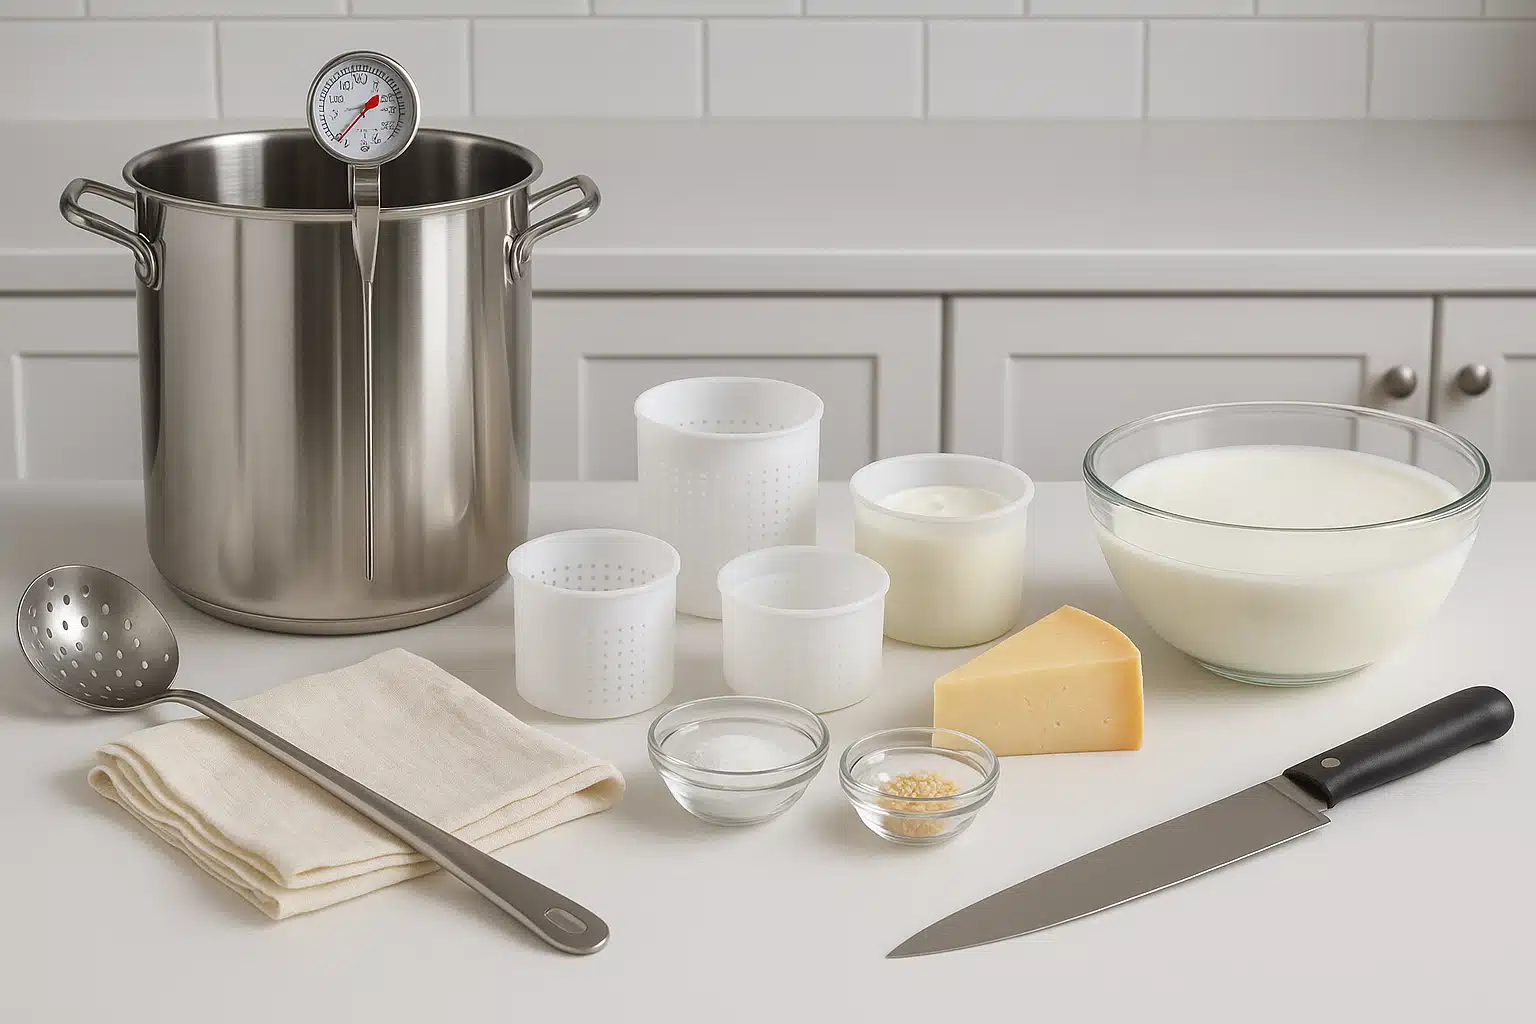
Essential Tools for Perfect Mozzarella Every Time
Having the right equipment can make the difference between frustration and success in cheese making. While you don’t need expensive specialized equipment to start, a few key tools will significantly improve your results and make the process more enjoyable.
Troubleshooting Guide: Quick Solutions
If you’ve made mozzarella that turned out rubbery, here’s a quick reference guide to identify and fix the problem:
- If your mozzarella is rubbery and tough: Check your stretching temperature (should be 57-60°C/135-140°F) and avoid over-stretching. Consider using whole milk instead of reduced-fat varieties.
- If your mozzarella won’t stretch at all: Your curds are likely too cold. Reheat them gradually in hot water until they become pliable. Also check your pH—it may be too low (too acidic).
- If your mozzarella is crumbly: The pH is probably too low. Use less acid in your next batch or reduce the acidification time if using a culture.
- If your mozzarella is tough even after proper stretching: You may have over-stretched it or used ultra-pasteurized milk. Try gentler handling and verify your milk type.
- If your mozzarella has uneven texture: Temperature distribution may be inconsistent. Ensure curds are heated evenly and maintain water temperature throughout stretching.
Tips for Consistent Success
Beyond avoiding the common mistakes, here are some additional tips to help you achieve consistently perfect mozzarella:
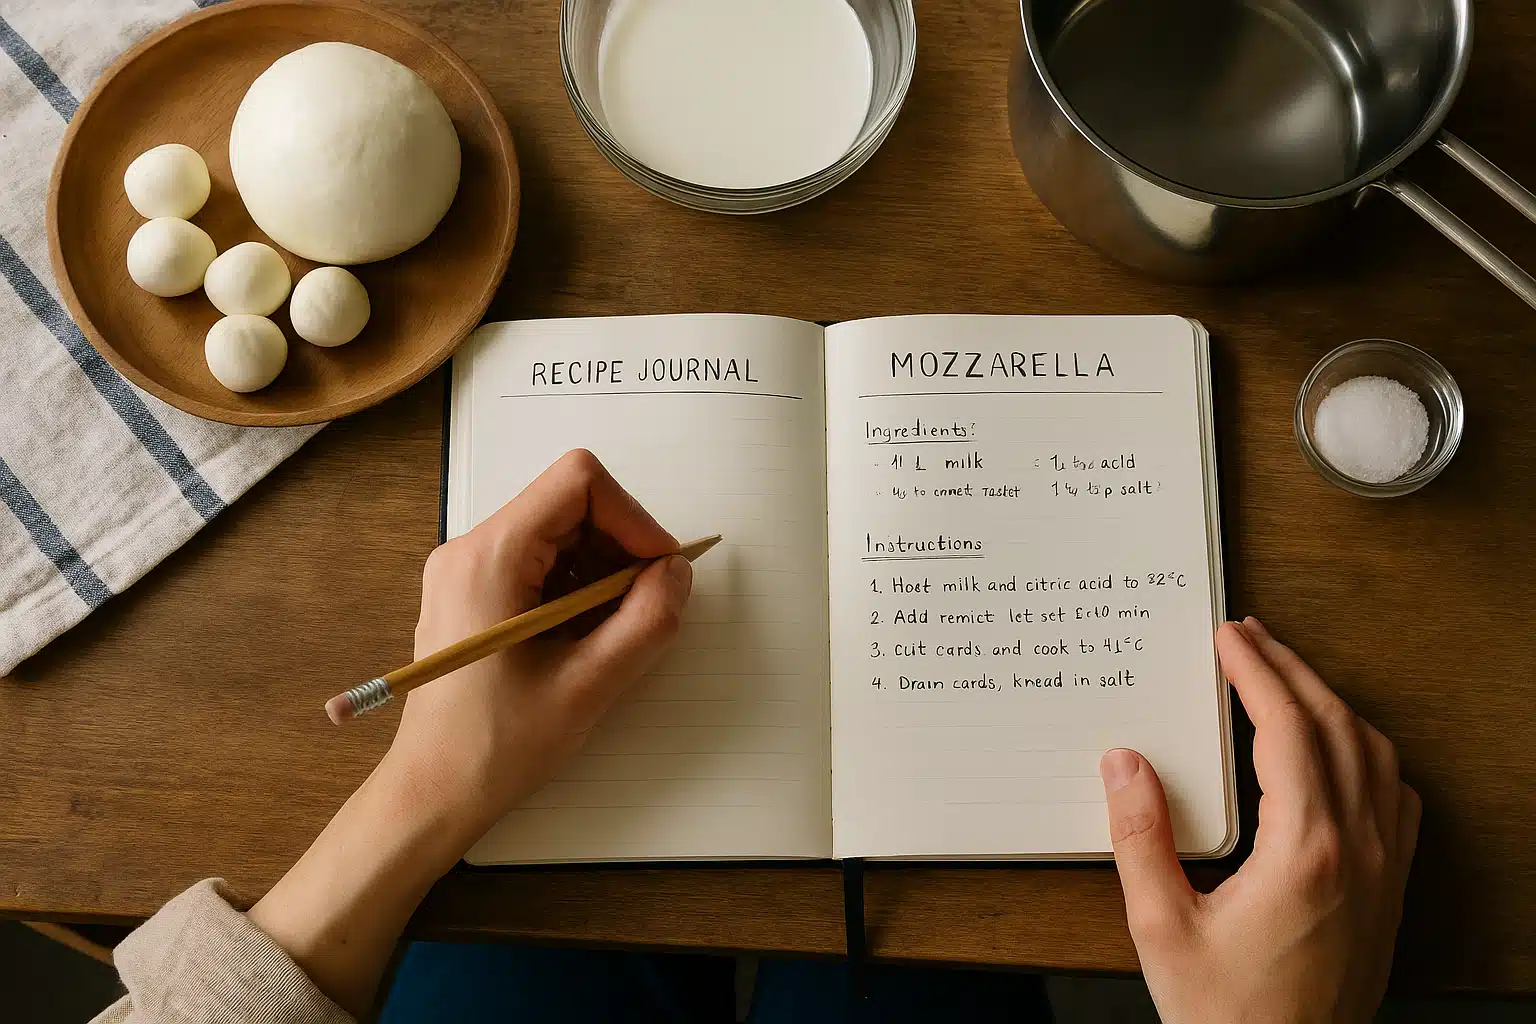
- Keep detailed notes: Record temperatures, timing, milk brands, and results for each batch. This helps you identify what works best in your specific conditions and with your equipment.
- Practice makes perfect: Don’t be discouraged by early failures. Cheese making is a skill that improves with experience. Each batch teaches you something new.
- Start with fresh ingredients: Always use the freshest milk possible and check expiration dates on rennet and citric acid. Old ingredients can produce unreliable results.
- Work clean: Sanitize all equipment before starting. While mozzarella is relatively quick and doesn’t involve aging, cleanliness still matters for quality and safety.
- Control your environment: Room temperature can affect your process. Working in a very cold kitchen may require adjustments to maintain proper temperatures throughout.
- Be patient with the learning curve: Understanding the feel of properly set curds, the right stretching consistency, and the perfect moment to stop comes with practice and attentive observation.
Storing Your Perfect Mozzarella
Once you’ve created perfect mozzarella, proper storage ensures it maintains that ideal texture and flavor. Fresh mozzarella is best consumed within a few days of making, but correct storage techniques can extend its quality life.
Store your mozzarella submerged in liquid—either the whey from the cheese-making process, a light brine solution, or fresh water. This keeps the cheese moist and prevents it from drying out and becoming rubbery. Keep it refrigerated at 2-4°C (36-39°F) in an airtight container.
For the best flavor and texture, remove mozzarella from refrigeration about 30 minutes before serving. This allows it to come to room temperature, which enhances both its taste and its characteristic soft texture.
Conclusion
Creating perfect mozzarella with that ideal creamy, stretchy texture is absolutely achievable when you understand and avoid the common mistakes that lead to rubbery results. By mastering temperature control, developing proper stretching technique, choosing quality whole milk, balancing acidity correctly, and exercising patience throughout the process, you’ll consistently produce mozzarella that rivals or exceeds anything available commercially.
Remember that cheese making is both a science and an art. While the scientific principles of temperature, pH, and protein chemistry provide the foundation, developing the intuitive feel for when curds are ready, how much to stretch, and when to stop comes through hands-on experience. Don’t be discouraged by initial attempts that don’t turn out perfectly—each batch is a learning opportunity that brings you closer to mastery.
The satisfaction of creating your own fresh, delicious mozzarella is well worth the effort. Whether you’re preparing it for a special meal, enjoying the meditative process of cheese making as a hobby, or working toward self-sufficiency in your kitchen, the skills you develop will serve you well. With the knowledge from this guide, you’re now equipped to troubleshoot problems, make informed decisions about ingredients and techniques, and consistently produce mozzarella with that perfect, tender texture—never rubbery again.
Start your next batch with confidence, apply these principles, and enjoy the delicious results of your improved mozzarella-making skills!